
What is Compressor Ratio?
Introduction
Compression can be confusing.
If you’re a home studio musician, producer, or engineer struggling to understand it, you’re definitely not alone.
But don’t worry—this article is here to make things easier by focusing on one of the most important controls on your compressor: the ratio knob.
First, we’ll explain what ratio means in plain English (no technical jargon). Then, if you’re interested, we’ll dive into the math behind it. (Don’t worry—you can skip that part if you want.)
Finally, we’ll show you how to set your compressor’s ratio knob like a pro, with some practical starting points. Just remember, these are guidelines—every signal is different, so use your ears and adjust as needed.
By the end of this article, you’ll feel completely confident using your compressor’s ratio knob, no matter what ratio you need.
What is the Compressor Ratio?
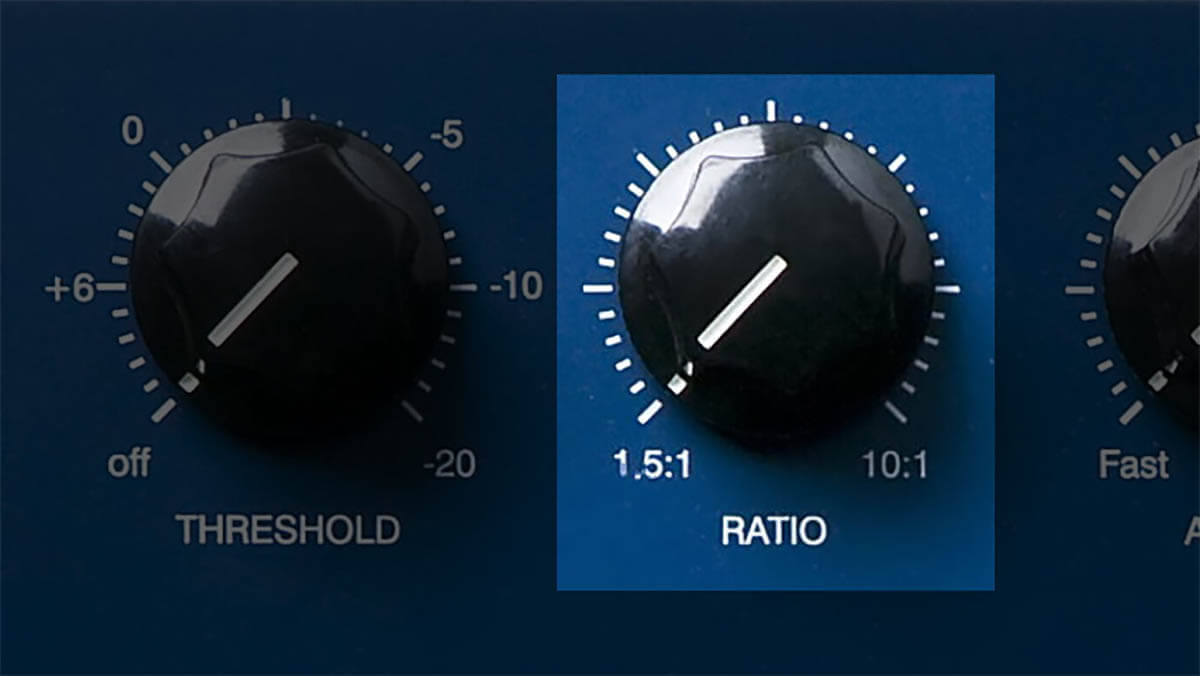
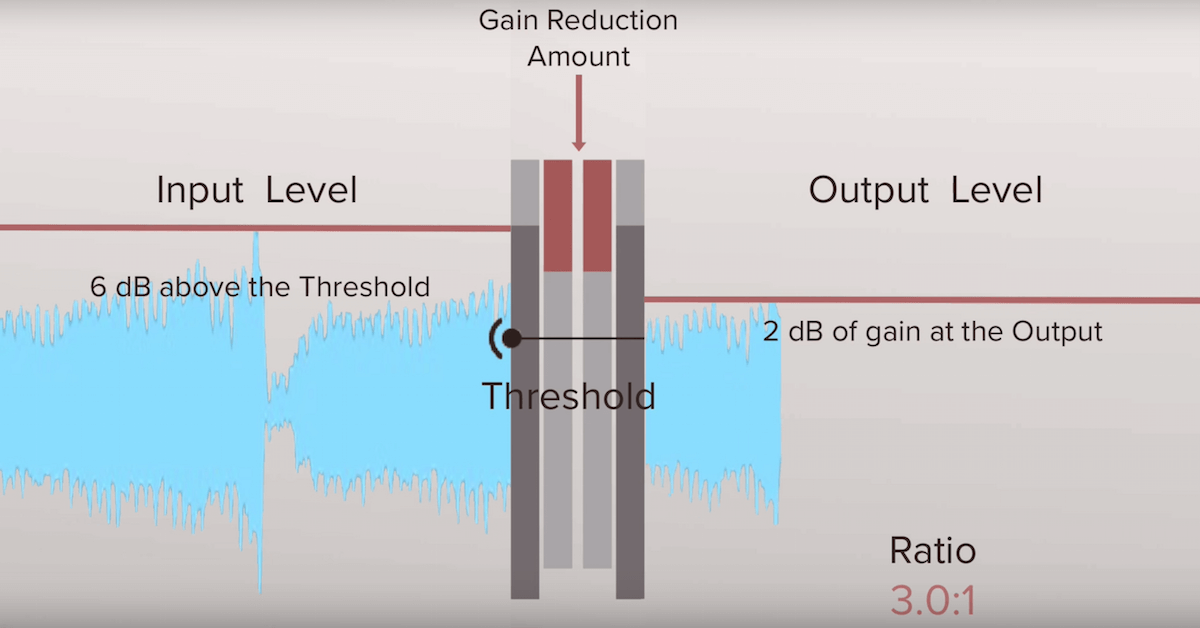
The ratio knob controls how much compression is applied. The numbers on the knob show the ratio of the input signal to the output signal. The higher the ratio, the more intense the compression.
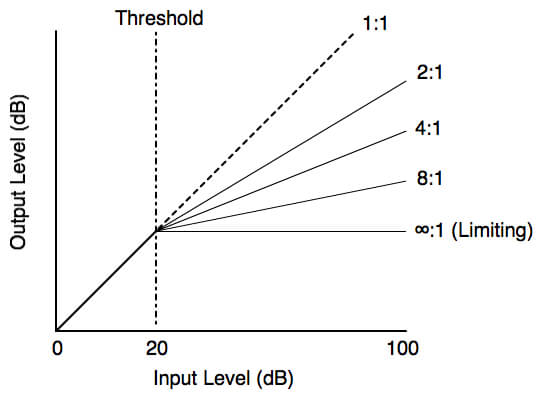
Compressors usually display ratio settings in decibels (dB). For example, with a 2:1 ratio, the input signal must go 2 dB over the threshold for the output to increase by just 1 dB.
This has a big impact on gain reduction, which is why it’s important to know exactly how much compression ratio you need. Compression ratios vary, but there’s a simple math behind how they work.
However, the available ratio settings depend on the type and brand of compressor you’re using. For example, here are some standard ratio options you’ll find on most compressors.
Ratio Variations:
- 1:1 means no compression is applied. The input and output levels remain exactly the same, regardless of the threshold setting.
- 1.5:1 applies very light compression. This ratio is gentle and transparent, helping to keep natural peaks and dips in the sound.
- 2:1 provides mild compression. This setting controls dynamics smoothly, without noticeably changing the tone or punch.
- 3:1 delivers moderate compression. This is a bit more assertive, offering light control over transients while still maintaining natural dynamics.
- 4:1 offers medium compression. This ratio gives tighter control over transients, and you might start to notice subtle changes to tone, punch, and loudness.
- 10:1 is considered heavy compression. This setting is aggressive, significantly reducing dynamic range and potentially causing the sound to lose punch, clarity, and presence if overused.
- 20:1 to Infinity:1 is called limiting. At Infinity:1, the compressor essentially prevents the signal from ever exceeding the threshold.
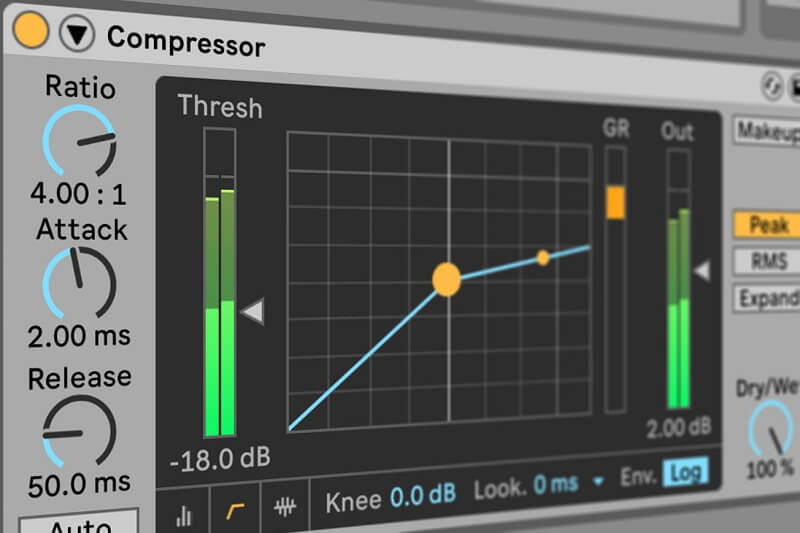
Remember: All the controls on a compressor work together. It’s best to adjust them as a group rather than focusing only on the ratio knob. For example, the ratio and threshold settings are closely linked.
Compression only happens when the signal goes above a set threshold level. When this occurs, the compressor reduces the volume of signals that exceed the threshold, using the ratio you’ve set.
Compressor Ratio Basics
There aren’t any specific ratio settings that work best for every sound. Listing exact ratio settings can be misleading because each sound and compressor is different.
The ratio settings you choose also depend on the source audio, the other compressor controls, and the result you want to achieve.
The best approach is to use your ears and your meters to find the right ratio for each sound. However, there are some general guidelines that can help you find a starting point when setting the compressor ratio.
Examples of Compression Ratio
Contemplate these what is compressor ratio fundamentals:
Let’s break down the fundamentals of compressor ratios:
Low Ratios: Lower compressor ratios sound natural and clear. They’re best for subtle compression that preserves the original peaks and valleys of a signal. However, lower ratios offer less dynamic control overall.
Medium Ratios: Moderate compressor ratios give you gentle dynamic control while keeping the signal’s natural feel. They help tighten up transients without making obvious changes to tone or punch. You might also notice your sound feels fuller and louder.
Heavy Ratios: Higher ratios bring a more processed, aggressive sound. They’re great when you want strong tone shaping and maximum dynamic control. But use heavy ratios carefully—they can make your signal lose punch, clarity, and presence.
Limiting: An infinite ratio acts as a hard ceiling for your signal. This reduces dynamic range and increases perceived loudness, but at the cost of losing detail and punch. Pushing limiting too hard can also introduce digital distortion and clipping.
Once you’re comfortable with the basics and have analyzed your signal, you’ll be ready to choose the right ratio. This is an essential step to getting your compression just right.
Remember, every compressor parameter matters, so it’s important to understand what each one does. If you’re unsure, it’s often better not to use the compressor—or, if you do, try parallel compression. That way, you only affect a duplicate of the signal on a separate fader, leaving the original untouched.
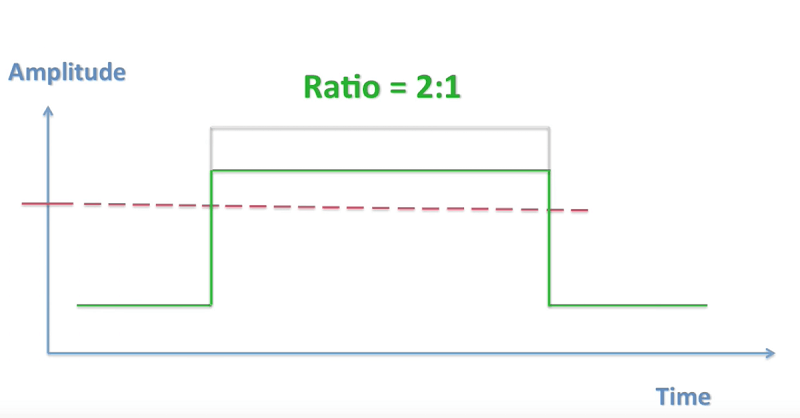
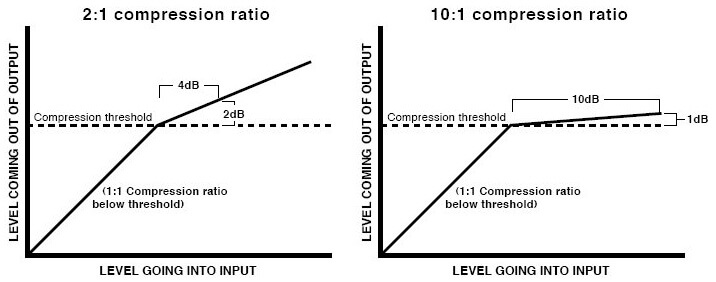
Example of 2:1 Ratio
Examples
You load up a compressor on the vocal, and it goes over the threshold by 10dB (more on the threshold in a second). We’ve set the ratio to 2:1. This means that the sound will be reduced in volume by a factor of 2. So, instead of getting 10dB louder, the vocal now only gets 5dB louder. Make sense?
Here’s another example:
If we set the ratio to 4:1, the sound will be reduced in volume by a factor of 4. Ten divided by four is 2.5, so our sound now only gets 2.5dB louder. With a ratio of 10:1? The sound now only gets 1dB louder!
Once again—the ratio determines how much the sound is compressed (reduced in volume). But at what point is the sound actually reduced? Is the entire track turned down? No. Compression only happens when the sound goes over the threshold.
Conclusion
Understanding your tools is essential if you want your mixes to sound polished and professional. Compression might just be the most important one, so make sure you really understand how to use it.
Try to learn how your mix sounds with compression engaged. Use the bypass button and listen for any differences you’re making in the song. Once you master this step, you’ll have no trouble recognizing compression in other songs as well. This will improve your knowledge and appreciation for the process itself.
As you get more comfortable listening for what compressors do to your recordings, start exploring different compressors and how they can help in your sessions. Soon, you’ll find yourself obsessed and drooling over vintage classics.
Now you know the ins and outs of what a compressor ratio is. So go back to your mix and use compression just right. Remember, you need to have a goal in mind when using compression, so decide what you want to achieve—and go for it!


Super explanation
Thanks for the post, really helpful