How to Use Panning
Introduction
As a newbie, looking at a mixing desk—whether it’s in your DAW or a hardware mixer—can feel pretty intimidating. Beyond all the controls, there’s also a lot of terminology to get your head around.
“Panning,” or “Pan” as it’s often labeled, is one such term. You’ll notice plenty of pan controls on a typical mixer, which might leave you wondering: what exactly is panning?
Panning is one of the most powerful techniques for adding depth to your mix. As we’ve mentioned before, depth is all about space—left and right, front and back.
While volume controls the sense of distance (front to back), panning handles the side-to-side positioning in your stereo field. In the early days of audio production, you could only pan sounds all the way to the right or left.
Nowadays, we have access to the entire stereo field and can place sounds anywhere between the speakers. But with so much happening in a mix, how do you decide how far left or right to pan each element?
What’s the reasoning behind these decisions? The truth is, there’s no strict formula for how to pan your instruments.
You’ll need to approach panning based on the project you’re working on. Every song or project may call for a different approach, so analyze your track first before making your panning decisions.
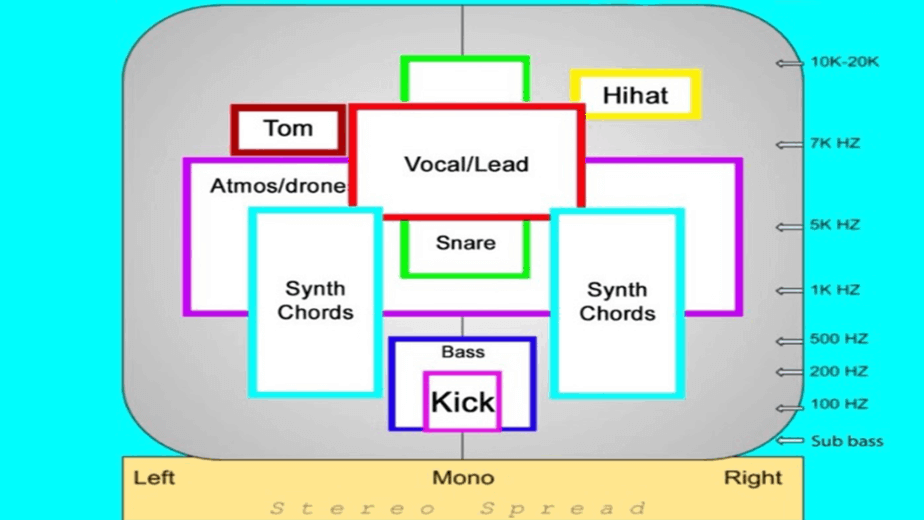
There are some basic guidelines to help you avoid common pitfalls. For example, it’s usually best not to pan your bass, kick drum, or lead vocals—at least in most situations. Of course, these aren’t hard rules. If you feel like getting creative and panning something slightly or even all the way off-center, go for it.
Generally, these elements stay in the center, as you’ll hear in most modern and commercial songs. That leaves you with plenty of other sounds you can experiment with, panning them to one side or the other. Unlike the old days of hard left or right panning, you now have the freedom to place things anywhere in the stereo field—the choice is yours!
Like most mixing decisions, panning comes down to your artistic instincts, the context of the track, and simply what sounds best. That doesn’t mean there aren’t useful suggestions, though. Let’s look at six tips for panning instruments or lead vocals in a mix.
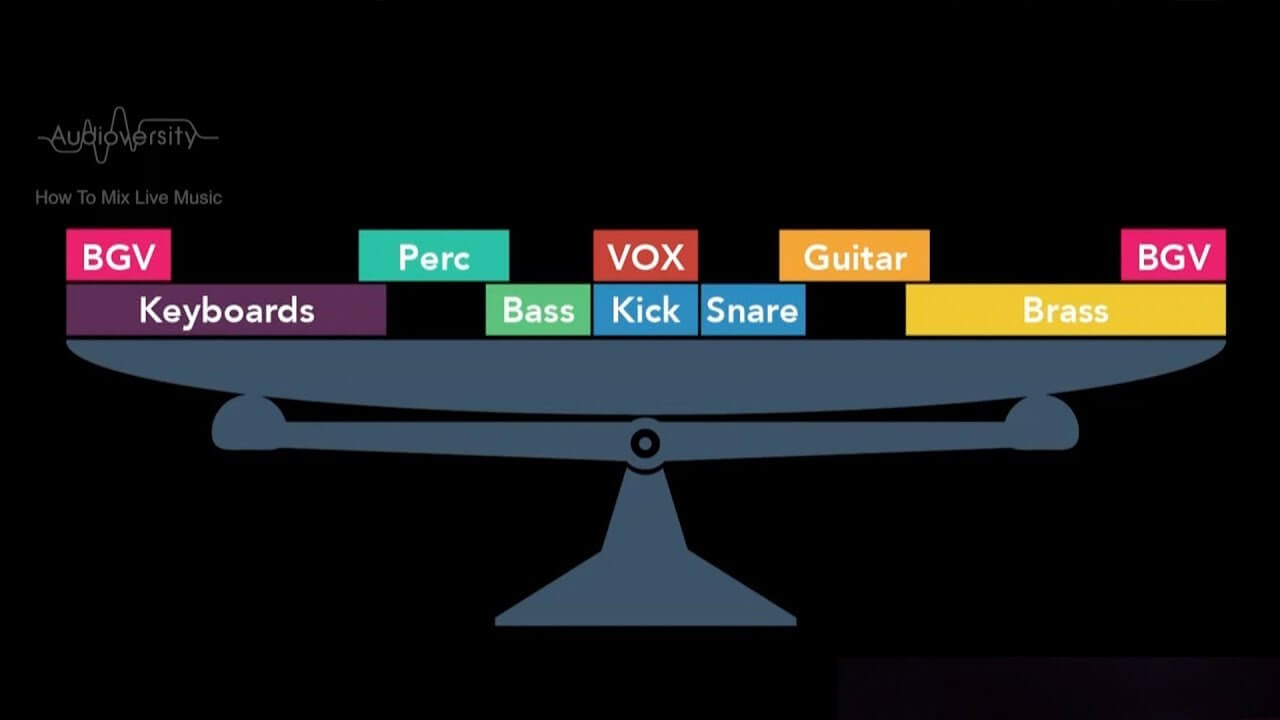
1. Panning: at first, pan hard or don’t pan at all.
Everyone approaches a project differently. Some people prefer to record all the instruments and vocals before starting any mixing. For them, panning comes later.
This order lets you hear the mix in its purest form, and then make gradual changes to move parts around the stereo space, working outward from the center.
On the other hand, some people start with a wide mix and then work inward. Not every element needs to be panned, but some should be. For example, rhythm guitars are often doubled, with one on each side.
While you could play it safe and pan these parts only partially left or right, consider going all the way instead.
The mix doesn’t have to stay this way, but setting the width of the stereo field from the start can be useful later on.
If you decide another instrument should take up those outer edges, you can always bring the rhythm guitars (or whatever else) in a bit.
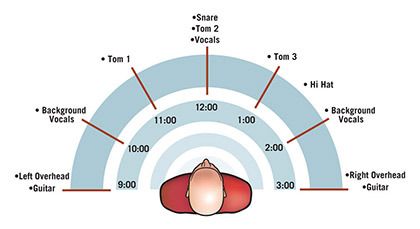
2. Pan the close mic drums to match the overheads
If you’re aiming for natural-sounding, acoustic drums, make sure your close mics are positioned to match the soundstage created by your overhead mics.
You might be tempted to get the widest possible tom sound, but it’s difficult to avoid conflicting with your overheads—and that can make the toms sound instantly disconnected from the rest of the kit.
If that’s your intention, that’s fine. Just remember: close-mic’d drums often carry some of the same snap and ambiance as the stereo overheads. So proceed with care, or you might end up with disorienting phase issues in your mix.
3. Keep away from just slightly off-center sounds
Moving sounds just slightly off-center in hopes of creating more separation is usually a wasted effort. In reality, when you keep the area around the center of the stereo field clear, the sounds on the far left and right can actually feel much more dramatic.
So, by all means, experiment with placing sounds a little off-center if you want—you might stumble upon something interesting! Just don’t expect it to be a quick fix for stereo separation problems.
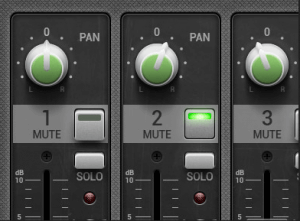
4. When you have two similar-sounding instruments, pan one left and the other right
When you have two guitars strumming throughout a track, if they’re both panned to the same spot in the stereo field, the sound can get muddled—almost as if there’s just one guitar playing.
Any slight timing differences between them can make it seem like the instrument is being played poorly. Panning one guitar half-left and the other half-right is often a good solution. Just remember to always check that your mix still sounds good in mono.
5. Use Stereo Effects
Using stereo effects correctly can add an impressive and natural sense of width to your stereo image.
One of my favorite ways to do this is with a stereo delay, where you set completely different delay times for the left and right channels. For example, you might use a quarter-note delay on the left and a dotted-eighth-note delay on the right.
This approach creates a clear difference between the two sides of your mix, resulting in a wider and more dimensional sound. It often works especially well on lead vocals.
You can also use reverb to make your stereo image feel wider. Try experimenting with different reverb plugins and presets to find the ones that sound the widest to you. There are usually noticeable differences in width from one plugin to another.
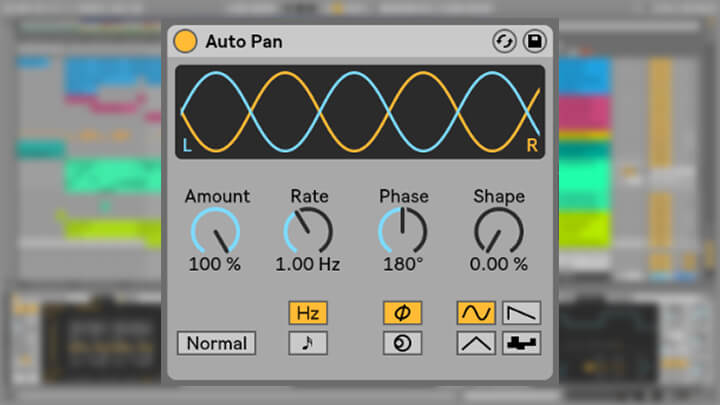
6. Pan Affected Source Opposite Of The Dry Source For Extra Stereo Width
These are techniques we use regularly. Even with just a single guitar part, you can create different levels of width by simply panning the guitar anywhere from near the center to fully left or right. If you have a processed or slightly different version of the same guitar, try panning it to the opposite side.
Be careful to choose a delay time that doesn’t disrupt the groove, and make sure it’s not so short that it causes phase or polarity problems.
Conclusion
There are certainly many more panning scenarios and possible solutions for all your panning challenges. Since we’ve given you plenty to get started, we’ll stop here and focus once again on intention.
Intention is the most important factor in a mix—it guides every choice you make.
Whether you’re panning an acoustic guitar, hi-hat, or double-tracked vocals, you can spread them across the stereo field to separate them from the center.
Intention is the reason behind what you do, how you do it, and when you do it. This applies to every aspect of mixing, and panning is no exception. We hope the information we’ve shared helps you get closer to achieving the mix you intend.



[…] What’s Panning? […]