What is Gain Automation?
Introduction
As music producers and engineers, we’re always searching for techniques that set us apart from the crowd. Every curious music enthusiast is on the lookout for something unique, and often, those hidden gems are right in front of us. Gain automation is a perfect example.
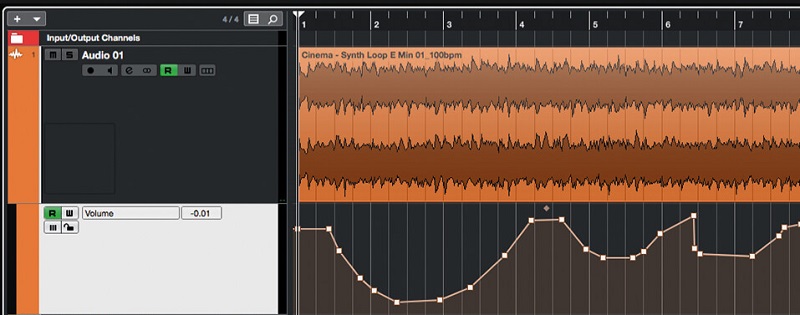
Automation refers to the process of automatically changing a specific parameter in your mix as the song progresses. In the case of gain automation, you’re adjusting the volume of a single track, a group of tracks (bus), or even the entire master track over time.
By using this simple gain automation technique, you can raise or lower the volume of any signal to suit your needs—and the needs of the song. This approach can make your track sound more professional and cohesive, since the dynamic changes will happen automatically, adding a unique touch to your workflow.
There are many creative ways to use gain automation. In this guide, we’ll cover several methods and explain how you can apply them to your own music.
Gain Automation on Vocals
Two-Track Song
We really like applying this process to vocals—it’s a true game changer, especially when you’re working with a two-track song. In this setup, you have one track with the full instrumental or beat, and another track with the vocals.
With the help of gain automation, you can blend these two channels seamlessly, making your song sound complete and well-balanced. The trick is to boost the vocals a little during the busier sections of the music—usually the chorus or hook—so the vocals can “overpower” the already busy arrangement.
Conversely, when the song transitions to the verse and fewer elements are playing, you can lower the vocal level to better fit the balance. This process is widely used to create the perfect mix and resolve these common issues in your song.
Full Track + Vocals
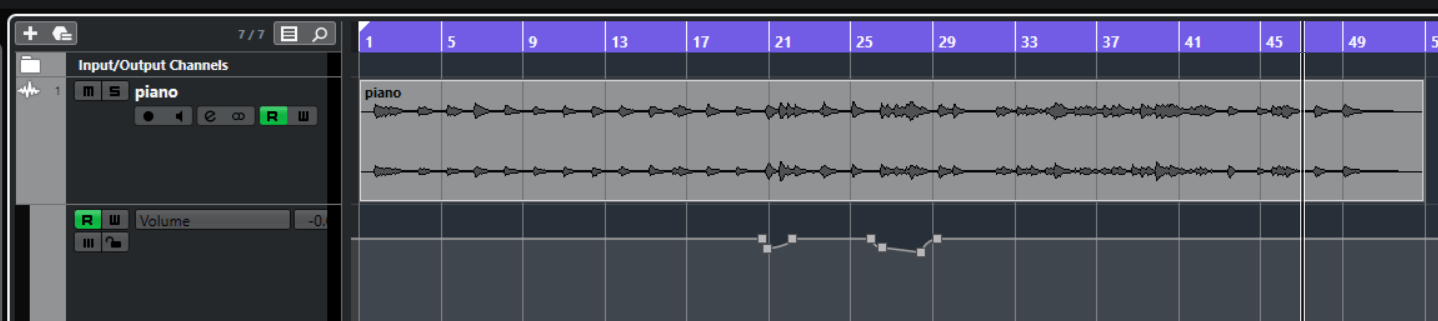
Gain automation is also helpful when you have a full track with each element on its own channel. Beyond just balancing the vocals, you can adjust individual tracks to fit the arrangement, giving you more creative and technical freedom to fine-tune your song.
Even small changes made with automation can make your song stand out and give listeners the sense that the engineer put real care and expertise into making it sound its best.
Manual De-essing
If you don’t fully trust your de-esser plugin, or it’s just not doing the job the way you want, you can always try manually automating the “s” sibilances. This is another situation where automation can be really useful. There are two main ways you can tackle this:
- Volume Automation – You can briefly lower the vocal volume right when those unwanted sibilances appear. The key here is to be very precise, making sure the automation only affects those exact moments. One downside is that this method can be pretty time-consuming, since you’ll need to go through the entire song and cut out every sibilance.
- EQ Band Automation – This method is similar to volume automation, but instead of the whole vocal track, you only automate one specific frequency band in your EQ plugin. You target the frequency where the problematic “s” occurs and use automation to reduce it just at those points. The process is much the same as above: manually finding each sibilance and cutting it with automation.
Note! – You might be thinking this can easily be handled with a dynamic EQ, which automatically reduces the frequency whenever it gets too loud. The ideal approach is to use dynamic EQ, but also automate the threshold, adjusting it depending on how strong each sibilance is.
Gain Automation on Busses and Groups
Once you’ve finished automating each individual channel in your song, you can fine-tune things even further by automating entire groups—if your arrangement calls for it.
A great example of this is experimenting with the backing vocals, boosting or cutting them as needed throughout the track. This adds playfulness to your song and helps you fill out certain frequency ranges, making it easier to achieve the balance you’re looking for.
You can also try automating the master channel’s gain for creative effect. For instance, it’s common to boost the master channel by +1dB during the chorus and drop it by -1dB when the chorus ends. This gives the chorus more impact and makes that part of the song feel extra powerful.

Gain Automation for Effects
The same principle applies when automating your effects. You can increase or decrease the effect’s gain depending on which part of the song you want to highlight. This technique is most commonly used with time-based effects, such as reverb and delay.
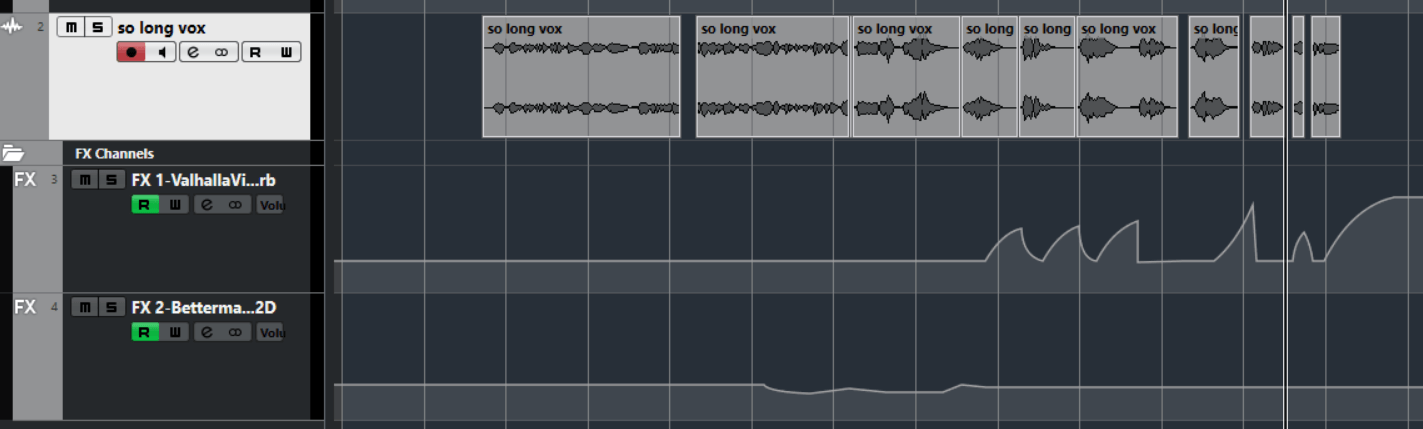
By making the reverb more noticeable at the end of phrases and exaggerating the effect, you can really highlight the reverb in your mix. This technique also helps to “unmuddy” your song by reducing the overall reverb build-up. We have a video on our YouTube channel that shows you how to automate reverb:
Conclusion
In this guide, we’ve explained the basic processes of gain automation, and we hope you’ll find it useful in your own work.
Just a quick note—there are many other ways to automate things using plugins and various recording or production techniques. There are also plenty of other automation tips and tricks out there, but here we’re focusing solely on what gain automation is and how to use it. With that in mind…
We encourage every music producer and engineer reading this brief guide to experiment and discover their own ways of using automation. Remember, every knob and slider you see in your DAW can be automated—opening up a world of creative and technical possibilities.
If you have any questions about the topics we’ve covered here, please feel free to ask. We’re always happy to help!