What is a Mix Bus?
Introduction
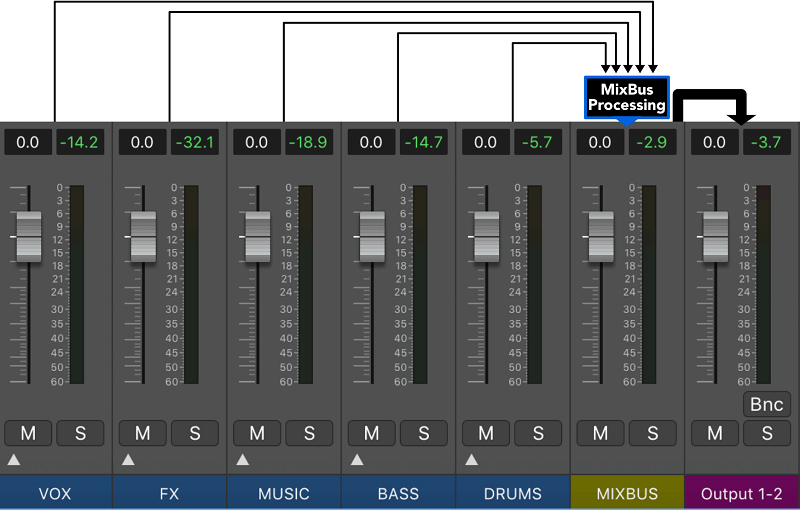
A mix bus is a way to send or “route” several audio tracks to a specific destination. Some common places to route audio include aux sends, subgroups, and your main left/right (L/R) mix. You can route your chosen channels or audio to the bus you want (Aux Send, Main L/R, VCA, etc.) and then send that signal to your desired destination by turning up the faders or knobs for those channels within that bus.
The term “mix bus” is used in both live sound and recording and usually refers to output channels or busses, as mentioned above. One of the biggest advantages of having multiple buses is being able to control several sources or channels with a single “group” fader.
Why use a Mix Bus?
Routing your entire mix to a single channel before sending it to the master fader might seem unusual at first. After all, why not just route everything directly to the master fader? The reason is that many DAWs only provide a ‘pre-fade’ master channel. This means if you move the master fader, it can disrupt the input levels of any plugins inserted on that channel.
The solution is to route everything to an auxiliary channel first, one that is set to ‘post-fade’. Then, send the processed signal from this auxiliary track to the master fader. With a post-fade auxiliary acting as your ‘mix bus’, adjusting the fader won’t affect the input levels of your plugins. This way, you can raise or lower the processed audio using the fader without interfering with your plugin settings.
What is Bus Routing?
Bus routing basically means having separate buses for different sections of your mix. Let us explain.
For example, if you have drums (kick, snare, hi-hat, toms, overheads, room) along with other instruments like bass, guitars, vocals, and so on, you end up with a lot of channels all going straight into the master bus.
This can make it pretty hard to keep everything under control. But if you create an auxiliary channel for all the drums, another one for the bass, and so on, you’ll have a much easier time managing your tracks, automating them, and applying compression to your mix.
How to Process Mix Bus
To apply mix bus processing at the start of a mix, you need to understand how each piece of analog gear or plugin will affect your sound. We recommend keeping your mix bus signal chain mostly the same for every track to maintain consistency.
Our mix bus setup stays nearly identical for each session. We’ll add or remove a few elements depending on the track, since each song has its own unique character.
Some songs need a clean, polished sound, while others benefit from a bit of grit and soul. It’s fine to add a touch of color to your mix bus in special cases, but for the most part, your EQ and compression settings should remain consistent.
No matter how you approach mix bus processing, we suggest using caution with how much EQ and dynamics processing you apply. If you overdo the EQ or compression, or try to create a “mastered” sound in your mix, you might limit what your mastering engineer can do—even if you’re mastering the track yourself.
In particular, mix bus processing shouldn’t be used to make the mix louder. Use compression and limiting here to glue and control the mix, not to raise the overall level—that’s a job for mastering. Use just enough processing to get your mix where you want it, but leave space for mastering to work its magic.
Three Basic Plugins You Need on your Mix Bus
A Compressor
Choosing a good compressor is essential when working on your mix bus. You want something that shapes the dynamics effectively, and each compressor will add its own unique character to your mix.
Here are just a few great options:
- Vertigo VSC-2
- FabFilter Pro-C 2
- UNISUM
- SSL-Style Compressor
You really can’t go wrong with an SSL-style bus compressor. It delivers a bright, punchy sound that works well with most modern genres. There are plenty of excellent emulations available, but our favorite is the SSL Compressor from Waves.
Lately, our top choice for a mix bus compressor has been the API 2500. It’s a bit cleaner than the SSL and gives us the benefits of compression without adding much color or changing the tone.

A Parametric EQ
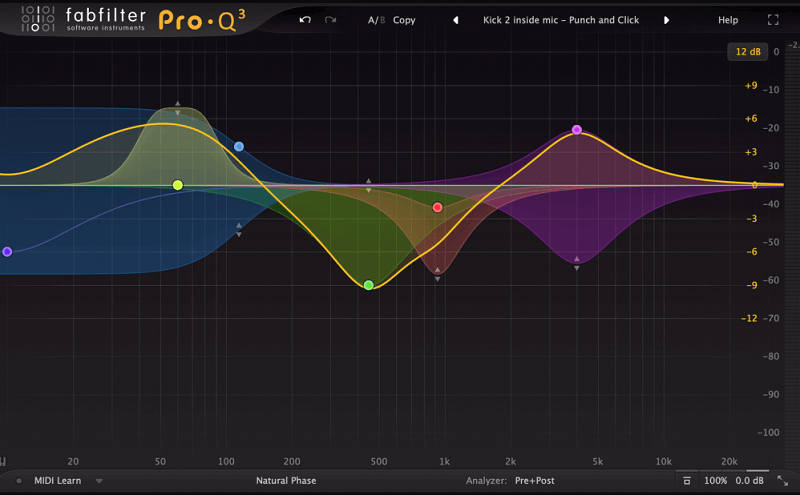
EQ is one of the most powerful tools for mixing. When used thoughtfully on your mix bus, it can really make your mix shine. Our go-to is FabFilter Pro-Q 3, but here’s a more complete list of options:
- Stock EQ
- FabFilter Pro-Q 3
- iZotope Ozone EQ
- DMG Audio EQuilibrium
For this purpose, aim for a digital parametric EQ. While colored EQs like the Pultec are great, the options listed above offer much more flexibility.
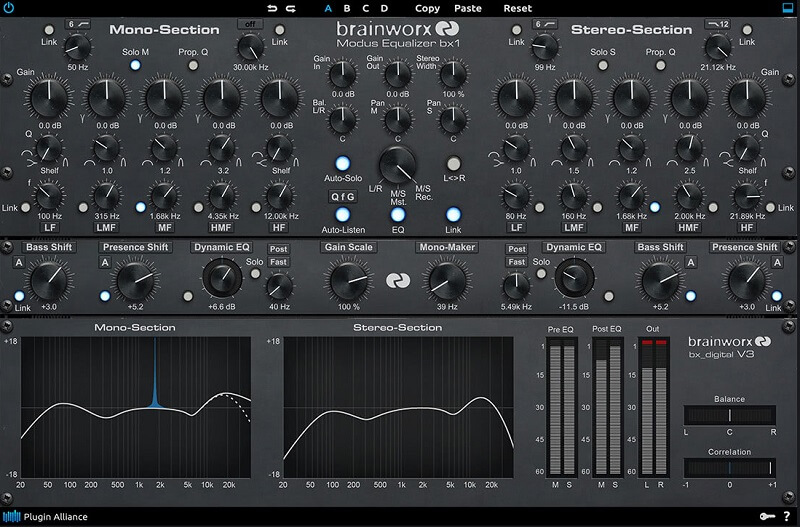
A Mid/Side (M/S) EQ
Mid/Side processing is a real game-changer. It lets you shape the stereo image exactly the way you want, which can really help your mixes feel more open and spacious.
Most of the advanced EQs mentioned earlier have a mid/side mode, but here are a few options to consider anyway:
- Default EQ (if it offers mid/side mode)
- Brainworx bx_Digital V3
- FabFilter Pro-Q 3 (with mid/side mode)
Tips on Mix Bus Processing
Now, aside from technical routing, let’s focus on ways to optimize your mix and master channel.
Keep your mix bus processing subtle. You’ll get better results by being creative with each channel individually instead of trying to fix everything at the end. The more control you have over your sounds, the more detail you’ll get overall. Remember, if you have too much to fix on your mix bus, you’ll end up affecting other channels that might already sound great.
Don’t over-compress. If you compress too much, you’ll lose dynamic range. If you’re missing gain at the end, you have two choices: either adjust the gain for each channel individually, or if you need to compress on the mix bus, use parallel compression.
Use a reference track. Too many people mix without one, only to realize in a club that their track sounds completely off. Test some elements against a reference track directly in your arrangement.
Avoid presets from all-in-one plugins! This is something we see a lot—people drop in Ozone, pick a preset, and export. If you do this, make sure to check the compression ratio, levels, gain reduction, and attack/release settings. These can really mess up your track, which can be a disaster in the mastering stage. The better the mix we receive, the better the master we can give you. When we compress, we try to keep gain reduction below 3dB, with a slow attack and fast release.
Use shelving EQ for tonal balance. As we showed in one of our earlier IG posts, shelving EQs are great for shaping the overall tone of your track and quickly adjusting the lows or highs.
Don’t use a limiter on your mix bus. Keep your signal clean.
Routing the mix bus to the master fader
Finally, set the output of your mix bus aux track to the master fader. In most DAWs, this will be labeled as the name of the analog outputs that connect to your audio system. You might also see terms like ‘Master’ or ‘Stereo Output’ used. Remember, the signal passes through the auxiliary channel before it reaches the master fader.
It’s really that simple! Open your DAW and give it a try. Set up a master track and an auxiliary track. Try adjusting the fader levels and notice how pre-fade and post-fade options affect your plugin settings.
Conclusion
Whether you just need to organize your tracks into sub-groups or want to set up more complex effects with auxiliary buses, mix buses are a huge timesaver and can really simplify your workflow. The less time you spend on technical details, the more time you have to be creative! So, get the best of both worlds: stay organized and keep your creativity flowing.
In summary, mix-bus processing is a powerful technique that can take your mix to the next level. However, every move you make should serve the musicality of the mix. Listen closely to the track and let it guide your decisions. Does it need more punch? Does it feel cohesive? Should it be brighter, bassier, or louder?
Trust your ears and be intentional with your processing choices by constantly A/B-ing and listening back to your mix.