Tips for Better Home Recordings
Introduction
If you have a microphone and a computer, you’re probably already making recordings at home. While it’s possible to create tracks that sound as polished as studio releases, it’s not very likely. Home recordings often can’t quite match those made in a professional studio.
The main challenge comes from working with limited equipment, less-than-ideal acoustics, and a lack of experience. All of these factors influence how your final mix turns out. Still, it’s absolutely possible to make great music at home—and sometimes, it’s hard to tell the difference between home and studio recordings.
To get the best results, many musicians split their recording time between their home setup and a professional studio.
Follow these 10 basic guidelines to build good habits and achieve professional-sounding vocals.
1. Reduce Background Noise
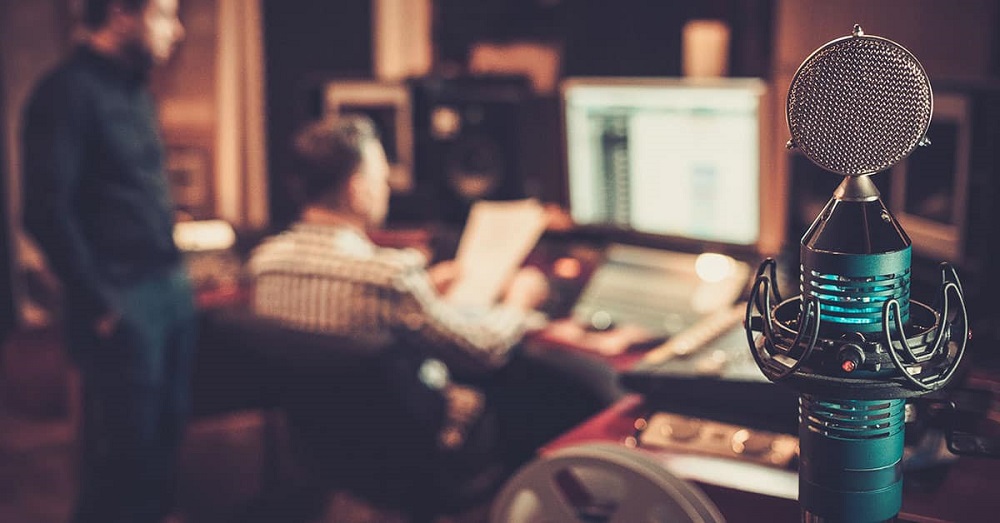
Professional recordings stand out from amateur ones mainly because of the level of background noise. Reducing background noise can be especially challenging when recording at home, whether you live in an apartment, near a busy street, or share your space with others.
Before you start recording, take a moment to listen carefully to your surroundings. To avoid frustration later, it’s a good idea to turn off all sources of noise before you begin. You might also find it helpful to create a noise reduction checklist to make sure you don’t forget anything.
Unexpected noises can easily find their way into your bedroom studio recordings. To achieve a professional result, do your best to minimize background noise whenever you record.
2. Select The Right Microphone For The Job
When recording at home, you’ll probably use either a dynamic or a condenser microphone. Dynamic microphones are made to capture sounds that are close and direct. They can handle loud sounds well, but they aren’t great at picking up audio from far away.
On the other hand, condenser microphones give you a more accurate and detailed sound, even from a distance. They’re great for capturing delicate audio and also work well for recording video. Just remember this tip: if your room doesn’t sound good, stick with dynamic microphones. Condenser microphones will pick up more room noise and reverb if your recording space isn’t treated for sound.
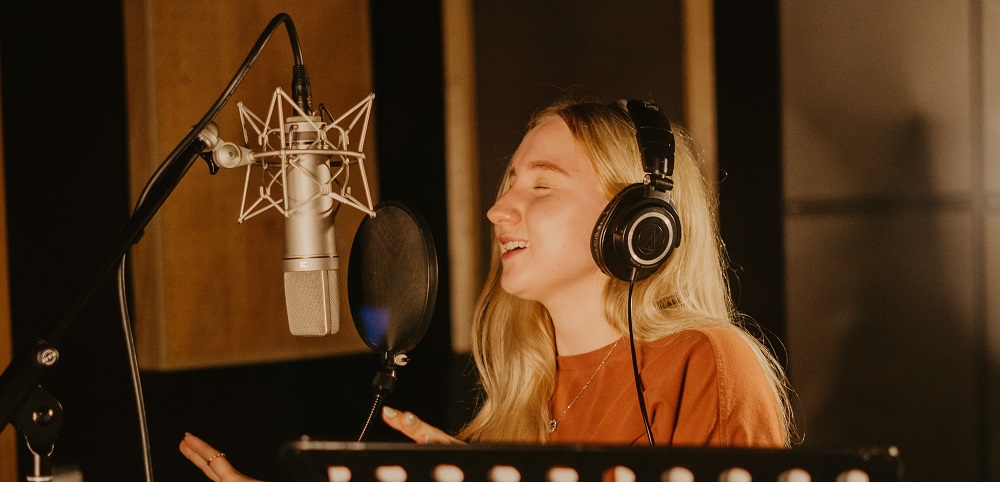
3. Distance Between You And The Mic
The sound of your recorded voice can change a lot depending on how far your mouth is from the condenser microphone. When you sing or speak closer to the microphone, it tends to boost the low frequencies, making your voice sound deeper.
For the best results, vocalists should position themselves about six inches away from the microphone to avoid this effect. If you want a more natural sound, especially for podcasts, try standing even farther from the mic. Don’t be afraid to experiment with different placements and distances until you find the sound you like.
Your microphone should generally be between 2 and 12 inches from your face. Based on the distance you choose, it’s helpful to use a pop filter about one to two inches away from the microphone. Additionally, take steps to improve your recording space and adjust your mix for the best quality.
4. Always Leave Headroom During Tracking
When recording, our goal is to achieve a strong, clear signal with a good signal-to-noise ratio. Thanks to modern 24-bit and 32-bit recording technology, our DAWs can easily capture audio with both a high signal-to-noise ratio and a wide dynamic range.
There’s no need to turn up your interface’s preamp so much that the signal is close to clipping. If a signal clips at the preamp and gets recorded with distortion, there’s no way to fix it later.
To keep things sounding their best, it’s a good idea to set your preamp level a bit lower than the maximum. This way, you leave enough headroom for volume peaks and dynamic changes.
5. Edit to Improve the Recording
The ideal situation is to capture the best possible performance from the start. In a perfect world, you wouldn’t need to edit or modify the recording at all. However, in reality, there’s no need to be afraid of making edits after recording to improve the overall quality.
Don’t hesitate to move notes within your DAW if you have a great take that just needs a couple of timing adjustments. Likewise, using autotune to fix out-of-tune notes on a vocal track can be very helpful when necessary.
I’m not trying to be someone who believes these tools should never be used. It’s always best to get the original take as close to perfect as possible, but there’s nothing wrong with using technology to help achieve the best result.
6. Create a More Interesting Digital Space
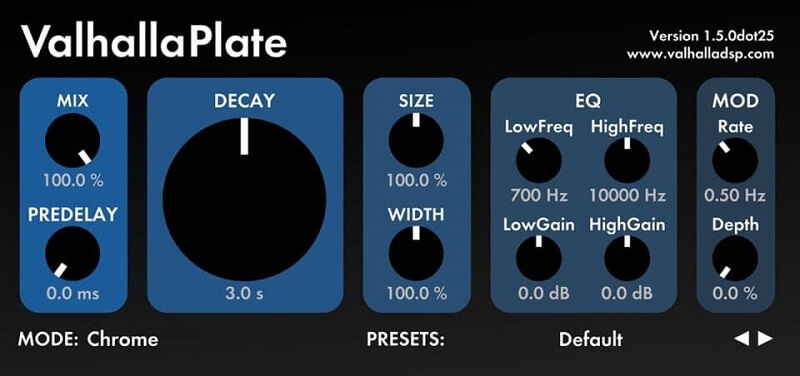
Reverb is often used in bedroom productions to “cover up” poorly recorded or poorly performed parts. However, there’s no denying that high-quality room sound is what sets a commercial space apart from a private residence. If you want to achieve that “living room feel” on a budget, using reverb plugins is the way to go.
The trick is to avoid obvious, long-tail reverbs like hall, plate, or spring types. Instead, we’re aiming to recreate the subtle air and depth of a high-quality tracking environment. Short room and chamber reverbs work best for this purpose, and some of my favorites are those that mimic the sound of specific places.
7. Don’t Overuse Correction Tools
We often become overly critical of our own performances when recording music, and we tend to rely too much on timing and pitch correction to achieve what we think is the perfect result.
If vocal takes are over-corrected or performances are quantized too much, the outcome can sound robotic and lifeless. Recordings are usually more engaging when they retain some of the natural, human element. To avoid this problem, stop mixing with your eyes.
Try listening to the track with your eyes closed. If something stands out and bothers you, go ahead and fix it. However, using pitch and timing correction as a default can sometimes strip the life out of your music. When these tools are used as creative effects, the rules can be different, but overall, it’s important to trust your ears rather than your eyes.
8. Record Yourself to Practice
Thanks to technological advancements, setting up a basic home studio has become easy and affordable. We believe that singers should make a habit of recording themselves regularly. Microphones can capture subtle qualities in your voice that you may not have noticed before.
Also, as we all know, the way our voice sounds to others is quite different from how we hear it ourselves. Before recording in a professional studio, it’s extremely important to get used to the sound of your recorded voice and to practice your recording techniques.
All you need is a laptop, an audio interface, a microphone, headphones, and basic recording software.
9. Take Time to Test
It’s easy to get stuck using the same gear over and over. But if you have the option and time, try testing out different microphones, preamps, and other equipment on your instruments or vocals.
Don’t be afraid to experiment with various combinations in your recording chain. The best gear for your music is the one that sounds right to you—not just what you’re “supposed” to use.
You can also try out a few different setups and then pick the one that works best with what you have. Whenever you have a choice, don’t just set things up out of habit—take a moment to think about what will sound best.
10. Love Your Sound
Professional singers often say, “I hate recording my voice because I hate how it sounds.” But if singing is your profession, it’s time to start loving your voice! If you’re not satisfied with how you sound, look for ways to improve.
Is it a technique issue? Could you experiment with your tone? Are you just not used to hearing your own voice, or does it feel unfamiliar? If so, tip number eight is just what you need.
Maybe that’s simply how your voice has always sounded, and it’s time to get used to it. This way, you can focus on emotion and delivery, instead of worrying about how you sound.
Conclusion
When it comes to making music at home, there are several important things to consider. The sound quality of your recordings depends heavily on the equipment you use, your recording techniques, the room you record in, and even the order in which you record your instruments.
If you want your music to sound professional, you need to pay attention to these factors. These days, home musicians can recreate the sound of classic gear from different decades for a fraction of the cost, with much more flexibility. You don’t need a fancy studio filled with vintage equipment and perfect acoustics to achieve high-quality recordings.
To help you get started—and hopefully inspire you to learn more—here are a few of the most important tips to keep in mind. These will help you begin your journey into home recording with confidence.