EQing Electric Guitars
Introduction
If you’re an aspiring recording engineer or a guitarist who wants more control over your sound, you’ve probably wondered how to EQ an electric guitar.
Achieving a great electric guitar tone depends on dialing in the right EQ settings at specific frequencies. EQing is both a science and an art, and it all begins with understanding some basic principles.
Even if you have the best guitar and top-notch gear, a poorly set EQ can make your sound “off” or distorted. Whether you’re a guitarist or a sound engineer, knowing how to EQ an electric guitar is essential.
Getting a good electric guitar sound isn’t as simple as it might seem. Many factors play a crucial role, but we’ll focus on the most important ones here. Any mistake in these areas can result in a poor-sounding guitar.
In this article, we’ll cover the best techniques for EQing your electric guitar, setting it up for further processing, and blending it with the other elements of your song. Let’s jump right into the topic.
Electric Guitar Fundamental Frequencies
There are some basic and essential frequency areas you should always pay attention to with any instrument, no matter how it’s recorded. This blog post will give you an overview of EQing the guitar—not recording techniques. Before we dive in, let’s make sure we understand the basics of EQ.
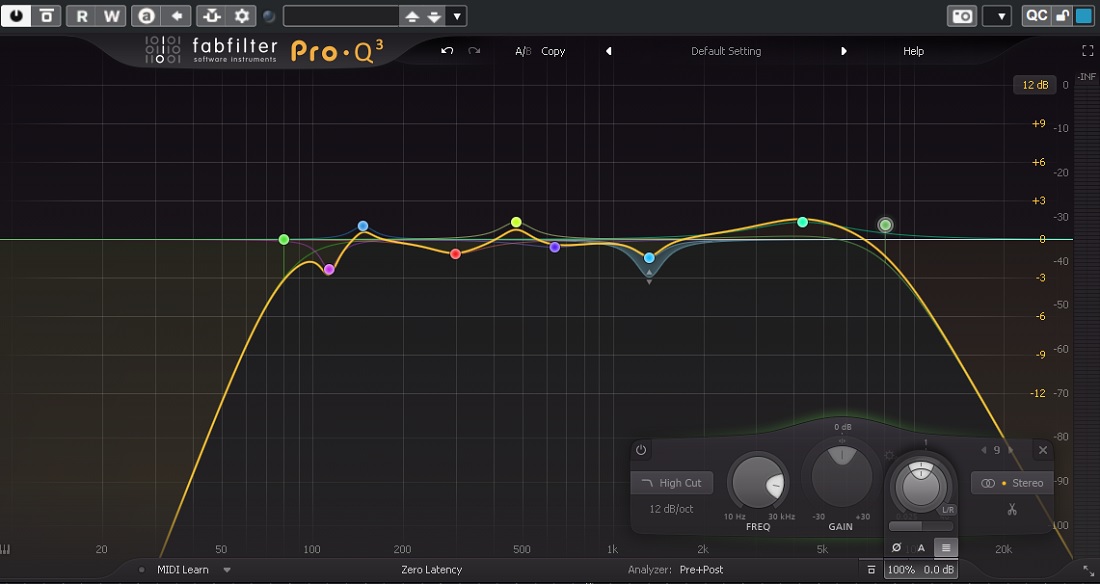
Depending on how low your bottom string is tuned, the frequency range of an electric guitar recorded through an amp can stretch from around 80Hz up to about 4.5kHz. If you look closely at a frequency analyzer, you’ll notice that there’s actually a lot of content above 4.5kHz, but most of this doesn’t really matter for electric guitars.
Frequencies above 7kHz mostly consist of “fizz,” especially when you’re dealing with distorted electric guitars. For rhythm guitars, your main focus should usually be the low midrange, roughly from 150 to 500Hz. For lead guitars—especially if you want them to stand out in a busy mix—look between 3 and 5kHz.
Our advice is to get familiar with the key frequency areas for the instruments in your genre. Learn how they show up on the frequency spectrum. This will help you remove unwanted frequencies and get a great sound out of your instruments.

EQing Low Frequencies
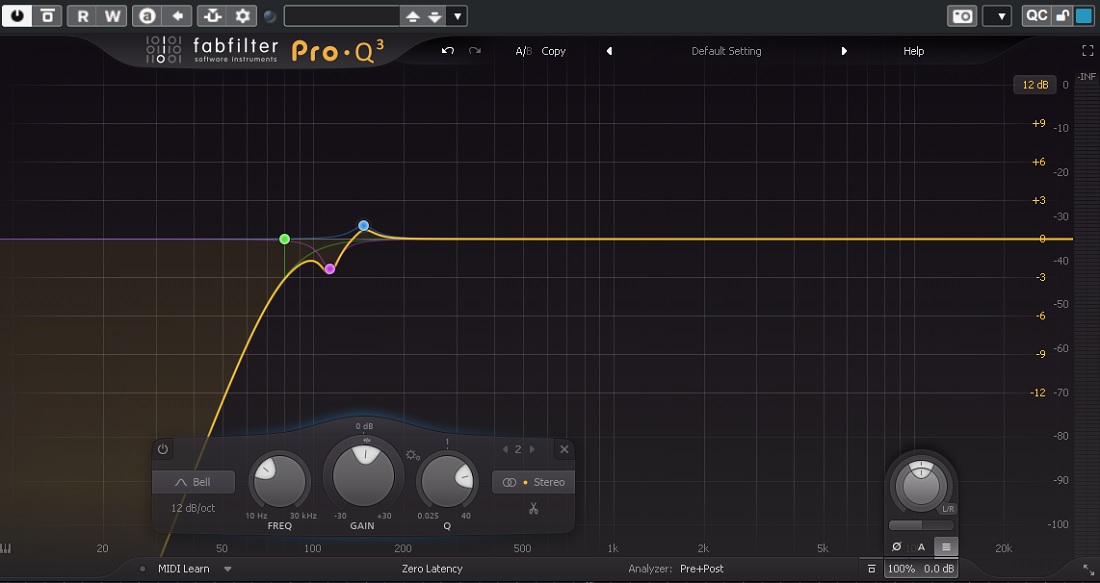
Low frequencies, especially those below 80-90 Hz, are not well produced by electric guitars. If you don’t cut these frequencies, your mix can end up sounding muddy and incoherent.
Generally, the bass frequencies of an electric guitar sit between 100-150 Hz. The challenge here is that these frequencies often overlap with those of a bass guitar, which can lead to clashes in the mix.
If you want a guitar sound with a powerful low-end and clear bass, you’ll need to find a balance between the guitar and the bass guitar. Most of the time, a narrow cut around 100 Hz and a slight boost between 100 and 150 Hz will help you get the sound you’re after.
You can also use EQ automation as a helpful trick. For example, you can boost the low frequencies on the guitar when it’s playing solo, and then reduce them when the bass guitar comes in. If there’s no bass guitar in the mix, there’s no need to cut those frequencies—go ahead and boost them to add depth to your sound.
The reason for using a high-pass filter to remove low-end frequencies is that the fundamental range of an electric guitar is between 82.4 Hz and 1174.6 Hz (not counting harmonics). Because of this, it’s usually recommended to cut everything below 80-100 Hz when setting the EQ for an electric guitar.
EQing Mid-Range Frequencies
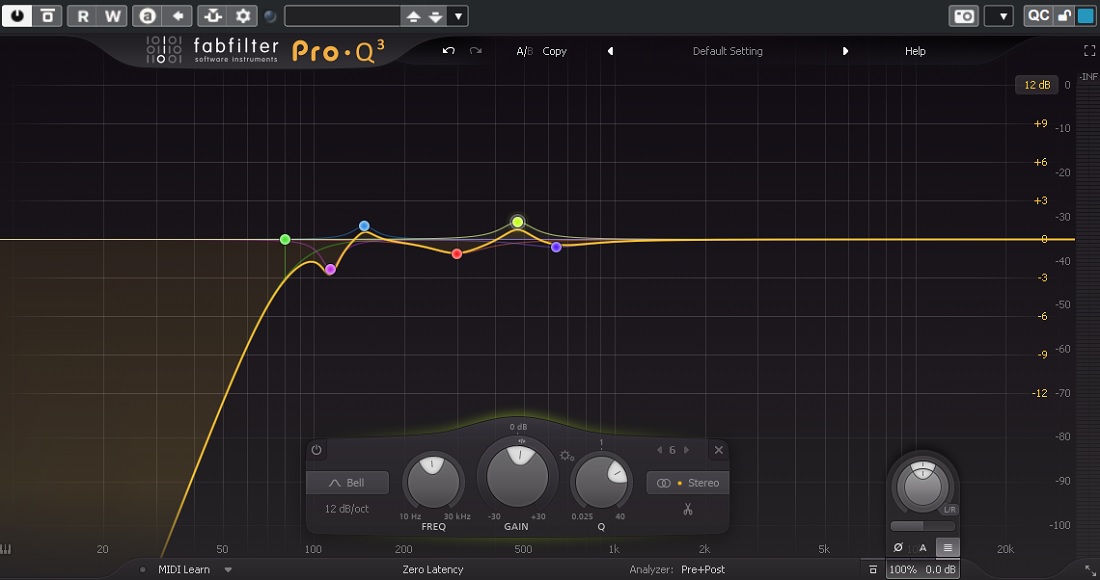
Mud often sits between 250Hz and 350Hz. If there’s too much mud in your mix, the sound can become flat and lifeless. For a bit more clarity, you might want to cut some of these frequencies, depending on your guitar recording.
However, you should cut this area with caution. Many mixers make deep cuts to increase clarity, but they don’t realize they’re removing all of the guitar’s body and life in the process.
Bandpass filters are often used to remove the resonance frequency of electric guitars, which is around 600Hz. You can use a bandpass filter with a center frequency of 600Hz to reduce or cut out this part of the frequency spectrum.
With a digital mixer, lowering this frequency range is fairly simple. You can use a peaking or bell EQ filter, sometimes called a bandpass filter, set to the right frequency range. To start, find the 600Hz frequency and slowly decrease it. On the mixer’s display, you’ll also see a slight reduction in frequencies just above and below 600Hz.
This happens because the 600Hz frequency acts as the center point in your digital mixer. As you lower it, you also reduce the surrounding frequencies a bit, which can help round off the sound—great for the final product.
So, in addition to cutting frequencies in the midrange, you’ll also find the basic guitar tone in this area that you might want to enhance. It’s often located between the muddy area and the resonance, so you’ll need to be precise in finding the right sound. A slight boost somewhere between 300Hz and 600Hz can add body to the guitar and help give the instrument its signature sound.
EQing High Frequencies
There is a noticeable sound between 1-2 kHz, usually produced by the pick. Because of this, you might want to cut those frequencies unless you are aiming for a very raw and realistic sound. In this same range, harsh and unpleasant tones can also appear in guitar recordings. Depending on your own preferences, consider either boosting or cutting in this area.
If your guitars are distorted, you might want to boost around 5 kHz to add presence, but be cautious, since these frequencies may already be emphasized in distorted tones. Also, keep in mind that this range can conflict with the overheads of drums, so you’ll need to decide what’s most important in your mix.
Boosting around 10 kHz can sometimes make electric guitars sound better, but again, if your guitar is distorted, you might want to avoid this. Frequencies above 15 kHz are usually not very useful, and most people can’t hear them anyway. You can use a low-pass filter to roll off these higher frequencies.
Be careful with the high-end frequencies, and focus mainly on the ranges that are most important for guitar. Heavily distorted guitars won’t benefit from big boosts in the high end; that might work better for acoustic guitars, but not when mixing electrics.
EQing Electric Guitar Solos
Just like with lead guitar lines, you have several options when shaping solos, but you can also try something different. Boosting some of the high frequencies—especially between 3 kHz and 4 kHz—amplifies the percussive attack of the guitar pick on the strings.
This range is very sensitive to human hearing, so even small boosts can make things sound noticeably louder. For a glossy sound on solos played with humbucker-equipped guitars, try boosting a bit higher, around 5 kHz.
EQing the Lead Guitar
A perfect lead guitar riff can turn any song into a classic, but how that riff fits in the mix depends a lot on EQ. To add bite, try boosting the highs around 2 kHz to 5 kHz. If you’re playing with a clean tone, consider increasing the 150 Hz to 300 Hz range to add warmth.
If you’re using a distorted tone, boosting between 400 Hz and 1000 Hz will give you a crunchy effect, while raising the super highs up to 6 kHz creates a sizzling, almost fizzy sound. To avoid causing problems by boosting one frequency area too much, it’s best to use multiple types of EQ if possible.
Use Saturation Plugin
Sometimes, you can tame harsh high frequencies with saturation instead of an EQ. Using a saturation plugin is a great way to try something different from the usual EQ plugins or hardware.
Saturation can help smooth out those sharp, wiry electric guitars (like a bright Stratocaster), while also adding pleasing harmonic content to your sound—especially with tape or tube saturation. This approach gives you a richer, fuller result compared to simply cutting frequencies with an EQ, making your mix sound even better.
Beyond just fixing technical issues, saturation can leave you with a rounder, warmer sound that really benefits your final mix. Give it a try and see how it works for you.
Conclusion
The electric guitar EQ process is something that deserves close attention, since mixing electric guitars is a craft on its own. You’re working with a signal that often leads the song, so getting this part right is crucial.
If you don’t mess up the guitar EQ, the rest of the mixing process becomes much easier. You’ll have a smoother time fitting in the other elements, making sure the guitar sits perfectly with the rest of the instruments and really stands out to the listener.
Although this article is brief, we’ve covered all the basic details of when you need to EQ the electric guitar during mixing. We’ll cover recording techniques—like amps, mic placement, and more—in a separate article.
If you have any questions about this topic, please let us know in the comment section below. We can look into it together and gain a better understanding of the process.