What is Signal Flow
Introduction
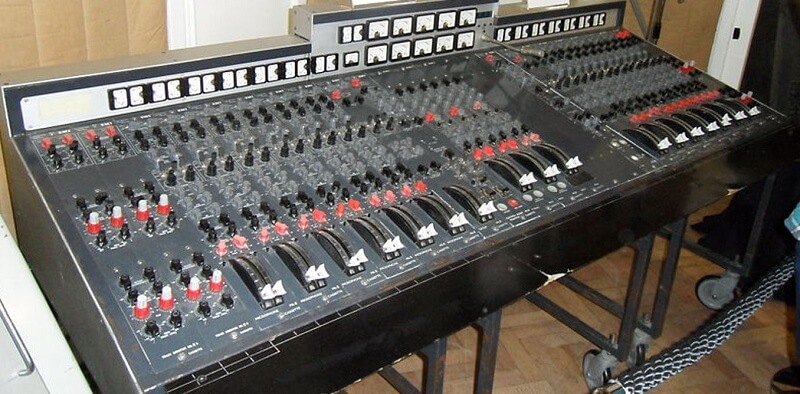
Understanding where the audio signal is right now, and where it’s headed next, is a key part of working on a large-format mixing console.
All those knobs and buttons become much less intimidating when you know what’s generating the signal, what it’s passing through, where it’s being processed, what’s processing it, and how that processing is changing your audio.
Once you get your head around signal flow, all the other ideas—like frequency, dynamics, and equalization—will start to make sense, because these concepts are built into understanding the gear and components that shape signal flow.
How Do We Use Signal Flow?
In sensible terms, there are principally two classes of the way to direct signal in digital music production. One includes splitting tracks down a parallel path (the aux send) where effects processing may be managed individually from the dry source track. The opposite includes routing a number of tracks to be grouped and processed collectively in a submix.
Even for those who’re new to the idea of signal flow, you may have most likely at least heard of utilizing aux sends for effects in a mix, and you might also have a fairly solid grasp on how to use this type of signal routing.
While you use an aux send, you’re successfully splitting the signal down two paths — the unique straight line from the audio track to the mix bus, and a second (auxiliary) path that you’ve simply made. It’s like a fork in the street, besides the signal travels down each path simultaneously.
Why Should We Care About Signal Flow?
Signal flow is a powerful tool, though it might not be as immediately obvious as something like compression or reverb. Simply routing a signal to a bus doesn’t directly change the way it sounds.
However, the paths we choose for our signals—and where and how we process them along those paths—can have a huge impact on what we can achieve in a mix session.
Once you get comfortable with routing signals and see how it opens up new ways to shape sounds in a mix, it becomes clear that the possibilities are almost endless.
Signal Path In-Depth
Most of us already know the basic function of a mixing console, so let’s dive a little deeper and see exactly what happens to the signal as it moves from its source all the way to monitoring. The information here focuses on the analog signal path, so you can understand every step you can take before recording your signal into your DAW.
This process is pretty similar to the processing chain in your DAW, but here we’re talking about the microphone signal—whether you’re recording vocals or instruments. Let’s break it down.
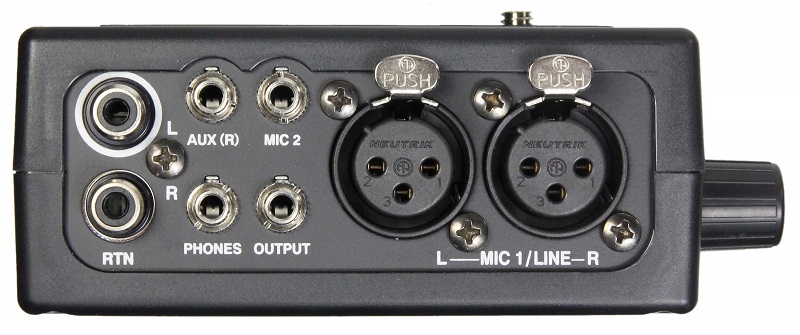
Mic or Line Input
First, you’ll need to tell the console whether you’re recording from a microphone or a line-level source, such as a keyboard or synthesizer. This is important because microphone signals are much weaker than line-level signals, so to set the correct gain, you have to make sure the desk knows what kind of input it’s receiving. If you select “mic,” your signal will go through the desk’s preamp to boost the level. If you select “line,” the signal will usually bypass the preamp since it doesn’t need the extra gain.
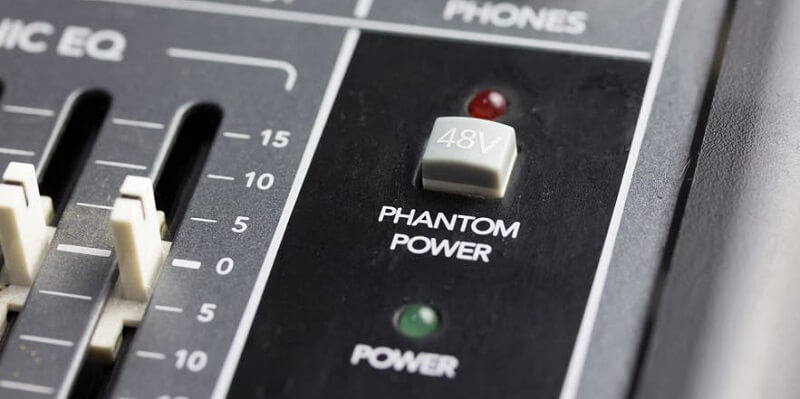
The Phantom Power
If you’re using a condenser microphone, you’ll need to enable phantom power. This sends a small electrical signal to the microphone, essentially turning it on. However, always double-check, because not all microphones require phantom power—and accidentally turning it on could damage some mics.
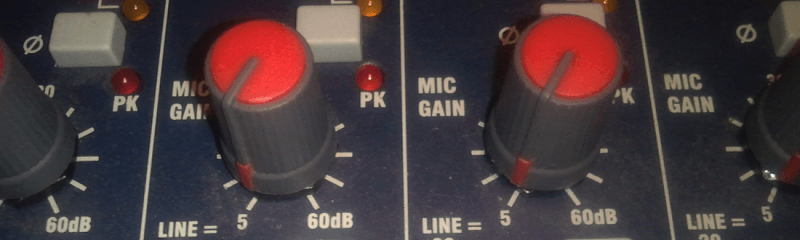
Set the Gain
Next, it’s important to set the proper gain level. Gain staging is crucial for achieving a clear signal and ensuring a good signal-to-noise ratio. You’ll usually have a Pad option as well, which allows you to reduce the signal by a certain number of dB if it’s too loud—for example, if you’re using a very sensitive microphone and your singer has a powerful voice.
Preamp
If ‘mic’ is selected, the signal will be routed to the desk’s preamp. As mentioned earlier, microphone signals are typically quite weak, so a preamp is necessary to boost the signal to a usable level. Many producers prefer to use external preamps for their unique sound characteristics instead of relying on the desk’s built-in preamp. These external preamps can be added into the signal chain via a patch bay.
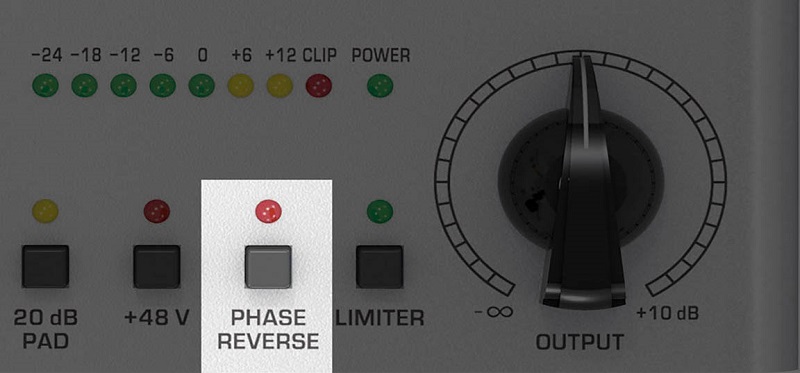
Phase
You’ll usually see an option to reverse the phase of your signal. This simply flips your signal’s waveform upside down, so the positive peaks become negative and vice versa. This is important to check when using multiple microphones, because if one or more are out of phase (meaning when one is positive, the other is negative), you could lose the low end in the affected tracks, or sometimes even the entire signal itself.
Inserts
An insert is usually found between the preamp and EQ section of a mixing desk. It allows you to add an effects unit or signal processor, such as a compressor, directly into the signal path. To do this, you physically route the signal out from the insert, into your effect unit, and then back into the signal chain. This is often done using a patch bay or insert points on the channel strip in smaller mixers. In your DAW, the process is different.
Equalization
You’ll usually find an EQ section on your mixing desk that lets you adjust the frequency content of your signal. The EQ on a mixing console isn’t as precise at targeting specific frequencies as a graphic EQ or a plugin, but they’re great for making adjustments during the recording process. Some EQs can be set to affect the signal either before it reaches your DAW or afterwards, at the monitoring stage.
AUX Sends
A mixing console usually has several auxiliary sends on every channel. If you’ve mixed “in the box” before, think of these as similar to a bus channel. An aux lets the console send a copy of the channel’s signal to another destination. This might be for using an outboard effects unit or for creating a duplicate of the original track for parallel compression.
An auxiliary send typically gives you the option of ‘pre’ or ‘post’ send, meaning you can choose to send the signal either before or after your faders. If you set it to pre, you can change the fader as much as you like in the control room, but it won’t affect the level of the auxiliary send. On the other hand, if you set it to post, the aux send level will be affected by your fader adjustments.
Headphone Mix
An important part of any recording session is making sure each performer has their own headphone mix of the track. Usually, you’ll find a section on the mixing desk that lets you raise or lower the volume of each track feeding into the headphones. Sometimes, this is done using auxiliary tracks—in that case, a pre-fader auxiliary send would be suitable.
DAW
After all of the above steps, your signal will reach your DAW, which is where you’ll actually record the track. This doesn’t need much explanation, but remember: adjusting any of the settings mentioned earlier (like gain or phase reversal) won’t affect the signal once it’s recorded. So, make sure all your settings are correct before you start tracking.
Conclusion
Signal flow isn’t just some technical jargon that audio engineers throw around to sound smart. It’s essential for figuring out how to solve problems while recording and mixing!
Make sure everything is set up and clear before you record your microphone or instrument. Once you hit record, you can’t go back and fix things easily. It’s always better to get everything sorted and capture the best possible take, especially when using your hardware and microphones.
Taking care of issues ahead of time saves you tons of time later. That way, you can focus on the creative process instead of getting stuck dealing with technical problems. If you have any questions about signal flow, feel free to ask in the comment section.