What Is Noise Floor
Introduction
When you study audio theory, everything sounds straightforward. But once you start working in practice, things change quickly. Instead of focusing on the creative side, you often spend most of your time just fixing audio problems. As soon as you get your recordings, you start treating them for issues. The key is learning how to handle (or even prevent) these problems so you can keep moving forward.
Isn’t it frustrating when you listen back to your recordings and hear that annoying humming sound? It can really affect your work and your music. But do you really understand what causes it, where it comes from, or how it impacts your final result? More importantly, do you know what you can do to prevent it?
The noise floor is a type of background noise that gets recorded into your signal. Unlike natural sounds that might occur behind the microphone, this is more like an electrical hum. In our opinion, the noise floor is probably the most unwanted noise you can have in an audio signal.
If you’re dealing with this issue, you’re in the right place. We’ll explain how to achieve a low noise floor, reduce unwanted noise from your audio’s dynamic range, and check if any of your gear is causing equipment noise. Let’s dive in.
What Is Noise Floor Exactly?
Electrical components naturally produce a certain amount of noise—like hum, hiss, and rumbles—even when they’re not actively being used. The term “noise floor” refers to the amount of sound that a piece of equipment produces on its own when there’s no input signal. More broadly, it describes the total noise generated by all the gear in a setup when everything is at rest.
In modern systems, especially when working entirely “in the box” (digitally), noise floors can be extremely low and sometimes even inaudible. Back in the days of analog tape, though, managing the noise floor was much more important. Engineers had to make sure the recorded signal was always louder than the background hums and quiet hisses from the mixing console, tape machines, and outboard gear.
The overall noise floor of a studio is also affected by outside sounds. People working from home have to deal with noise from air conditioners, traffic, birds, and other distractions. To keep the noise floor as low and quiet as possible, studios work hard to block out external noise.
Whether you’re working from home or in a professional studio, it’s important to take steps to reduce the noise floor and minimize any unwanted sounds that could end up in your recordings. Keeping these noises under control will help you avoid problems later on. Let’s go over the basics now.
Measuring Noise Floor
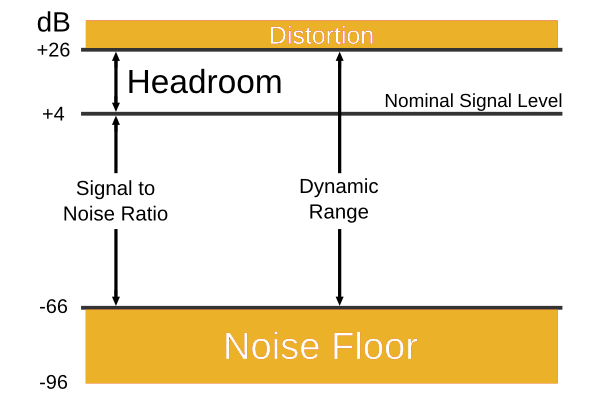
The noise floor can be measured in several ways. Let’s start with digital systems, which use dBFS (Decibels, Full Scale). It’s common knowledge that the dBFS scale measures audio volume, with 0 dBFS representing the loudest possible sound that can be recorded. As the sound level decreases (gets quieter), you’ll see the meter drop from 0 dBFS to -10, -20, -30, and so on.
Soundcards use the dBFS scale to measure input and output signals at the converter stage during digital audio conversion. Another method for measuring the noise floor is the sound pressure level (SPL) meter. SPL is usually used to measure ambient noise in studios, using a dB scale similar to dBFS. This is important if you want to measure noise levels and compare them before and after analysis.
Reducing Noise Floor in Recording
The first and most important step that will solve many of your problems and help with decision-making is to add acoustic treatment to the room where you plan to work and record. Why is this so crucial? The answer is simple: any external noise that seeps into your recording space can end up in your recordings.
To ensure a clean audio recording, take care of this before anything else. We won’t go into all the additional benefits of acoustic treatment here, but there are plenty—so don’t overlook this step.
Next, invest in an isolated-bottom mic stand that won’t transfer vibrations or cause pops and clicks from being unstable on the floor. Movements from an unstable stand can create air pressure on the mic capsule, resulting in hums or hisses. Getting a pop filter will also help with this, so make sure to get one.
Once you’ve sorted out these logistics, the next step is to use balanced audio cables. Balanced cables will give you the best possible recording quality, and even if you pay a little extra, you’ll get top-notch cables—often with a lifetime warranty. Here are some XLR cables we recommend to help you avoid these issues.
Finally, let’s talk about the microphone and preamp, which are also important in reducing noise floor. Every mic and preamp has some internal noise floor that can’t be completely eliminated, but you can minimize it. Look for preamps and microphones with very low self-noise that meet the standards of modern recordings.
If you’re recording more vintage styles and don’t mind a bit of hum in your vocals, this may not be a big concern. But if you need clean and transparent vocal recordings, check out some suggested microphones and preamps in the box below.
Reducing External Noise Floor Causes
Since we already covered some of this in the acoustic treatment section above, let’s move on and list a few other reasons that can create noise floor issues and increase electrical or atmospheric noise in your recordings.
One of the most annoying problems is noise caused by faulty outlets. Here’s an example: An audio engineer friend of ours was using a 500 series rack, powered with a regular power cable and plugged into a standard outlet. Everything was brand new—the units and the modules—but his recordings still had strange sounds in them. What was the problem, you ask?
It was ground loops and the noise they produce. To avoid ground loops, try using different power outlets, or use a power strip designed to prevent ground loops. This can help you avoid some of these common noise issues.
These might seem like minor problems, but when they start to stack up, you’ll notice a really obvious noise issue that you’ll need to fix quickly. Don’t overlook outside noise either. As we mentioned, computer fans, air conditioners, and electrical interference are all important to address if you want clean, noise-free recordings.
Reducing Noise Floor In The Mix
Even if you’ve taken care of everything and sorted out all the details before recording, you might still end up with some unwanted noise in your mix. Or, if you’re working for a client, you might receive a project that has a lot of noise already recorded in the signal, and now you need to fix it in the later stages.
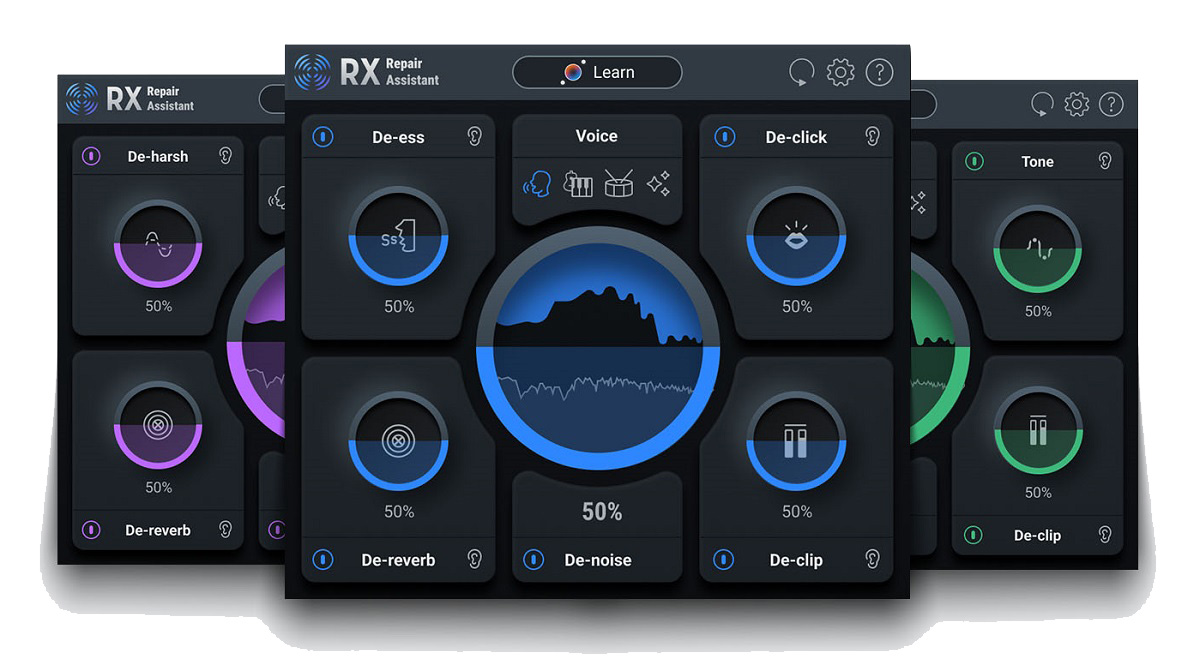
The good news is that there’s software available that can reduce these unwanted sounds, even after the fact. There are plenty of plugins—like de-hummers and de-noisers—that target the specific frequencies of these noises and can fix issues that slipped through during recording.
If you’re dealing with low-frequency noise, like a rumbling hum or some subby fuzz, sometimes a simple high-pass filter can do the trick. But if the noise is more complex, just reach for one of those specialized plugins and you’ll be good to go.
Check these plugins out:
- Brusfri by Klevgrand
- Restoration Suite 2 by Acon Digital
- Extract: Dialogue by Acon Digital
- Restore Plugin Bundle by Sonnox
- poltergate by denise
- RX 10 Elements by iZotope
- Esspresso by Klevgrand
- ReSample by 2nd Sense Audio
Conclusion
Here’s a bit more on the topic: The noise floor is unwanted and should always be addressed, no matter what caused it. The best way to get clear recordings is to tackle the noise floor at the source. However, if you find that it’s already present in your recordings, you can still try to fix it during the mixing stage. So, don’t worry too much about the noise floor—just focus on identifying the problem and solving it calmly, then move forward!
If you feel there’s something we missed about this topic, please let us know in the comments below. We’d be happy to update our article and add more insights about the noise floor!