Introduction
We’ve already covered some basics about processing your mix bus after finishing the mixing process. Now, it’s time to dive deeper into mix bus compression and offer some extra insights on the topic.
There are different opinions about this step—some engineers add compression at this stage, while others leave it to the mastering engineer. We’ll go over the pros and cons of mix bus compression and share tips, tricks, and guidelines to help you use it effectively.
So, without further ado, let’s take a closer look at what mix bus compression is and go through the key points you should know before applying it to your mix bus.

What is Mix Bus Compression?
Mix bus compression is when you apply gentle compression to the entire mix before any mastering processing takes place. This technique developed in the late 1970s because artists noticed a clear difference between what they heard in the studio and what played back on the radio or home record players.
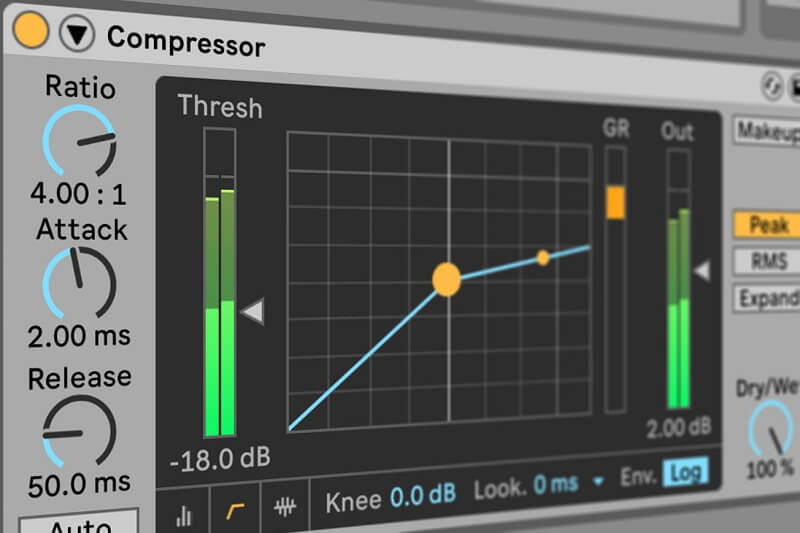
You can achieve mix bus compression with either a plugin compressor or an outboard hardware compressor. Modern plugins can handle both approaches very well, so it really comes down to your personal preference and which compressors you have available. The key point to remember is that we typically don’t add compression when printing the mix. Instead, this process is usually left to mastering engineers.
Back then, another round or two of compression would happen during broadcasting and mastering, which made vinyl records sound different from radio broadcasts. To help even out the mix and “glue” it together, engineers started adding gentle compression to the mix bus. These days, almost every mix has a few dB of compression added by default.
Using compression on the mix bus before any other processing lets you make sonic decisions early on, so you don’t disrupt the balance of your mix later. Compression helps “glue” the elements of your mix together, making them sound like one cohesive unit.
For example, think about compressing a waveform with just a single sound—it’s straightforward. But if you compress a waveform made up of several sounds combined, those sounds will affect each other. That’s the main difference and what gives mix bus compression its character.
Now that things are a bit clearer about what mix bus compression is, let’s look at the pros and cons of this process:
Pros:
- Using a mix bus compressor will help glue your mix together, making your song sound more cohesive.
- It allows you to smooth out any inconsistencies that may have slipped through during the mixing process.
- You’ll also add a touch of character or color to your mix from the compressor itself.
Cons:
- It’s easy to overcompress and end up ruining your mix.
- Choosing the wrong attack and release settings can also destroy your dynamic range.
- Applying too much gain reduction is just as damaging.
So, keep these points in mind before diving into any mix bus compressor and flattening your mix. Feel free to experiment on individual tracks, but when it comes to the overall mix bus chain, you need to tread carefully and avoid killing the vibe of your song.
If you’re reading this, you probably already know mistakes can happen and are looking for guidance. We believe that’s the case, so let’s dive into some practical tips that will help you use your mix bus compressor effectively—improving your mix without causing any harm.
How Much Gain Reduction is Enough?
When we talk about a compressed signal, the first thing that comes to mind is checking how much gain reduction is being applied before setting the other parameters. For example, when adding a compressor to a mix bus or master bus, it’s common to aim for about 1 to 3 dB of gain reduction.
What does this mean? It means we’re not slamming the compressor’s threshold down and crushing the dynamics. Instead, we’re just taming any sudden peaks and, most importantly, helping to “glue” all the tracks in the mix together.
Another important tip is to always listen to the mix before and after you add compression. Make sure to use “make-up gain” so that changes in volume don’t trick you into thinking your mix sounds better or worse than it actually is.
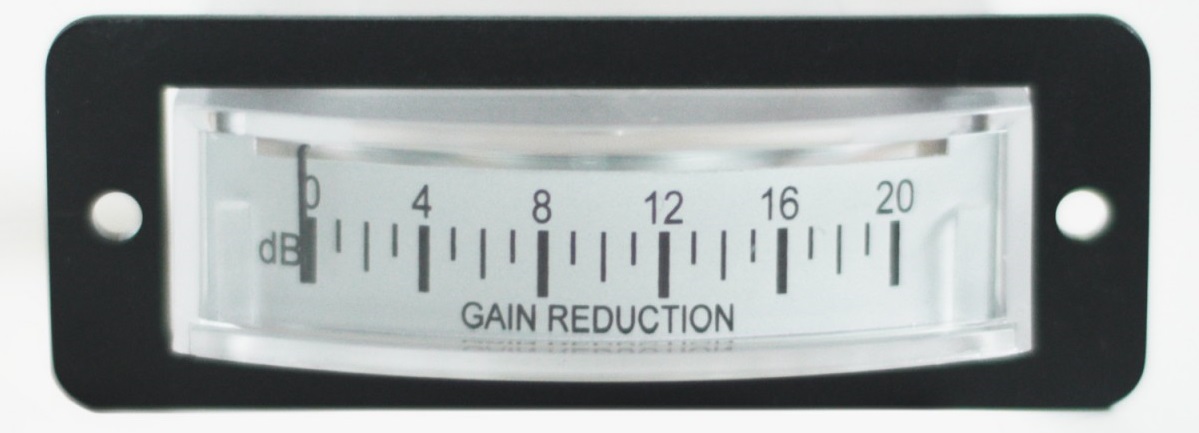
Always keep an eye on the gain reduction meter to see how much compression you’re applying. This meter will tell you if you’ve set things up well, so always compare before and after, using the gain reduction meter, to judge the results of your mix bus compression.

Setting the Ratio, Attack, and Release Time
Attack
When setting the attack time on a mix bus, starting with a medium to slow attack is usually a good idea. To understand what counts as a “medium” attack time, engineers should remember two key numbers: 8 and 25. Attack times between 8 and 25 milliseconds are considered medium.
Anything above 25 milliseconds is considered a slow attack, while anything below 8 milliseconds is a fast attack. Some people use 10 milliseconds and 30 milliseconds as easier numbers to remember, but to keep things simple, try starting around 20 milliseconds and use your ears to guide you.
With slower attack times, more of the initial transients will pass through the compressor. If you want to keep those transients, leave the attack time slow. However, if something is sticking out too much in the mix, you might try a faster attack instead—though it’s usually better to go back into the mix and fix the issue at the source.
If your track starts sounding worse as you adjust these parameters, attack and release times are probably the cause. If you’re only getting 1 or 2dB of gain reduction with a low ratio and things still don’t sound right, experiment with the attack and release times until you find the best result.

Release
Setting a medium release time is a great starting point when adjusting the release on your mix bus compressor. Generally, a release time between 100 and 300 milliseconds works well. Aim for somewhere around 200 milliseconds, but let your ears be the judge. Staying within this range helps avoid the risk of harming your mix.
Since we’re working with the entire mix rather than individual, predictable instruments, it’s helpful to take advantage of computer assistance and look-ahead algorithms. Some compressors offer an auto-release feature that decides how long to “hold on” to the compression before letting go and returning the signal to full volume.
With all your tracks summed to the mix bus, there won’t be consistent dynamics to guide your release setting. The dynamics will be much more variable. Using auto-release can help you maintain a sense of “musicality,” as the compressor adapts to the changing material for you.
In summary, either set your release time manually around 150 milliseconds or engage the auto-release feature on your compressor. Most importantly, trust both your ears and your eyes—the gain reduction meter will show you how long the compression is being applied before returning to normal.

Ratio
In our opinion, this is the easiest parameter to set. Even without specific guidance, you probably already know that light compression is needed on the mix bus. For gentle mix compression, you should use low ratios.
To stay in the safe zone, set your ratios between 1.5:1 and 2:1. A lower ratio means you just want a subtle touch of compression, while a higher ratio means you want the compression to be a bit more noticeable and give the whole mix a slightly stronger sense of compression.
Honestly, there isn’t much more to say about this parameter. It’s pretty straightforward, and lower ratios are the standard starting and ending points for mix bus compression.

Mix Bus Compression Tips, Tricks, and Guides
1. Should You Mix Into The Compressor?
If you’re aware of the compression you’re adding to the mix bus, then go ahead. But if you often forget that you’re already controlling some peaks with a mix bus compressor, it’s better to add it at the end of your process.
Our preference? We add the compressor at the end, and mix into a clean mix bus channel with only a meter plugin on it. We’ve made that mistake in the past and want to avoid repeating it, so we keep the mix bus clean and free of processing during the mixing stage.
2. Go Back In The Mix
As we mentioned earlier, if you notice a dynamic “error” in the mix before adding bus compression, we recommend going back and fixing that issue on the track itself.
Identify where the problem is coming from and revisit the compression settings on that specific signal. It could be a single track or a group bus, but regardless, it’s best practice to address it in the mix rather than leaving it for later. Ignoring it now can cause various problems down the line.
3. Choose The Right Compressor
When it comes time to choose a compressor for the mix bus, it’s always best to pick one that gives you full control over all the key parameters—especially attack and release times. Unlike compressors such as the LA2A, which have these settings internally fixed, having adjustable controls is important.
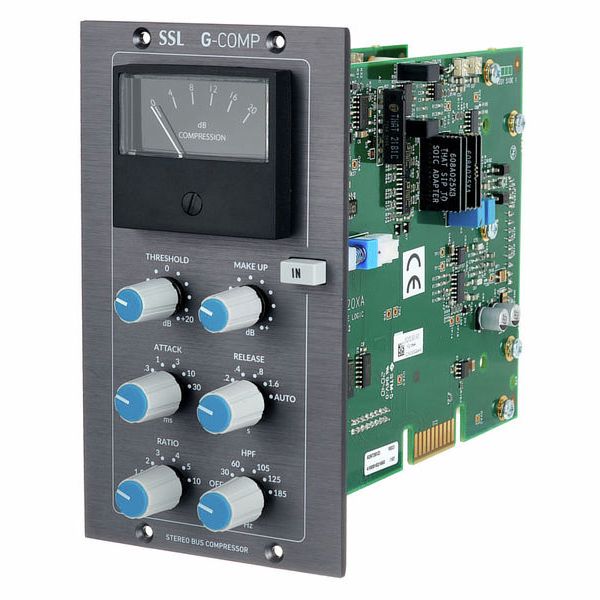
Different compressors respond in their own unique ways, so we want to make sure we have complete control. That’s why we most often use the API 2500 and SSL G Bus Compressor on the mix bus. These plugins provide everything we need, and we’re always pleased with how they sound.
We also believe that many mix engineers rely on these compressors, as they are widely considered studio standards for this purpose. Whether you’re using hardware units or software versions, both are excellent choices.

4. Multiband Compressors
This is another type of compressor that you’ll often find on the mix bus. Using a stereo compressor in multiband mode gives us more flexibility because we can target specific frequency ranges and make more precise adjustments.
That doesn’t mean you should go heavy-handed—keep your settings light, just apply them separately to each band, tweaking only what’s needed in each range. Maybe your low end is a bit too much? Add a touch more compression there. Or maybe your kick drum snaps are already well-timed—try a slower attack time in the 1 to 2 kHz range.
See what we did there? Even if the mix is basically done, these little finishing touches can make it perfect. Multiband mix bus compression lets you address separate areas, giving you the chance to fix minor issues that might have slipped through during mixing.
5. Add Harmonic Distortion
Some compressors can add what’s called harmonic distortion. This means they add color to your signal, making it sound rounder and giving it a unique character that’s recognizable for that specific compressor. When you listen to the compressed and uncompressed signals side by side, you’ll notice these differences.
Depending on the style of music you’re working on, you can choose a compressor that adds this kind of saturation or soft distortion to enhance the overall sound. For vintage-sounding genres, try using analog-modeled compressors or those known for their colorful character. On the other hand, if you’re producing modern music, a modern compressor will give your song a more contemporary feel.
Conclusion
If you now feel confident, go ahead and apply mix bus compression without any worries. We’ve provided some basic starting points, a selection of mix bus compressors, and general tips to guide you. We truly believe we’ve covered everything to help you understand what this process means for your production and the mixing stage of your song.
If you think we missed something about this topic, please let us know in the comments below. We’d be happy to explain further and update our article to give our readers the most complete information. Until then, happy mixing—and remember to compress with care!


