Tips to Improve Mix Translation
Introduction
Many engineers work hard to produce music to the best of their abilities. Even when they give 100% to their mix, sometimes the results aren’t satisfying when the tracks are played on different sound systems.
Since most listeners enjoy music on affordable earphones, laptops, or phone speakers, it’s important to make sure your music sounds good across all these devices. You also want your songs to sound great on the most common speakers, without losing quality when played on different systems.
In this article, we’ll share some tips on how you can improve your mix so it translates well to a variety of speakers, helping you achieve the best possible quality for your music.
1. Less is More
The art of achieving good translation in music starts right from the earliest stages of production—it’s not just something you can fix with a few tricks at mixdown. If you want your mixes to sound clear on a variety of systems, you need to think carefully about the elements you’re adding to your project from the very beginning.
Less really is more in this case. A track with a hundred different instruments might sound impressive on your studio monitors in a controlled environment, but if you don’t handle it properly, it can end up sounding cluttered when played on regular systems.
It’s worth taking a thoughtful approach when laying down parts for a new track. This isn’t always easy when you’re in the middle of a creative flow, but at the very least, take a break after recording your initial instruments. When you come back to the song, be ruthless about deciding what stays and what goes.
Once you’ve settled on the final elements that will make up the track, shape them carefully so that each one has its own space and doesn’t clash with the others.
If you do this with every project, you’ll have already solved half the problem before you even reach the final mixing and mastering stage. It’s common sense, but uncluttered mixes are much more likely to sound good on a variety of systems than mixes overloaded with conflicting parts.
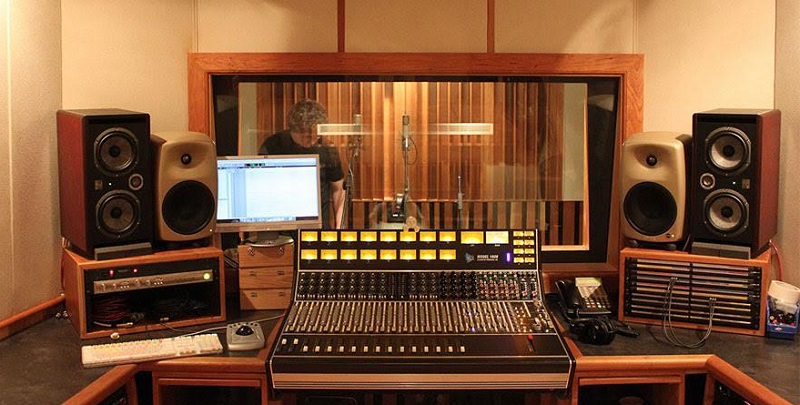
2. Improve Room Acoustics
Even though this may seem obvious, it’s worth repeating: room acoustics are absolutely crucial for achieving the final quality of your song. As we’ve mentioned in one of our books and learned from years of experience, the environment you mix in makes a huge difference.
If you’re mixing in a space that isn’t properly treated, you’ll definitely run into problems with how your mix translates to other systems. For example, if your room naturally boosts the bass, you might end up lowering the bass in your mix to compensate for what you’re hearing. As a result, your song could end up lacking bass everywhere else, since the room was adding extra low end during mixing.
That’s why it’s so important to treat your room and aim for the flattest frequency response possible at your listening position. If you can’t make your space fully acoustically perfect, at least try to treat the most critical parts of your room. This will make a big difference in how your mixes sound and will greatly improve your final results.

3. Improve Monitoring
We’re going to break this topic down since there are several key points you need to address to get the best possible sound from your mixes. Let’s take a closer look.
- Get Reference Monitors – This is a crucial step. While not everyone can afford high-end brands like Barefoot, aim to get the best monitor speakers you can within your budget. Do some research to find monitors that suit your genre and room size. Don’t expect great results if you stick with basic Logitech PC speakers.
- Learn Your Monitors – Even if you only have a $150 set of monitors, you’ll need to get to know them well to achieve the best sound. Check their frequency response charts, listen to music in your genre through them, and analyze what you hear. The more familiar you are with your monitors, the better your mixes will become.
- Get Avantone MixCubes Style Speakers – If your budget allows, consider getting a MixCube speaker. Even owning just one can give you valuable insight into your mix. These are excellent for simulating lower-quality speakers and for checking your mix in mono. If you want more details, you can read about them here!
- Monitor Positioning – It’s very important to place your monitors correctly on your desk or stands. Look up the best monitor positioning for your specific speakers and room size online to ensure you’re getting the most accurate sound.
4. Work on Optimal Loudness
If you regularly listen to loud sounds, pay attention to how your ears react in that environment. Do they feel like they’re compressing? When exposed to excessive volumes, your ears actually start to compress the sound to protect your hearing.
In these situations, your eardrums can become stiff, which leads to a less-than-ideal listening experience after being overstimulated by loud noise. You may struggle to hear dynamics clearly, and you risk overstimulating your ears to the point of damage. If you listen at high volumes too often, you might develop tinnitus—a high-pitched ringing in your ears. If the ringing doesn’t go away, your hearing may already be seriously compromised.
A modest volume, in this context, means just a bit louder than normal conversation but much lower than club (or pain threshold) levels. This typically ranges from about 75 to 90 dB SPL, but in most small rooms, it usually stays around 80 dB SPL. This level lets you hear performance dynamics and blocks out low-level background noise, while still being safe enough to protect your ears and enjoy listening.
5. Make Frequency Balanced Mix
Now that we’ve covered all the basics you need to set up before starting your mixing session, let’s talk about something important when you actually begin: getting a good balance of frequencies in your mix.
Focusing on balancing the frequencies ensures that no part of the spectrum stands out too much or gets lost. By doing this, you make sure your song translates all the frequencies clearly and evenly.
However, you still need to find the right balance between a flat frequency response and the specific curve you want for your song or genre. Frequency balance isn’t just about making everything sound perfectly even—it’s also about highlighting certain areas while still achieving a great overall result. In short, it’s finding the sweet spot between a flat curve and the character that fits your style or genre.
6. Know Your Genre
At this point, let’s assume you already know your genre inside and out. You’ve listened to countless songs within your style, analyzing how they sound, how they’re structured, and what elements make them work.
A key part of this process is listening to tracks from your genre on different sound systems, carefully noting how certain songs translate. This step is incredibly important, yet it often gets overlooked. Once you’re familiar with how your genre sounds across various setups, you’ll be able to match the quality and mix of the hit records you admire.
One more tip: don’t follow your genre’s “rules” too strictly. Just because something worked for one engineer doesn’t mean it will work for you. Feel free to experiment and find what brings out the best in your song.
7. Check on Various Systems
This might seem obvious, but it’s worth repeating in this article. Earlier, we mentioned that you should check hit songs in your genre on different systems—this is also the stage where you need to check how your own songs sound on those same systems.
Compare your track directly with others in your genre. Play them side by side or try mixing your song with theirs. You’ll quickly notice if something doesn’t sound right or isn’t quite there yet. When you spot issues, make a list of everything you need to adjust, then go back to your mix and fix those points.
Test your mix on old stereo systems, in your car, on your laptop, and through mobile speakers. You should also listen to your song on open-back mixing headphones, and then again on earbuds or a regular consumer headset. Trying your mix on all these different systems will give you plenty of feedback to help you improve it. The ultimate goal is to make your song sound great on as many systems as possible.

8. Use Reference Track
Let’s get back into your studio. Imagine you’ve already fine-tuned your song after analyzing your genre and testing it on different systems. Now it’s time to compare your track directly with a hit song from the same genre.
By comparing your song to a commercially successful track, you can match certain elements and make your mix as strong as the reference—especially in terms of balance and technique. This isn’t about copying every detail, but about using proven techniques to make your song translate better. If you have a reference track that already sounds great everywhere, use it as a guideline for your own song.
Spend an afternoon searching for the best reference songs in your genre. Don’t compare your mix to a mediocre song; choose the highest quality tracks and save them on your computer. Whenever you need, pull them up in your DAW to compare and borrow the best ideas for your own mix. Many professionals use this method, so why not you?
9. Professional and Client Feedback
One of the final steps you can take is to reach out to your professional mixer friends and get their feedback on your mix. Instead of inviting them to your studio, simply send them the song and let them listen to it on their own systems. Ask for their professional opinion, and if they point out any areas that need improvement, consider making adjustments based on their suggestions.
After that, check in with your client (if you’re working for someone else and not just yourself). They’ll likely have some preferences or guidelines for how they want the song to sound. It’s important to keep your client happy—plus, they may offer valuable feedback that can help you make the song even better.
Feedback is always helpful when it’s given constructively. Don’t pay too much attention to engineers with big egos who give advice just to show off how much they know. Ultimately, trust your own instincts and make sure you’re confident before deciding if this is your final mix.
Take your friends’ advice seriously only if you notice there are translation issues on their end. That should be your main concern when asking for their opinions, and always double-check any points they raise.
Conclusion
Mix translation can always be a pain, but once you get the hang of it, things will go much smoother. In this article, we’ve shared some tips to help you improve your mix translation. We believe that if you follow these suggestions, your mixes will start to translate better than before—especially if you’ve been struggling with this issue.
If you have any other questions or suggestions about this topic, we’d love to hear from you! If you have a good idea, we might even add it to the article. Just head down to the comment section and share your thoughts about better mix translation, and we can keep the conversation going from there!