Mid/Side Mixing
Introduction
Today, music mixing is louder, wider, and clearer than ever before. Advances in music production software have greatly improved the overall quality of music. These improvements have led to new techniques that take full advantage of powerful, modern software. One important approach that has made a big impact on the quality of mixes is mid/side processing.
Many producers have now heard of mid/side processing, or have even used certain mid/side processors and techniques to enhance their mixes. However, this method is still often underused. Whether you aren’t sure how mid/side processing works, or you’re looking for new ways to improve your mixes with this technique, there’s a lot to discover.
What is Mid/Side Mixing?
When we sit down to create a new track, we want to make sure we’re getting the cleanest and most professional sound possible. On our journey, we’ve discovered some strategies that can really help achieve an outstanding mix. We haven’t shared these tips before, but now we want to finally reveal how we truly take control of EQ and panning for our sounds.
Most people understand the basic idea of panning a signal left and right, but many may not have heard of mid/side mixing. In this article, we’ll explain the basics of mid/side mixing, and show you how you can use it in any DAW.
Definition of Mid/Side Mixing
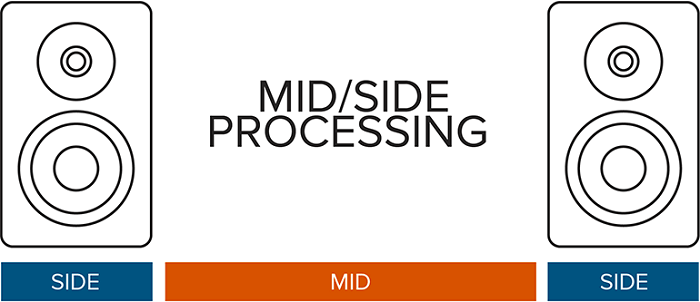
Mid/Side processing works by splitting a stereo signal into two parts. The ‘Mid’ channel contains only the information that’s present in both the left and right channels—in other words, the mono signal.
The “Side” channel includes everything that’s different between the left and right channels. This means it captures the sounds that are only on the sides and not in the middle. Once the signal is encoded into M/S, these two channels can be processed completely independently. After processing, they’re combined, and you can use standard left and right panning.
Think of it this way: you can shape your stereo image separately from the center. This gives you a lot of new ways to control your sound.
1. Lead Vocal M/S Trick
Lead vocals should always be front and center in a song. Keeping the lead vocals centered helps them sit better in the mix, gives them extra clarity, and keeps their punch.
Instead of just turning up the vocal track, try making space for the vocals within the mix. For example, use mid/side processing to remove mid-range frequencies from instruments that compete with the vocals.
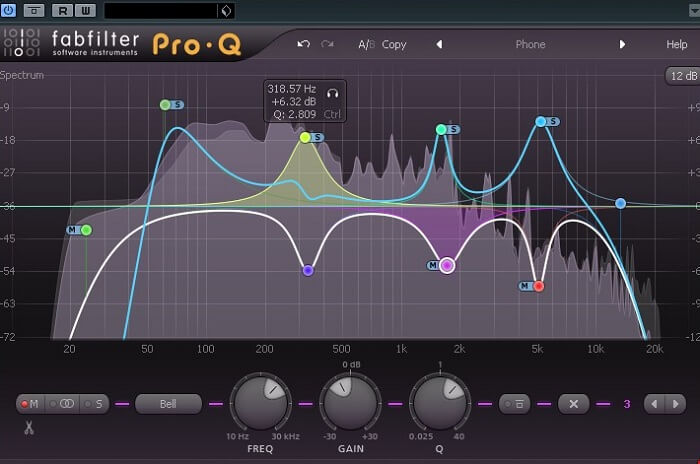
First, find the frequency range where the vocal has the most energy. To do this, boost a bell filter on an EQ and sweep it across the frequency spectrum. Listen for the dominant frequencies that give the vocal its strength. Write down this frequency range, then turn off the EQ.
Next, group together all the instruments that share those conflicting frequencies.
Finally, use a mid/side EQ on the group to cut that frequency range from the mono channel. This technique creates a pocket for the vocals to sit nicely in the mix. Also, by reducing the mid frequencies, you keep the wider side frequencies intact, so they don’t clash with the vocals.
2. Improve your Bass
Are you using any stereo widening, either on your mix bus or on individual instruments? If so, you’ll find another great use for mid/side EQ.
Stereo expansion tools can sound fantastic, but you have to be careful with them. One reason is to avoid phase cancellation. But it’s also important to make sure you don’t widen the bass frequencies too much.
When low frequencies are spread across the stereo field, they can easily overpower your mix. For example, if you add a stereo widener to your mix bus and love how it sounds, you might suddenly notice the bass feels too big.
Now, the bass is taking up a much wider part of the stereo image than you want. This is where mid/side EQ can really help. By adding a high-pass filter to the sides, you can control those low frequencies.
By cutting the lows on the sides, you reduce muddiness and keep the bass centered. Most subwoofers are mono, and our ears aren’t very good at detecting the direction of low sounds anyway. So, there’s little risk of harming your mix by doing this.
3. Start with simple level changes
Before you dive into advanced M/S processing techniques—and there are plenty to choose from—start with the most basic approach: adjusting the relative levels of the mid and side channels. This simple move can bring more focus and stability to the center of your mix, while adding excitement to the sides.
Boosting the side channel by just 1 or 2 dB can do wonders in certain situations, making the track sound wider and more open. It also helps cymbals, guitars, and other instruments panned to the left or right come alive a bit more. Even the vocals tend to sit better in the mix.
On the other hand, lowering the sides slightly (or boosting the mid channel a bit) will make the whole track sound more mono. This is especially effective for low frequencies, which usually sit in the center, and helps bring the lead vocal or center elements forward in the mix.
4. Mid/Side Reverbs
Reverb is a key element in music production, adding depth and space to your mixes. Since reverb helps create a sense of space, your mixes can really benefit from a bit of mid/side processing to maintain the clarity and width found in modern tracks. By splitting your mid and side signals into two separate channels, you gain much more control over your reverb and can process each channel individually.
To do this, create a return or send channel. Mute the side signal on one channel and mute the mid on the other. Because we want a wider and clearer reverb, we’ll process each channel differently. On the side channel, add an EQ and boost the high frequencies.
This will make the reverb sound wider, as unique frequency content stands out more in the stereo field. After you apply the EQ, add some OTT (over-the-top) compression.
OTT is a multiband compressor that uses both upward and downward compression to bring out the finer details in your sound, giving it a gritty and saturated character. Applying a small amount of OTT to your reverb helps reveal the full reverb sound and increases the side signal, creating greater separation from the mid signal and resulting in an even wider sound!
5. M/S Stereo for Fuller Sound
Use mid/side equalization to create a wider stereo image on a full mix or on individual elements. You can achieve stereo width by adjusting the balance between the mid (center) and side (stereo) signals. For example, you can widen a sound by boosting the high frequencies in the side channel or by cutting low frequencies in the mid channel.
Widening the stereo image will make your mix sound fuller and more enjoyable for the listener. Stereo widening is also helpful for sound design. For instance, when layering synths, you can create a broader, richer sound.
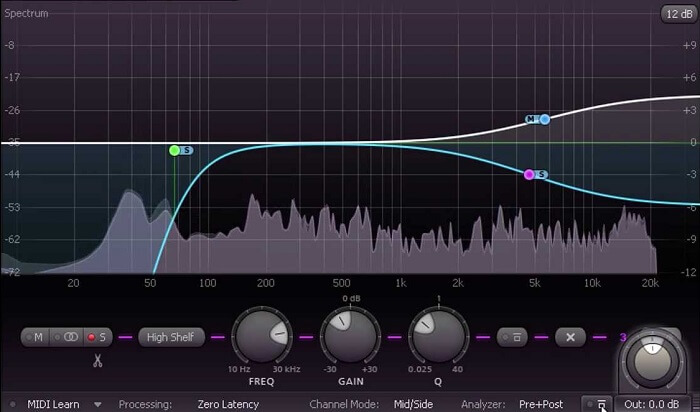
In the example above, a synth track is widened by reducing the volume of the mono (mid) signal and boosting the stereo (side) signal with a high-shelf filter at 8,000 Hz. This approach makes space to layer a mono-focused synth while also adding width. When combined, both layers sound more cohesive, present, and immersive.
This mixing technique can sometimes work better than using stereo width plugins. For example, stereo imaging plugins can affect the phase of a sound and cause it to lose punch. In contrast, mid/side processing keeps the integrity of the center channel while widening only the sides.

6. Use M/S for compression
Get things moving in your effects return by applying a compressor to the mid-channel only, using a fast attack time to tame the transients. This technique can significantly reduce the chance of unwanted artifacts in your reverb and room ambience, which are usually panned to the edges of a mix.
If you compress both the mid and side channels on a reverb buss, try compressing the mid-channel more than the sides. This can create the effect of making the reverb sound wider.
On your mix buss, try compressing the sides channel to bring out the softer, more textural elements. This can help highlight the ambiance without squashing the backbeat—much like compressing the room mics on a drum kit.
When working with the sides channel, aim for just a dB or two of gain reduction, and use fairly slow attack and release times. This allows the transients (like cymbals and hi-hats) to come through naturally; otherwise, things can start to sound unnatural.
7. Improved Side Chain
By now, we all know what sidechaining is. But when you step into the mid/side realm of mixing, you can create even more dynamic interest and spaciousness. This type of sidechaining adds another layer of pumping, but this time, we’re only going to apply it to the side channel of our wider-sounding instruments.
This creates a three-dimensional pumping effect that gives the illusion of a more expansive stereo field. To achieve this, group your wider stereo instruments and add a mid/side processor to the group to separate the channels. Then, place a compressor only on the side channel and set it to trigger from the kick and snare.
8. Mastering with Mid/Side Processing
If your mix sounds muddy, try reducing the low frequencies in the side channel using a low-shelf filter. This can be especially useful for cleaning up hard-panned guitars, allowing you to remove unwanted muddiness without affecting the vocal and kick drum that sit in the center of the mix.
If your mastering compressor is having trouble reducing the dynamic range without making the mix sound narrow or squashed, consider using a mid/side compressor. Apply less compression to the side channel than to the mid channel. This way, the compressor won’t squash the wider, more ambient, and spatial elements of the mix when the central elements—like the kick, snare, and bass—trigger heavy compression.
A dry acoustic mix can be warmed up with mid/side reverb. Add reverb to the mid channel, but filter out some of the low end from the wet, reverberant signal to avoid muddying the kick drum and bass. On the side channel, add 2–4% more reverb than you used on the mid channel, without filtering, to enhance the sense of space.
Conclusion
That wraps up another informative post! We’ve given a brief explanation of what mid/side mixing and processing are, along with some practical tips for trying out this method.
If you have other ways of using mid/side processing, feel free to share them in the comments and help out our community of readers! Until next time—have fun!