Layering Audio 101
If you’re aiming for richer, more professional-sounding tracks, you’ve probably come across the concept of layering sounds. The idea is simple: combine (or stack) two or more similar types of sounds together. This can create a result that’s stronger or more interesting than using just a single sound source.
The main reason for layering is to achieve a fuller, thicker sound. That’s why layering in music production is such a thoughtful and detailed process. Below, you’ll find some useful layering tips to help enhance your production process.
Introduction
Layering in music is as old as music itself. Think of choirs, where multiple singers join together in unison to create more depth and energy. This adds a more complex and intriguing sound for your listener.
However, blending several sound sources can easily turn into a mess, especially when they share similar qualities. Frequency clashes and overlapping can quickly muddy up your mix, particularly in the midrange.
Transients can compete with each other, leading to inconsistent energy. A lack of precision can also cause phase cancellation, weak effects, and an overall mix that sounds flat and amateurish.
Concept of Layering Sounds
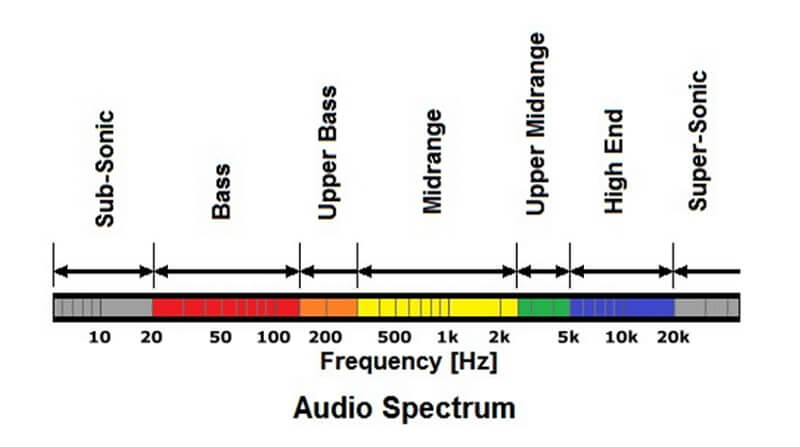
For centuries, arrangers and composers have considered the frequency makeup of the instruments they use. Each instrument has its own frequency range, determined by its size and shape. Composers take advantage of these natural limitations. For example, when writing music for a string quartet, a composer instinctively knows the range of each instrument.
The bass can reach very low frequencies, while the violin can soar into the highest registers. Composers plan instrumental parts so that different sections of the orchestra complement each other, allowing for balance in both the higher and lower parts of the music.
Often, for instance, they use dramatic glissandos that start in the lower range and climb to the highest notes. By understanding each instrument’s range, composers can blend and layer sounds to achieve a richer, more dynamic result.
You can apply this same idea to electronic music. Controlling the frequency balance in your mix is a great way to give your tracks a professional sound.
Carefully select instruments or sounds with frequency ranges that don’t clash. This keeps your music interesting and clear. Avoid using the same instrument across the entire frequency spectrum, especially if your arrangement is busy. Improper layering can actually muddy your mix instead of enhancing it.
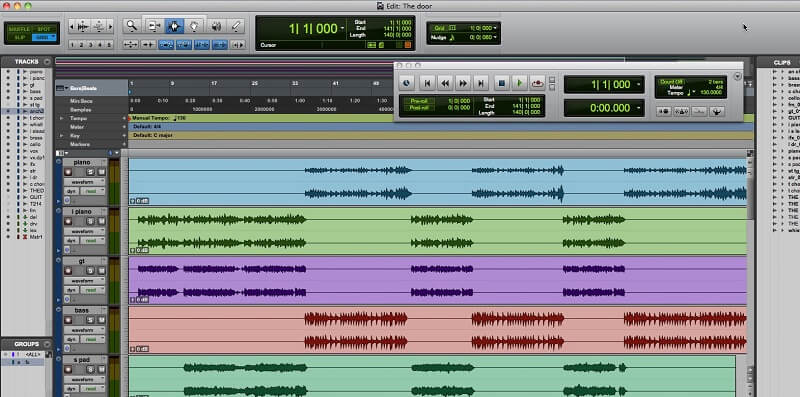
Layer with Loops
Start with a simple 4-bar loop. Then, duplicate this exact loop, but add some reverb or other effects to suit your taste. Keep the original loop present to anchor your sound, and layer it with your processed version to give your loop more character.
Experiment with how you process each duplicate and find the best spot for each layer in your mix. However, be careful not to overdo it. Layer your loops thoughtfully and intentionally. Always listen to your full mix to make sure everything fits together well.
Start with your Present Percussive or Melodic track
Create a new track and copy over the combined information from your first track to this new one. Keep the same sound, but try moving the melody up or down an octave on the new track.
Next, use this new track to audition different sounds and see which ones best match your creative vision for the song as a whole. It’s often helpful to experiment by layering this track with sounds that are sonically different from your original audio.
Frequency Layering
The concept of layering sounds can be described simply as copying and pasting parts from your mix into different sounds and multiple music tracks.
Once you master this technique, you’ll start to identify the exact elements you want to highlight and learn how to achieve your desired effect by adjusting each layer.
When done correctly, this method can add extra dimensions and a richer sound to your tracks. Any musician who explores music concepts learns the limitations of each instrument and how challenging it can be to create a track with different instruments.
Bringing together different instruments for smooth transitions is accomplished through sound layering and careful adjustment of frequencies.
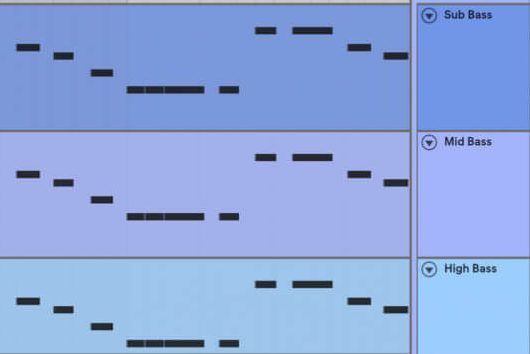
Bass Sound Layering
While EDM is typically played on massive club and festival sound systems, a lot of listeners actually hear it on laptop speakers and headphones. These smaller systems can’t reproduce deep sub-frequencies, so adding an extra layer to your sub-bass can help make it more audible.
Here’s one method you can try:
- Duplicate your sub-bass track.
- Raise the pitch of the sub-bass notes by one octave.
- Apply a low-cut filter to this sub layer around 120 Hz.
- Add some saturation or distortion.
- Use a stereo spreader.
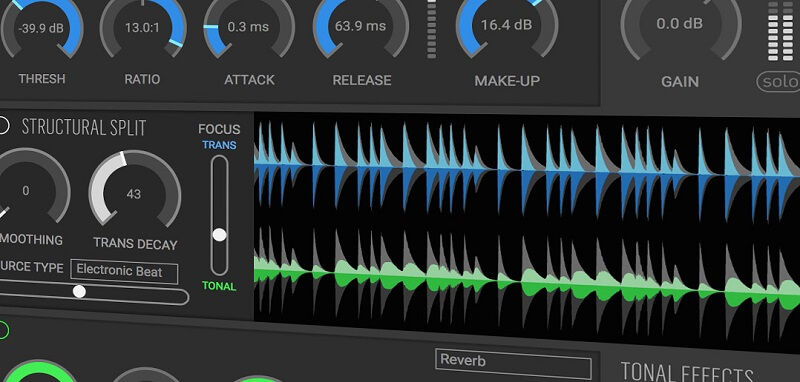
Drum Sound Layering
Once your drum layers are properly aligned, you can use audio effects and processors to further unify the group of samples into a single drum hit. By applying processing after layering the samples, each sound will be affected by the same settings, giving the drum hit a consistent overall character.
In theory, you can use any effect to achieve this cohesiveness. However, if you want to preserve the original qualities of each layer, there are certain effects that work especially well for blending layers together. For example, kick drum layering is often used to enhance the low end of your drums. This technique is great for adding depth if your kick drum is lacking in bass.
Compression is probably the most straightforward way to bring everything together. Bus compression—where you apply compression to a group of sounds in the mix—is a common method for making elements sit well together.
Specifically, drum bus compression is a popular way to make a drum kit sound more unified, and you can use the same approach to make your layered sounds blend more smoothly.
Layering for Sound Design
If you work with a lot of samples, creating a brand-new sound is simple—just copy and paste the MIDI notes from one track into a new patch.
Film score producers love this technique because it lets them quickly add extra texture and color to a track. You can also easily transpose notes down an octave for a fuller sound, or double the notes with a different sample for even more variety.
One of the best things about using a digital audio workstation (DAW) is that you can have virtually unlimited tracks. This means you can layer as much as you want and try out endless combinations to achieve exactly the sound you’re looking for.
And if you don’t like a layer you’ve added, you can always delete it and keep your original track safe. This makes it easy to experiment and discover new sounds by combining elements from existing ones, adding richness and depth to your mix and master.
While you’ll need to process each individual layer, working with groups of layers can help blend them together and make them sound like a single, cohesive instrument. Try sending the layers to a bus and adding gentle compression, or use effects like reverb or delay to bring the sounds to life.
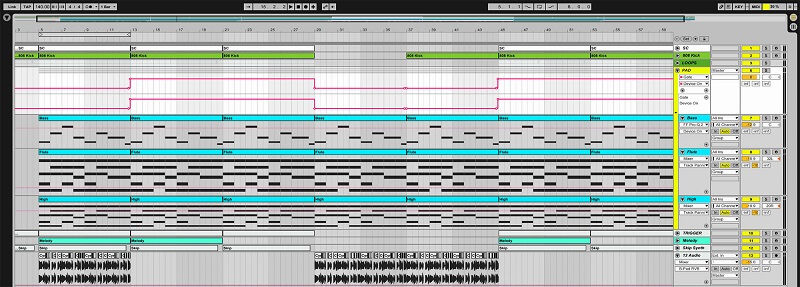
Layered Synths for a Presence
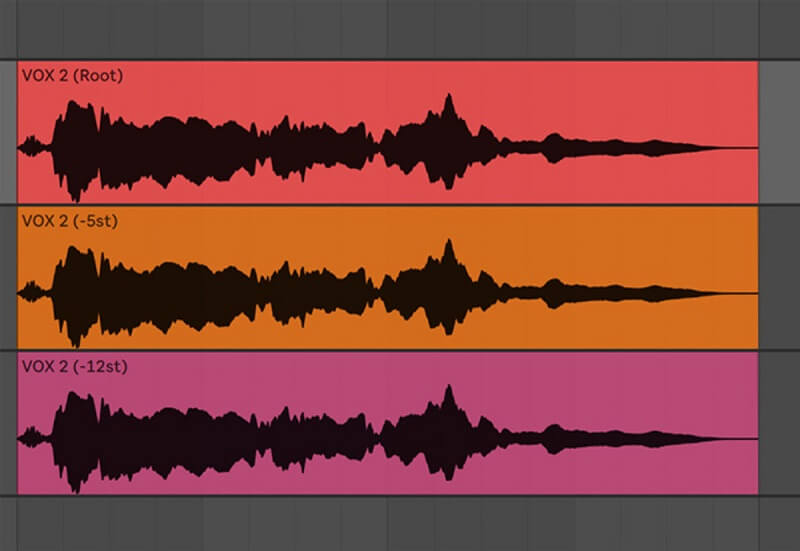
Layering synths is a great way to create a full, shimmering lead with a solid low end. Start by recording a simple mid-low bass line that you like, using your favorite synth VST plugins. Make two copies of your original line.
Pitch the first copy down to cover the lower notes, letting it act as your sub. The second copy should provide the sparkle—try pitching it up or adjusting the settings to give you that high-end shine that cuts through the mix.
The result is a lead synth with bright highs and a strong mid-low foundation that fills out your track. The exact settings you use for each layer are up to you.
Be sure to use some subtractive EQ to avoid a muddy mix. Layering synths well takes experimentation and careful listening. Use this sound-layering approach as a starting point, but tweak it to fit your needs and the overall mix.

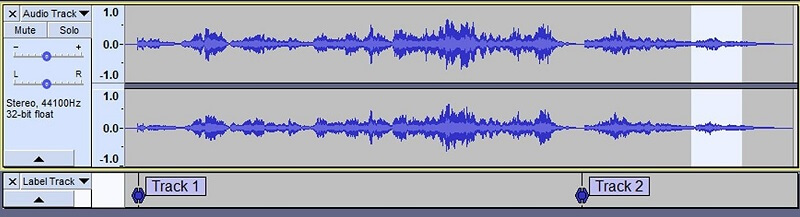
Lead Vocals Layering
It’s important to take the time to develop your sound, especially when it comes to how you deliver your verses. A single lead vocal should be intimate, and choosing the right moments to breathe will help maintain that sense of closeness for the listener.
If you decide to double the lead vocal, timing becomes crucial. If your timing is off compared to the original lead, the result can be unpleasant. Loosely layered vocals can make you lose the intimacy you’re trying to create.
However, there’s another effect you should be aware of when layering these vocal parts. If your performances are too perfectly aligned, your vocals may start to sound “phasey,” which can almost cancel out the center image.
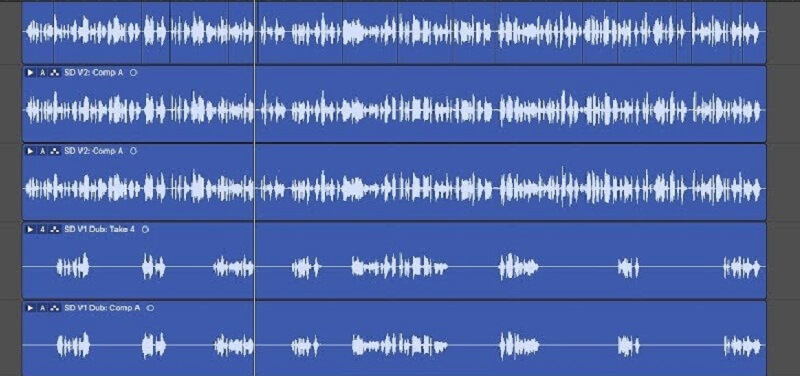
Ad-Lib Tracks – Single Tracks & Doubling
Your ad-lib or hype tracks are a great way to express yourself in a less formal way. Your tone should vary enough so these vocals really stand out.
Try layering your vocals with a whisper track. Tucked underneath your main vocal, the breathiness can sound really cool. Or, go the opposite direction with a screaming track. You can run this through amp simulators to add some real angst to your verses.
Think about how many ad-lib tracks you want. This is your chance to make them stand out in the stereo field. If you do two or more, try performing the same ad-libs on each take, or create a stutter effect by naturally offsetting your delivery between the tracks.
Now, you can pan these tracks left and right to make certain phrases really pop and add a dynamic build where you want extra emphasis.
Background Vocals/Chorus
The way your background vocals sound as a whole depends largely on the arrangement. Knowing how to pan these tracks will play a huge role in how full your recording sounds—even if you’re only using a single note for each part.
For example, let’s say you create a three-part harmony for the chorus, but you only record one take of each note. How will you pan them in the mix? Will the result feel unbalanced?
I’m not saying that recording just one track per note is wrong. All the parts of a well-arranged vocal need to be heard. But if you’re adding extra layers just to increase your track count, you’re going in the wrong direction. Less is often more.
However, when a chorus has the right number of vocal parts stacked for each harmony, and the layers are added thoughtfully, nothing sounds sweeter.
Conclusion
Layering sounds can be a lot of fun, but it can also be a bit tricky. There are plenty of sound design tutorials out there that can help you create some really amazing noises. It’s worth spending time learning audio design, especially for the specific VST you use in your music production. We’ve tried to share the most important layering tips here so you can get the most out of them.
The great thing about layering is that there’s really no right or wrong way to do it. You just experiment and play around until you come up with something awesome. Hopefully, this article will give you a few ideas on how you can use this technique to create bigger, more impressive sounds.