How To Use Autotune
Introduction
It happened exactly 36 seconds into the song—a glimpse of the kind of pop music that was on its way, a hint of the future we now live in. The line “I can’t break through” suddenly turned crystal clear, as if the singer had vanished behind frosted glass.
That sparkling special effect returned in the next verse, but this time a robotic warble trembled through, “So sa-a-a-ad that you’re leaving.”
The song, of course, was Cher’s “Believe,” a worldwide hit when it was released in October 1998. And what we were really “leaving” behind was the 20th century.
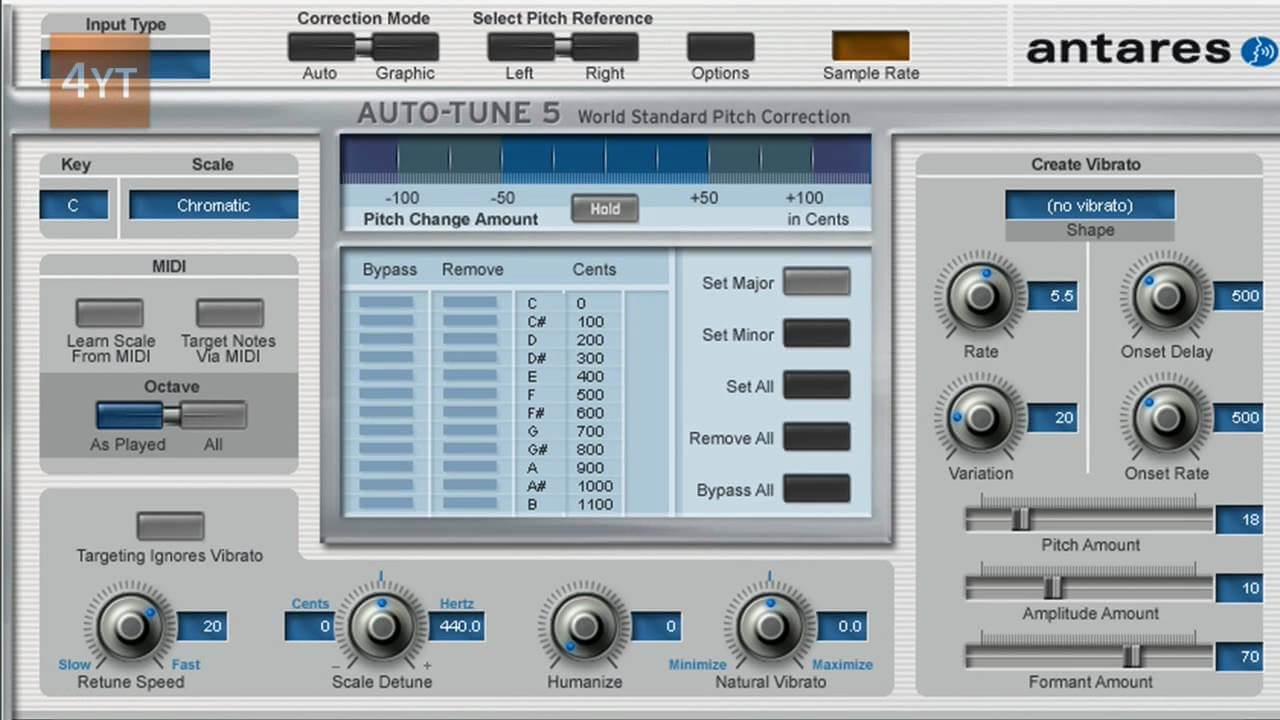
The pitch-correction technology known as Auto-Tune had been around for about a year before “Believe” topped the charts, but its earlier uses were subtle, just as its creators, Antares Audio Technologies, intended.
“Believe” was the first song where the effect was impossible to miss: The shimmering, fluttering quality in Cher’s voice at key moments called attention to its own technological magic—a mix of otherworldly perfection and angelic transcendence that fit perfectly with the mysterious spirituality of the chorus, “Do you believe in life after love?”
Auto-Tune adjusts and tweaks the pitch of a vocal track, and it’s now famous in popular hip-hop music. While it can create a robotic, high-pitched effect, it can also be used to make traditional singing voices sound perfectly in tune.
If you want to use Auto-Tune to change the sound of a song, you can do it pretty easily. Some audio editing programs, like GarageBand, have their own built-in Auto-Tune, while others require a plugin that you can buy and download online.
Three main points of how to use Autotune correctly
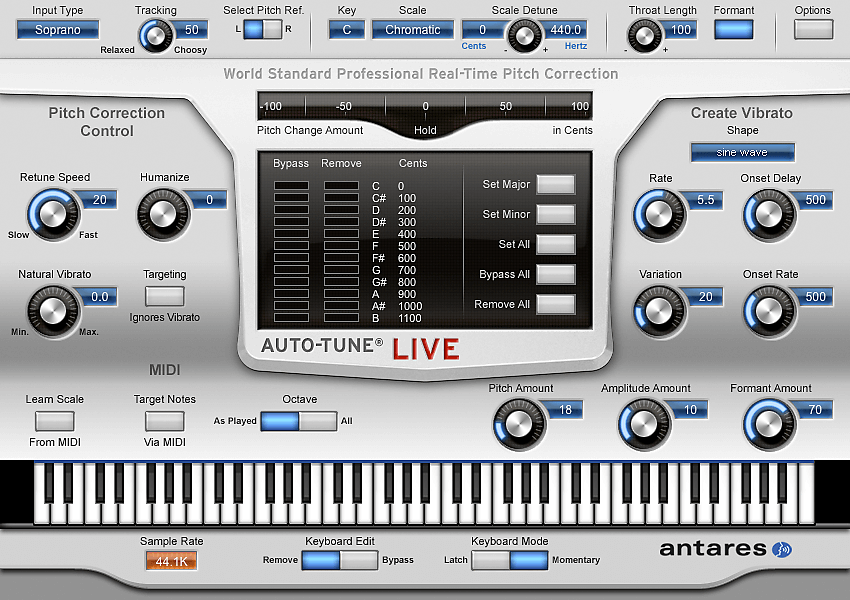
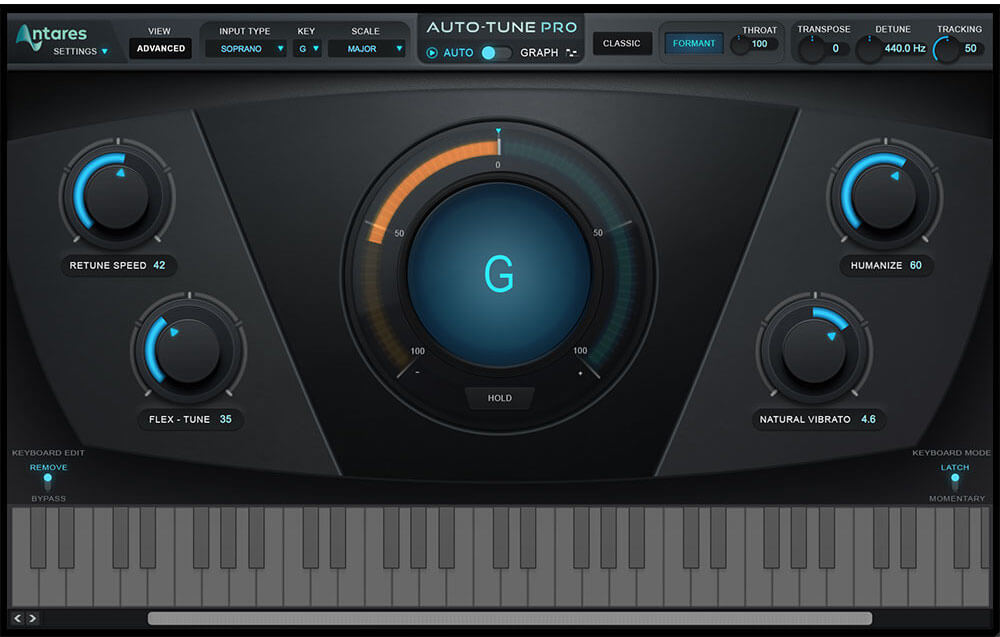
Whatever your goal, to make Auto-Tune sound its best, there are three key settings you need to get right:
The correct key of the song. This is the most important part of the process, and honestly, where most people make mistakes. Bedroom producers—and even some engineers in professional studios who might not be strong in music theory—often end up setting Auto-Tune to the wrong key. If your song is in C major, Auto-Tune won’t work properly if you set it to D major, E major, or any other key.
It will, however, work in A minor, which is C major’s relative minor. No other key will sound right. It really helps to learn a bit of music theory and understand how to find the key of a song.
The input type. You’ll have options like Bass Instrument, Instrument, Low Male, Alto/Tenor, and Soprano. Bass Instrument and Instrument are for instruments, so skip those if you want a vocal effect. Choose Low Male if the singer is in a very low range (think Barry White). Alto/Tenor covers most typical vocal ranges, and Soprano is for very high-pitched singers. Picking the right input type tells Auto-Tune which octaves to focus on, giving you more accurate results.
Retune speed. This knob is important, but it really depends on the pitch of the input. Generally, the higher the setting, the faster Auto-Tune will adjust each note. A slower speed makes the effect sound more relaxed, letting more natural vibrato through before correcting the pitch.
Some people think of this as the “amount of Auto-Tune,” but that’s not quite accurate. The amount of correction you hear depends on the original pitch, but the faster the retune speed, the more obvious the Auto-Tune effect will be.
Three Vocal Tuning Methods
Vocal Tuning Method #1 – Set and Forget (EDM Tracks)
“Nightmare” by Pyramind alum The Ghostwriterz features a female vocalist who sings in a delicate style about how she’s going to destroy her ex. The smooth vocals layered with underlying rage are intense—like the old saying goes, “hell hath no fury like a woman scorned.” Honestly, if she were my ex, I’d probably be having nightmares, too.
Her performance is strong and full of emotion, but it’s not perfect. Changing the singer or making her record a thousand takes for improvement isn’t always practical. So, the next best option is to “fix” the vocal.
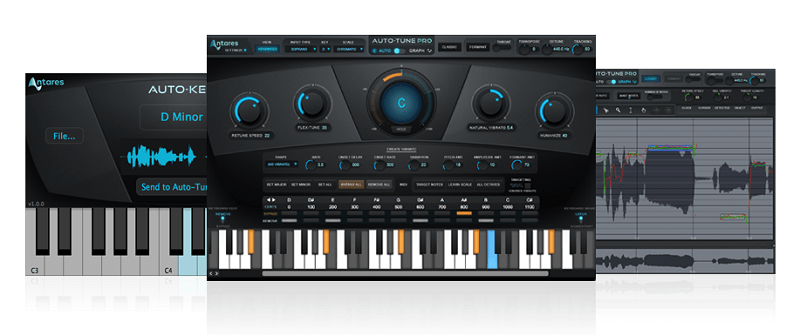
That’s where Auto-Tune Realtime Advanced comes in.
As the name suggests, this tool is made to work in real time—you can simply put it on any input channel of your audio interface console and tune vocals “to tape” as they’re recorded! But for our purposes, since the vocals are already recorded, we’ll just use it to fix them.
In its default view, there are only four knobs. It really doesn’t get much simpler than this. Two of these knobs will handle around 80% of the job, and you might not even touch the other two.
By default, the plugin assumes you have no knowledge of music theory, pitch, key, or anything like that. It expects that every note can (and should) be corrected, treating all notes as valid.
Vocal Tuning Method #2 – Time for Robots! (Trap|Dubstep Tracks)
“Bioshock” by Pyramind alum DJPJ (Booty Drop Records) features a male rapper dropping bombs throughout the verse.
Since there’s no actual “singing” here, it raises the question—why bother with Autotune? The answer: Robots. That’s why.
This got me thinking—what happens if you stack Autotune Realtime Advanced (ATRA) effects one after another to really mess with the pitch? Could you actually create robotic voices?
It was fun to try, but the effect didn’t quite give me what I wanted. Still, I can see the value in using it for stubborn notes that need more than one “wash” with Autotune Realtime Advanced. But it didn’t make a robot, so I kept experimenting.
Using the same pitch correction approach, I noticed the rapper’s pitch started on the note “E” and gradually shifted up to “G.” So I picked a note in the middle—“F”—and set the keyboard to only allow that note through.
Vocal Tuning Method #3 – Singing! (RnB/Pop)
Here are some starting points you can use, but keep in mind that you’ll need to adjust them to taste for each vocal track. What works best will change every time!
If you want an intentionally over-the-top effect like Cher or T-Pain, set the retune speed and flex tune speeds to zero. This will snap the notes instantly to the correct pitches. Set the humanize knob to maximum, and reduce natural vibrato as much as possible.
This will make the vocals sound almost like a synthesizer. For an even more dramatic effect, try singing slightly off-pitch when recording. You should be close, but not perfect, so that the plugin really works to re-pitch every note.
For the modern pop and country sound, try setting the retune speed between 5 ms and 15 ms, with very little flex tune. Just a touch helps the track still sound natural.
This setting should give you a pitch-perfect track that doesn’t “snap” too quickly to each note, so it still feels like a human performance.
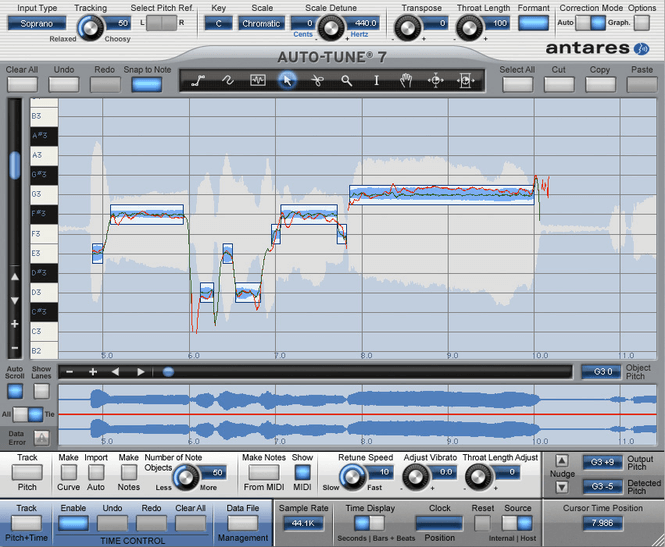
There are a number of tools to begin with right here and we’ll describe them briefly from left to right:
- The Line Tool lets you draw multi-segment lines on the pitch correction graph. It’s especially useful when you want to keep a pitch straight or smoothly bend from one pitch to another.
- The Curve Tool is what you’ll use if you want to freehand your pitch corrections. We personally find this tool a bit tricky to use.
- The Note Tool draws notes that are locked to specific pitches and can’t stray from them. We tend to use this one more often than the Line Tool.
- The Arrow Tool is by far the most commonly used. It’s what you’ll use to select and edit existing lines or notes.
- The Scissors Tool lets you split existing lines or notes into separate pieces for individual editing. We usually use this when notes or lines have been generated automatically and need to be separated.
- The Magnifying Glass is for zooming. Just click and drag a box around what you want to zoom into, then release to zoom in.
- The I-Beam Tool lets you select a section of time for editing or generating data within. This is also a commonly used tool.
- The Hand Tool lets you move the display around. Click and hold anywhere on the screen, then drag to the area you want to see. We find the scrolling function on Apple mice works well for this purpose too, so we don’t use this tool much.
This is why your Auto-Tune would not sound like the professional:
For Auto-Tune to work at its best, the singer’s pitch needs to be close to a note within the key and scale of the track even before any processing begins. In other words, the vocalist has to be at least near the correct note for the effect to sound pleasing to the ear.
Whether you want a natural pitch correction or the famous T-Pain robotic effect, this principle still holds true. If the singer’s original note is way off from the right one in the key, Auto-Tune will try to correct it by rounding up or down to the nearest note. This is when you get unwanted artifacts and unexpected notes you didn’t intend to hear.
If you apply Auto-Tune and notice that some parts sound good while others sound too robotic or just a bit off, those are the spots the singer needs to improve. It can be hard for non-singers to notice slightly sharp or flat notes, or those that aren’t in the track’s scale, so Auto-Tune can actually help highlight those problem areas.
This is why major artists who use Auto-Tune still sound great—because they can already sing well before any processing happens. The Weeknd is a great example: he’s obviously a talented singer who can hit the right notes, but his go-to mixer, Illangelo, has said that he always adds at least a bit of Auto-Tune to the vocals.
Conclusion on How to Use Pitch Correction Plugins
Hopefully, this gives you a solid starting point in the world of Auto-Tuning and helps demystify the process a bit. Honestly, Auto-Tune has rescued countless projects from disaster and has allowed hundreds of productions to keep those amazing performances that, in the past, might have needed to be recorded over and over—and over—until they were finally in key.
But has anyone stopped to think about the emotion left in a recording after an artist has sung the same part for the 150th time? Sure, it might finally be perfectly in tune, but does the singer’s emotion still match the original idea of the song and convince listeners it’s meant to be happy?
Let’s be real—Elvis probably left the building about 145 takes ago. The point is, if a take sounds and feels great but has a few pitch issues here and there, it’s often worth tuning instead of sucking the life out of a part just to make it technically perfect.
Whether you choose to use Auto-Tune for subtle pitch correction or go all-in for that robotic effect, it’s the right tool for both jobs. There are plenty of plugin options out there, and many of them will get the job done just fine.
At the end of the day, which plugin you use is up to your personal preference. What matters most is learning how to use Auto-Tune properly, so you can be confident you’ve done the job right.