How to Mix Drums
Introduction
Writing about the right way to mix is a bit like dancing about architecture. There’s really no substitute for hands-on practice. I want to make that clear before I dive into this detailed guide. What I hope to do here is give you some perspective on what to listen for, some options for what to aim for, and a few ways to move from level 1 to level 2.
I’m not promising any secret formula. My goal is to share some information that might speed up your learning process. I’m offering this disclaimer because I see too many articles claiming to be a “how-to-do” instead of a “how-to-learn.” Anyone who pretends that production isn’t a skill built from practice is just selling snake oil.
So, how do you mix drums? In my experience, the first step is to imagine the finished sound in your head. This is a 100% creative decision. There’s no set way your drums should sound, except for what you want. Your intention is the cornerstone of whether your drum treatment is successful. We need to decide, creatively, what we want the listener to feel.
Usually, we want drums that sound full, powerful, and punchy. That’s no surprise. But is that all? You can have all of those qualities and still have the drums feel relaxed, or you can have all of them and make the drums sound aggressive. Sometimes, you might want a rounder, softer drum sound. You have to define your goals.
This brings up the question—how do you know what you want? Maybe you’ve heard your favorite mix engineer say, “the song really mixed itself,” or something like, “I let the song tell me what it wants.” That’s because the clues are all in the context. The feel of the music, the meaning of the lyrics, and—most importantly—how the drummer is playing tells us everything we need to know.
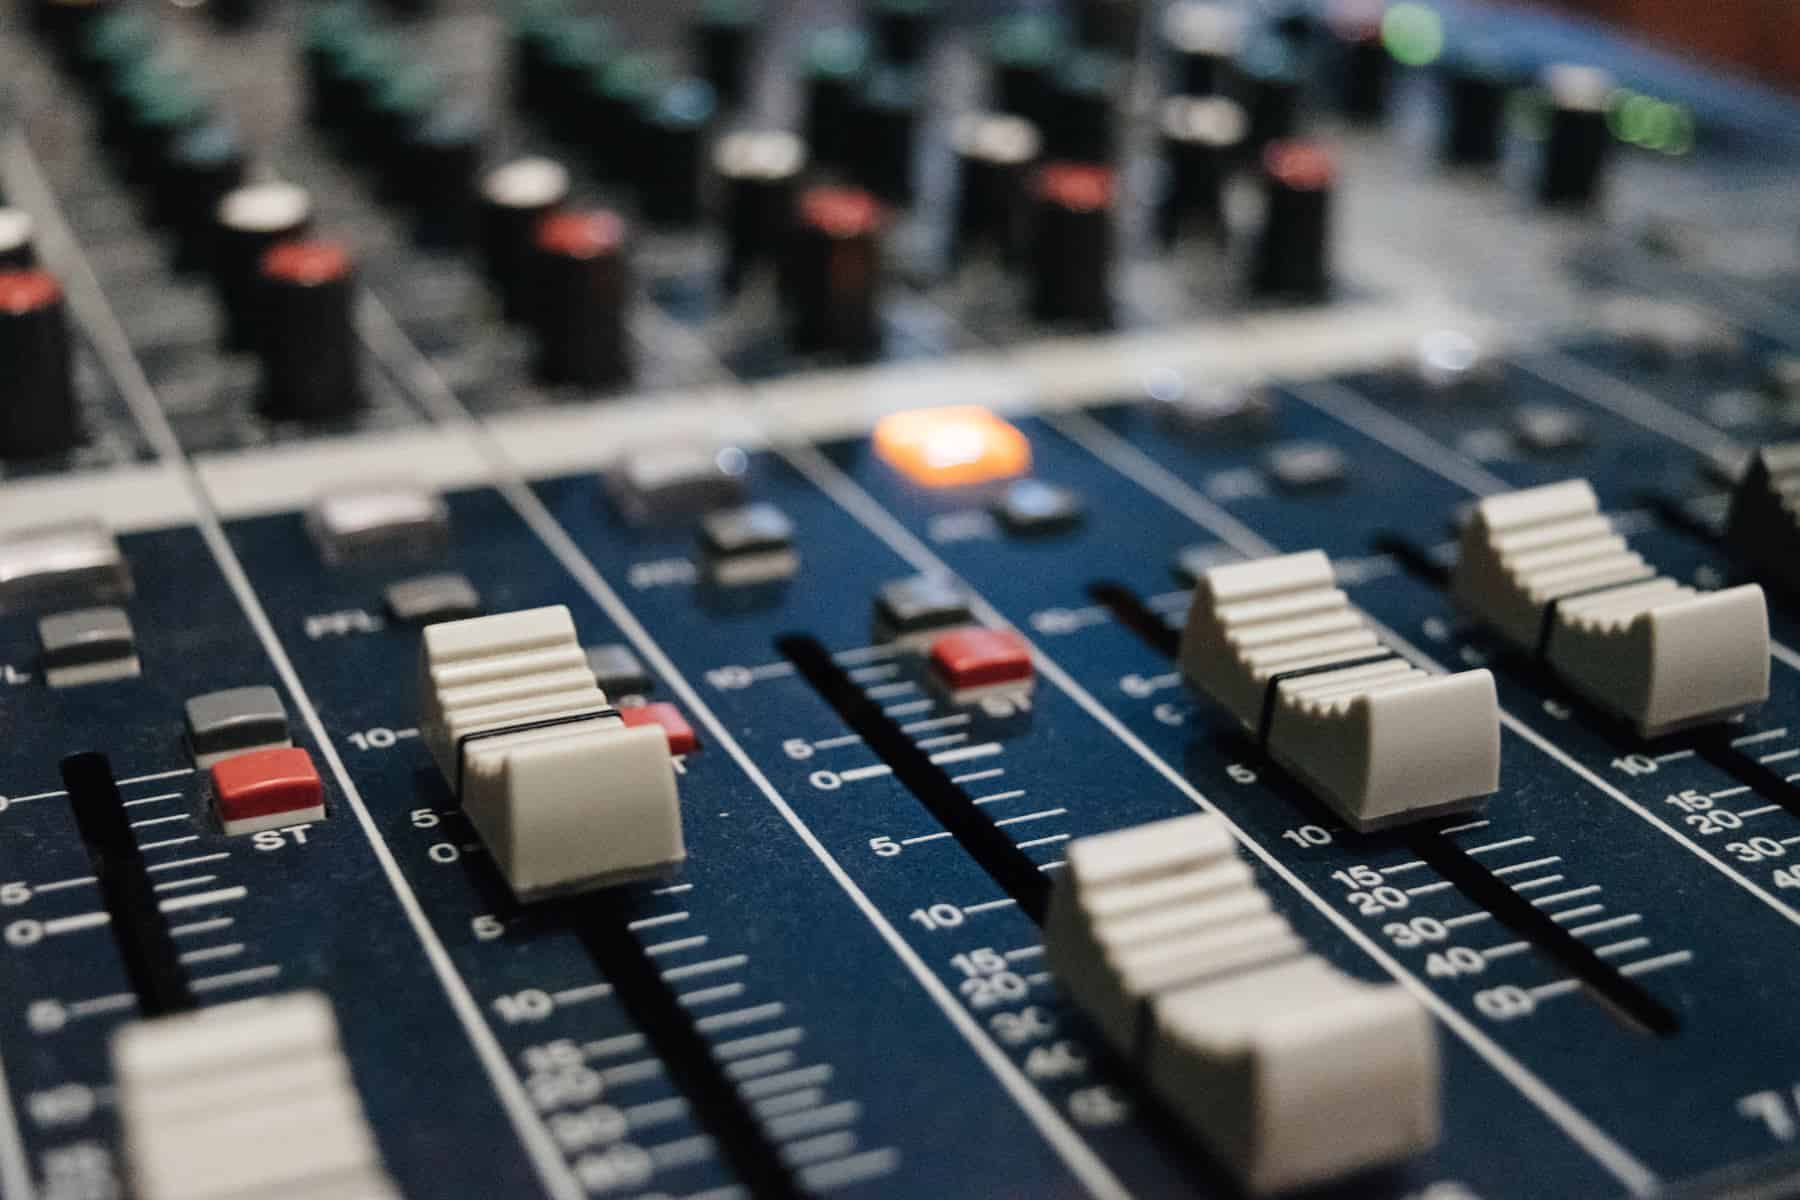
1. Balance
Step one in mixing drums is getting the balance right. Before you do anything else, you need to make sure the volume levels are set properly.
Start by soloing your drum bus and turning all your drum mics all the way down. Next, bring up the most important part first—this is usually the kick or snare, depending on your song. Then, one by one, bring in the other drum parts. Adjust each one until the whole drum set sounds natural and cohesive.
Once your drum set is balanced, it’s time to fit the drums into the rest of the mix. Un-solo your drum bus, turn its volume all the way down, and slowly bring it up until it sits well with everything else.
A helpful tip is to do this during the loudest section of your song. If the drums are balanced during the most intense part, they’re likely to stay well-balanced throughout the rest of the track.
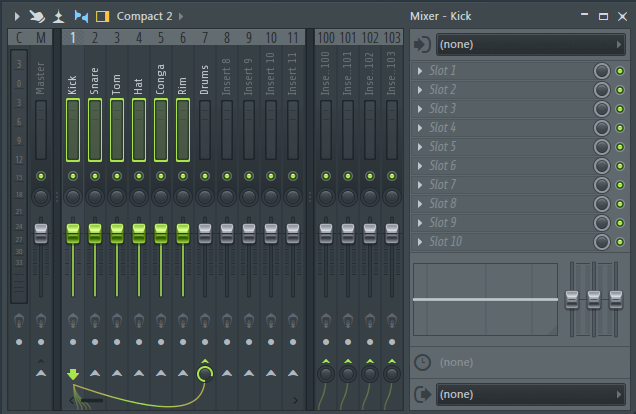
2. Grouping
For my process, the second step is always the same: I group all my drum tracks together and send them to a drum subgroup.
From this subgroup, I set up a few aux returns that I’ll later use for parallel processing. These aux returns will stay muted for now. I also create a few subgroups within the drum channels—one for all the kick mics, one for the snare, and sometimes stereo groups for toms or auxiliary cymbals. This helps me stay organized and makes it easier to consolidate channels, especially if I’m mixing on a console.
In addition, I’ll set up a few parallel return channels for the kick, snare, and some reverb returns too.
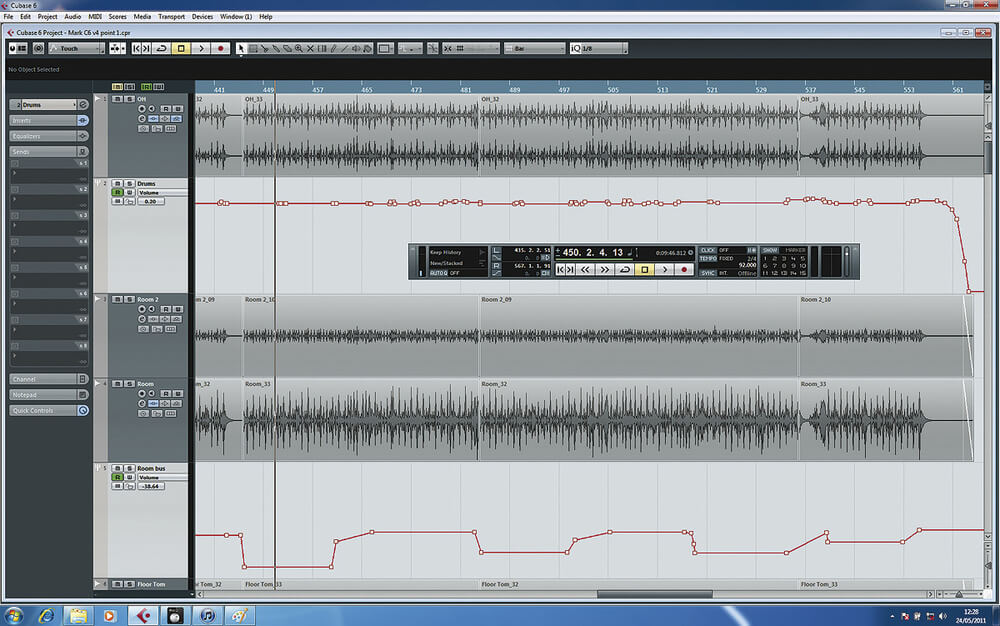
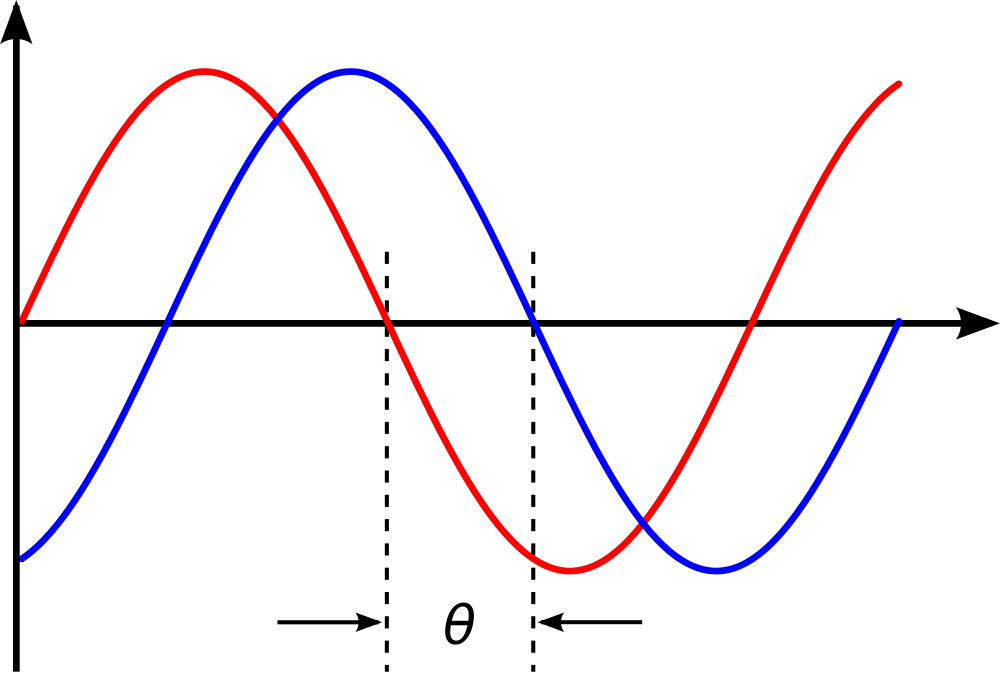
3. Check the phase
Once your final drum tracks are ready to go, it’s time to check that each track is in phase with the others. If even one microphone was off by just half an inch during recording, you could end up with phase issues that make the whole drum kit sound thin and weak.
To fix phase problems with drum tracks, simply zoom in on the audio tracks in your DAW. You should be able to spot which track is out of phase by looking at the transients—if they’re ahead of or behind the rest, that’s your culprit. Just slide the out-of-phase track to line up the main downbeat’s transient with the other mics.
Once you’ve lined up all the tracks correctly, you should hear a clear improvement in your drum sound.
However, perfect phase alignment isn’t always the goal. Lining up the overheads perfectly, for example, can actually narrow your stereo image. Sometimes you want a strong mono center, and other times you’re after a really wide sound. Sometimes you want a punchy kick, while other times you might prefer the depth that comes from a little timing variation.
That’s why it’s important to know what you want first. Basically, whenever you change the timing to adjust phase, you’re trading depth for punch and fullness. You just need to decide which is more important for the song you’re working on.
4. Tuning Your Drums
This is a crucial part of the guide! Making sure your drums are in key with your track is one of the biggest things people often miss when mixing drums in DAWs. This is especially true when you’re working with kick drums.
In digital music, like Trap and even some Hip Hop, your kick drum really needs to harmonize with your bass and melody. It acts as a kind of glue that holds everything together. So, how do you make this happen?
Finding the Right Note
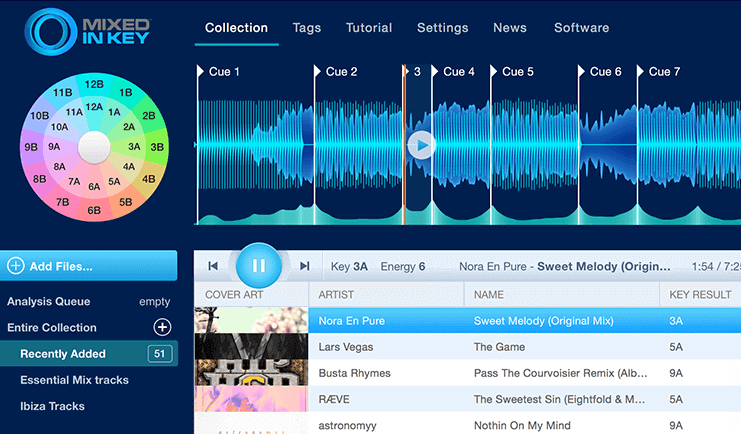
The easiest way to do this is by figuring out the key of your track first. If you’re not sure how to find the key, there’s a great piece of software called Mixed In Key that can help you out.
And if you still can’t work it out, you can always brush up on some basic music theory with a simple music theory guide.
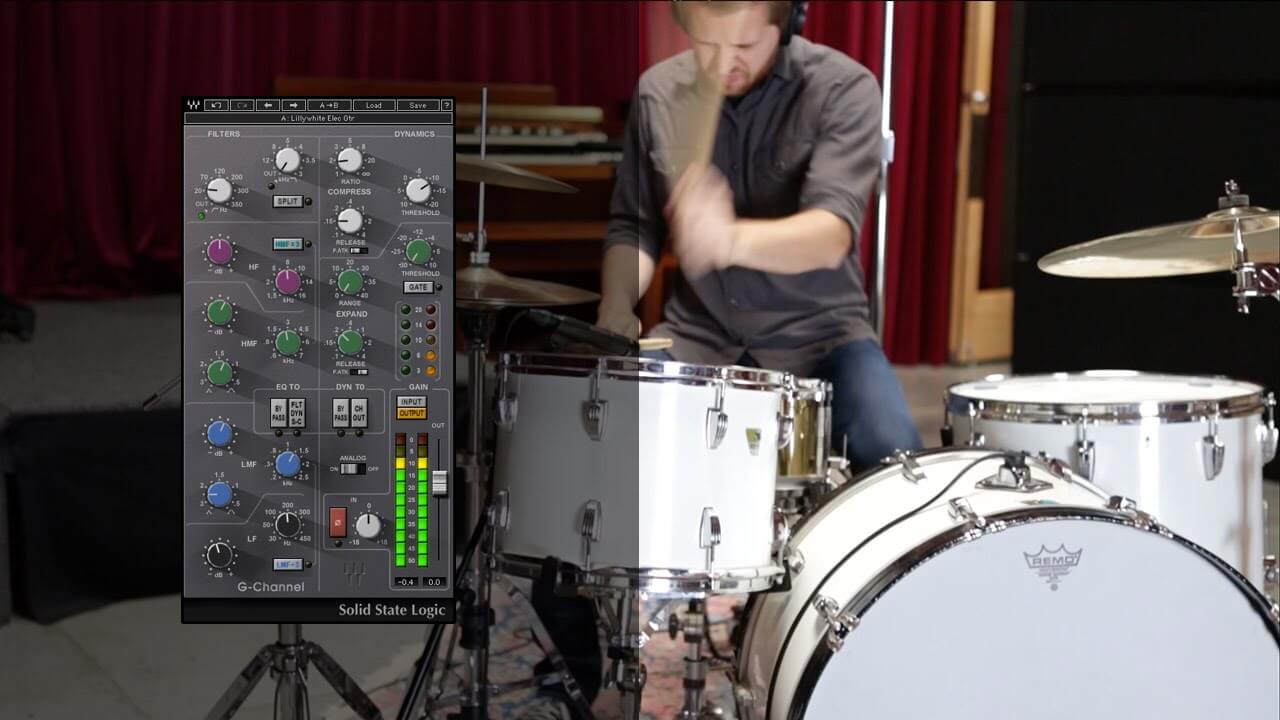
5. EQing the Drums
After that, I take a step back and listen to the drums as a whole. How loud do they need to be compared to the rest of the music? How bright or clear should they sound? There’s no point in EQing the top end or notching out the same room tone on every single drum track if I can just do it on the drum buss.
I like to think about the big picture. If I want something that sounds “analog” and “natural,” I’ll probably keep most of the room tone and be more careful with the top end. If I’m after a “poppy” and “punchy” sound, I’ll cut anything that isn’t essential to the drum’s character—especially anything building up in the lower mids—and add as much sparkly top end as I can without going overboard.
If I boost the top end and really like how it sounds, I’ll add a de-esser to the drum buss to keep the cymbals under control. Ultimately, this step is about listening to the whole kit and making sure everything works together.
For a more typical rock drum mix, I usually add a healthy amount of low end from the subs and some top end from the high treble. I’ll also surgically remove some low mids from the room mics and accentuate the 1-2kHz range, depending on how the drums were recorded. How you mix drums really depends on how they were recorded in the first place.
For more vibey indie tracks, I almost do the opposite. I’ll focus on the treble around 5kHz instead of the super-bright 10kHz area—and only if it needs it. I’m careful when cutting low mids, making gentle adjustments if I do anything at all.
If I’m boosting the low end, I’ll aim for the main bass range (80-250Hz) rather than the really deep subs. Mainly, I’m just trying to keep things sounding “natural” and only dial back anything that might distract my ear.
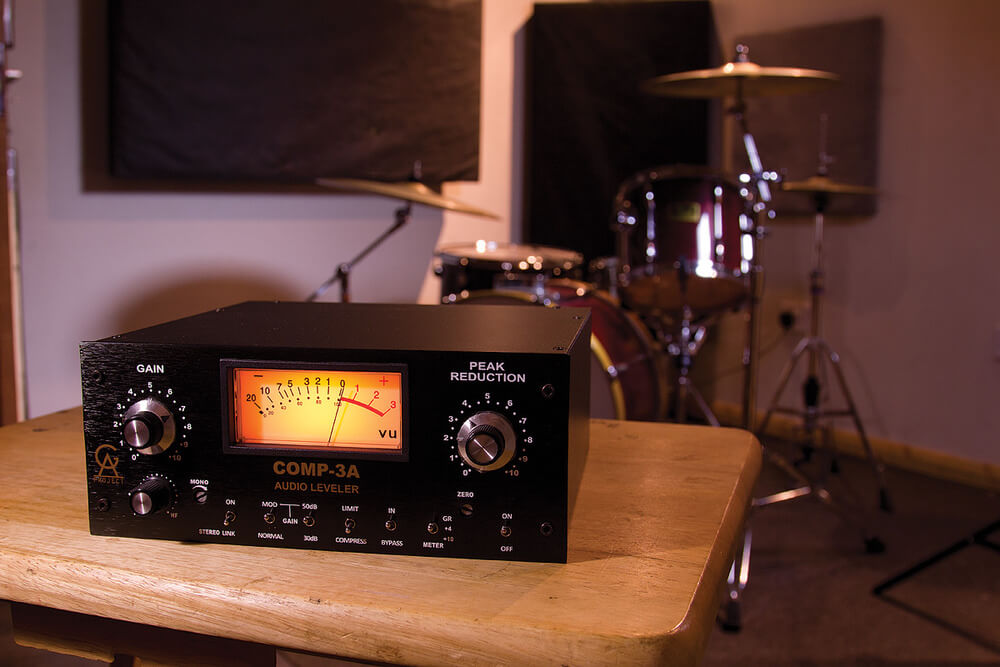
6. Compression
Compression is one of the key techniques for achieving a great drum mix. Especially on kick and snare, it’s common to use as much as 6 dB of compression on a single channel.
For a punchy sound, try using a compressor with fast attack times, like a VCA or FET compressor.
Start with a slow attack and a quick release for a more natural sound. With a slow attack, more of the initial transient passes through without being compressed. Gradually increase the attack time until you find the perfect balance of tight and punchy.
Quick release times are great for making drums sound snappy. Begin with the fastest release time possible, then slowly decrease it until the compressor starts to “breathe” along with the music. The gain reduction meter should almost return to zero just before the next drum hit.
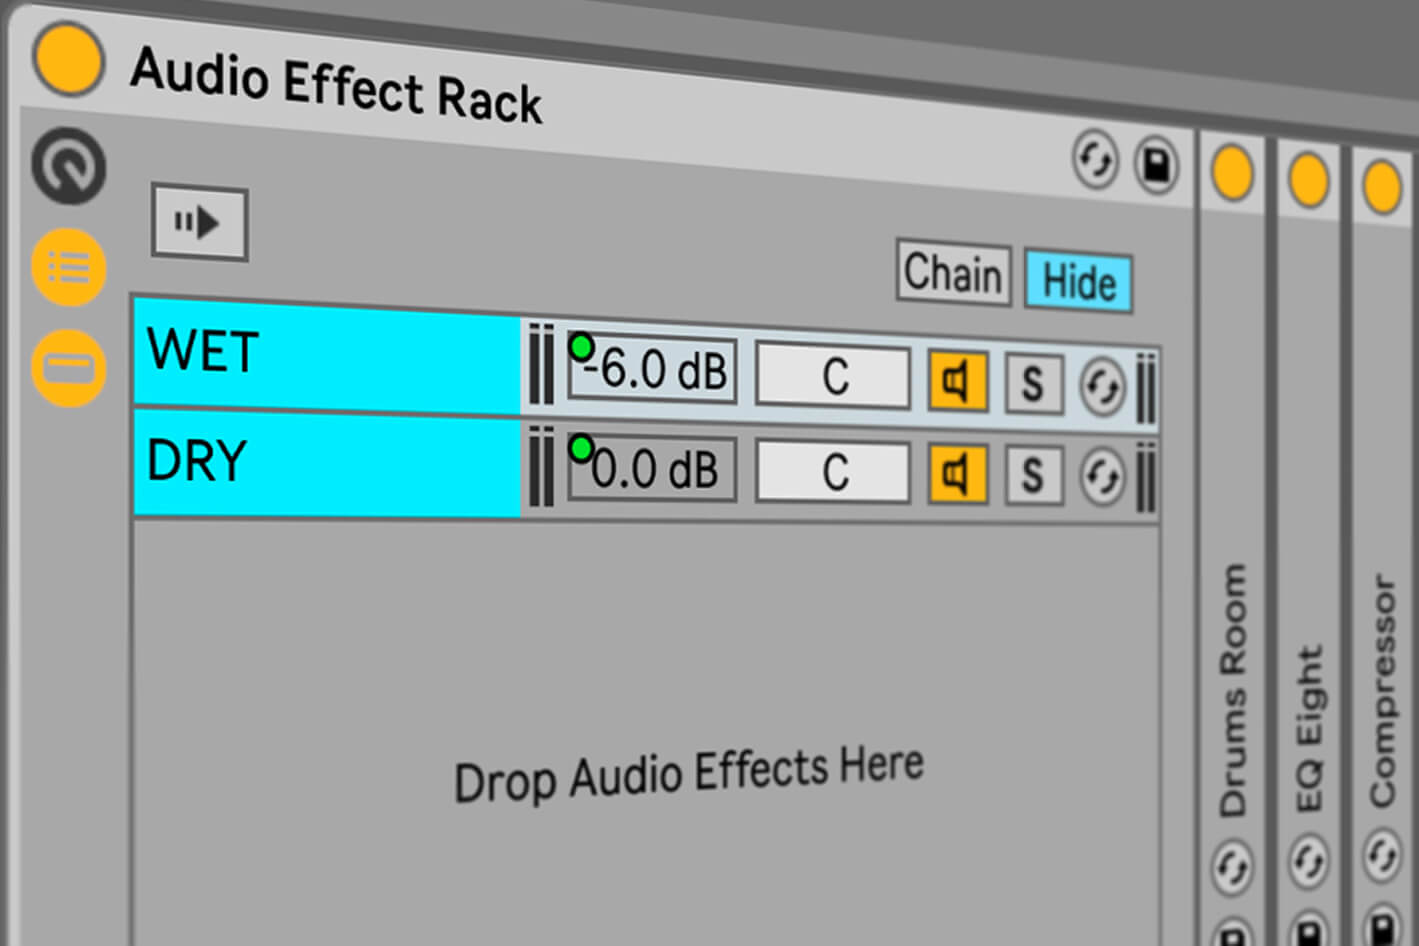
7. Parallel Processing
Parallel compression is a common technique for adding more body and punch to drum tracks. To set up a parallel compressor, send your drums on a stereo bus to a stereo aux track. Place the compressor plugin on this aux track to process the drums in parallel. You can either send the entire drum bus to the parallel compressor or send each individual drum element separately.
The difference is that routing each individual channel allows you to control how much of each drum hits the compressor. For example, you might want to send more kick and snare to the compressor and less of the other drum parts. You can even leave some elements out entirely. However, for simplicity, let’s send the whole drum bus to the parallel compressor.
When setting up parallel compression for drums, start with a ratio of about 3:1. Lower the threshold until you get anywhere from 12dB to 30dB of gain reduction. That’s a lot! Then adjust the attack and release controls to shape the punch and sustain. The key with parallel compression is that it shouldn’t sound pleasing on its own. It’s often used to deliberately exaggerate aspects of the drum’s impact (Attack, Decay, Sustain, Release) in an unnatural way.
When you blend it with the original drums, it adds fullness. In fact, it might seem strange, but you often want to reduce some of the initial punch (but not all) with a faster attack. You also want to aim for some pumping by using a faster release. It’s important to keep the parallel channel at a lower volume compared to the main drum tracks. When you mute and unmute the parallel channel to check its effect, you shouldn’t hear a big jump in overall volume.
Don’t convince yourself that parallel compression sounds better just because it’s louder. Even though the compressor settings are extreme, the increase in drum volume when you add the parallel channel should be subtle but effective.
8. Parallel Drum Reverb
If the room mics and overheads aren’t giving you enough sense of space, it’s a good idea to create a parallel reverb track. You can use any type of reverb you like, so find one that fits the sound you want or use your favorite go-to. Plate reverb is a classic choice for drums. Send the snare, toms, and hi-hat to the reverb, and adjust the send levels while listening to the mix. Usually, you’ll want more reverb on the snare and toms than on the other drum elements.
Reverb adds a sense of distance, so be careful not to push these elements too far back in the mix. Next, set a reverb length that sounds good in context. Many engineers use musical note values to set their reverb times, which means converting note values to milliseconds based on the song’s BPM. If you have trouble trusting your ears to pick the right length, look up how to do this conversion—it’s quick and effective.
After that, it’s a good idea to EQ the reverb return. Use a high-pass filter to clean up unwanted low end and a low-pass filter to tame some of the high frequencies. You might also want to notch out some of the muddiness around 250 Hz. Just be careful not to thin out the reverb too much!
9. Set Automation
Every DAW lets you write volume automation, and this is a simple yet powerful way to bring your drum tracks to life. Once your mix is dialed in, take some time to listen carefully to each drum channel throughout the song. You might notice that the hi-hat’s level works well in the verse, but it could stand to drop a bit in other sections—or that boosting it by just 1 dB in a certain part gives the track more impact.
Toward the end of the mixing process, making these small adjustments with automation can really tighten up how the drums fit in the mix and help drive the arrangement home to the listener.
In the end, you want your kick to punch, your snare to crack, your toms to thunder, and your cymbals to shimmer. Remember, these tips are just a starting point. Always listen carefully, serve the sound of the drums and the song, and don’t be afraid to experiment. Mixing drums—and mixing as a whole—is definitely an artistic process.