How to EQ Vocals
Introduction
One important thing to remember when you EQ a vocal is that the settings will be different for every project.
This will also depend on a variety of factors such as the type of microphone, the singer’s position, mic technique, the room, and many other things.
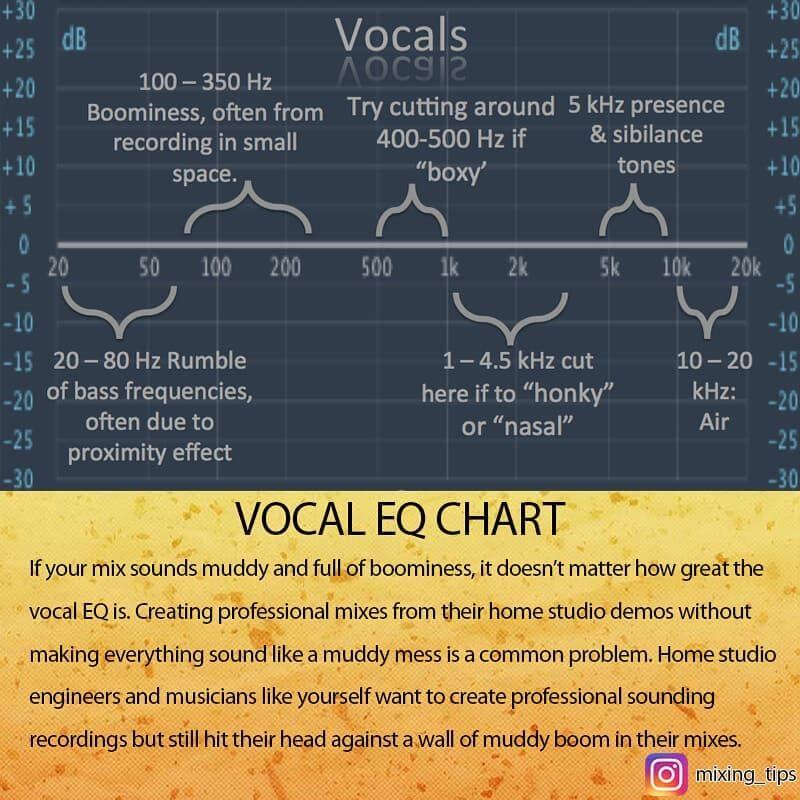
Low frequencies: It’s crucial to cut everything below 80 Hz—this area is just noise floor and will create rumble and muddiness in your mix, so cut it out if you don’t need it. This is especially important if the vocalist moves around or kicks the mic stand. A high-pass filter works wonders here.
Use caution, though, because if you overdo it, your vocals can sound thin and lose some of their fundamental frequencies. Always double-check what you’re doing with the filter.
Boominess: This effect is usually found between 100 Hz and 300 Hz. Avoid boosting this area, as it will make your vocals sound boomy and won’t sit well in the mix. Most of the time, you’ll want to cut this range, especially with male vocals or if the recording was done in a small room.
Many engineers find that this area causes most of the problems, but it also contains some nice, warm frequencies for vocals. We suggest trying a dynamic EQ or multiband compressor to tame this range and get the best of both worlds.
Mud & Boxiness: You’ll often find muddiness around the 350 Hz to 500 Hz range. Be careful with your cuts here, because too much can make your vocals sound hollow. Find the exact problem frequency and use a medium to narrow Q factor.
Everyone talks about the infamous mud. It’s simple: create a band in this frequency range and lower it until the mud is gone. Always do this carefully and tastefully—don’t rush.
Nasal & Honkiness: The area around 800 Hz to 1.5 kHz is often honky and metallic. You’ll want to cut this range to avoid a nasal quality.
As the name suggests, this makes your vocal sound like you have a stuffy nose. But this area can also contain some sweet spots, so be careful when adjusting it.
Clarity & Presence: After cutting out all the problem frequencies, your vocals should sound clearer and more present. If you want to add even more clarity and presence, try boosting in the 4 kHz to 9 kHz range. Just be careful not to add too much sibilance or plosive sounds.
Above this range, a slight boost helps the vocal shine through the mix. Always boost here if your microphone is lacking in this area.
Breath & Air: To help the vocals stand out in the mix, use a bandpass filter to boost from around 10 kHz to 16 kHz.
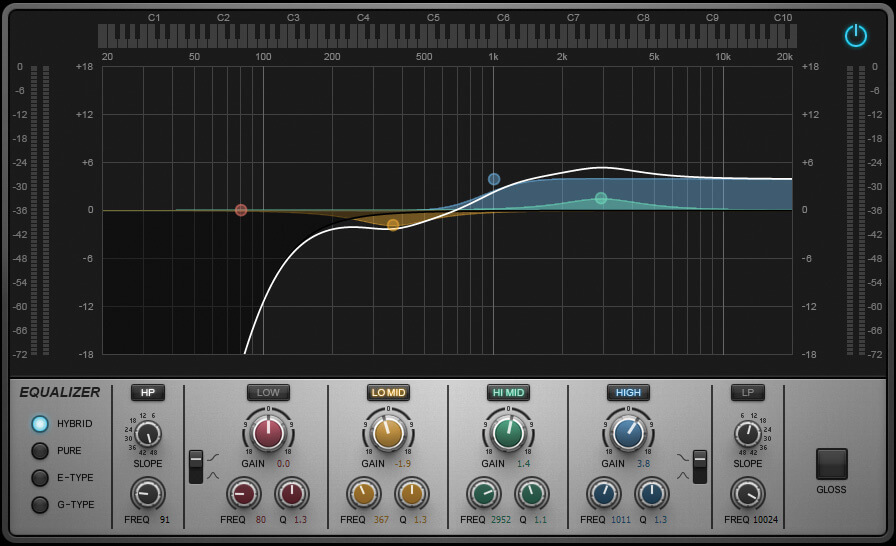
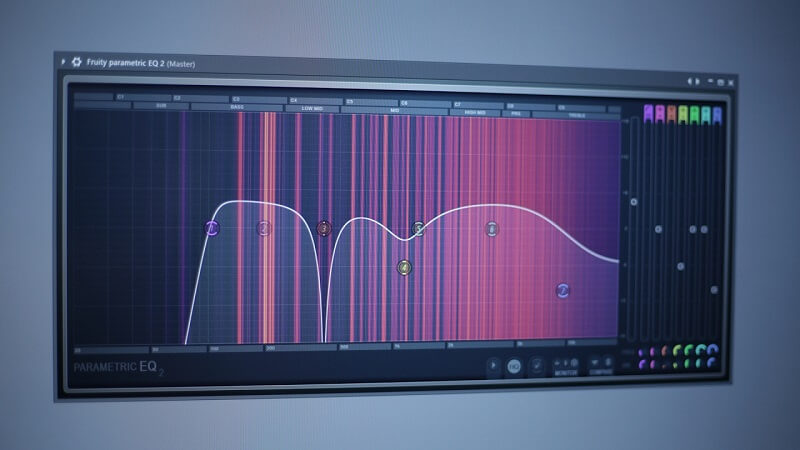
If you’re not sure where to boost, try a high-shelf filter above 10 kHz. Using a high-pass filter together with a high-shelf filter creates a useful EQ curve, especially when seen on a parametric EQ.
Other vocal EQ adjustments will depend on the specific vocal you’re working with.
Remember to use a narrow Q factor when cutting frequencies, and a wide Q factor when boosting. But rules can be broken, as long as it sounds good. Your ears should always guide your decisions. Whether you need to boost or cut, trust them.
Here are some basic tips to help you start EQing vocals the right way:
Tip #1 – Cut before you boost
Usually, when people talk about low-end frequency cuts, they’re referring to vocals. But in a worship band, there are a lot of instruments producing low-end sounds—not just the drums and bass, but also electric and even acoustic guitars.
Add in stage amps and floor monitors, and suddenly the stage is packed with a mix of low-end frequencies. Is that a problem? Using a simple high-pass filter can help reduce some of those unwanted low-end sounds that can make things muddy or harsh.
A great mix keeps just the right amount of low frequencies to support the music. Try this during your next soundcheck: while the band is playing, put on some headphones and solo the lead singer’s microphone. You’ll probably hear lots of extra noises the mic is picking up.
While you can filter out most of these sounds, a bit of precise EQ cutting can really help clean things up. Also, remember that the closer the singer’s mouth is to the microphone, the more bass you’ll get because of the proximity effect. Sometimes, this extra bass is helpful; other times, it’s not—it all depends on the situation. Who said mixing was supposed to be simple?
The best way to handle these trouble spots is with subtractive EQ. If you’re fixing a problem, it’s better to cut the troublesome frequencies. If you want to get creative with your EQ and add something special, you can boost certain frequencies instead. If you’re boosting, try using an analog-modeled EQ plugin to add a bit of character and warmth that those plugins often provide.

Tip #2 – Take away the mud
Muddiness is one of the biggest problems in most mixes, especially when you have the classic band setup with several guitars and a vocalist. Many of these instruments have a lot of energy in the 250-350Hz range, which can quickly cause a buildup of frequencies in this area.
Try cutting 3-5dB around 300Hz—move the EQ point around until you find the sweet spot.
This approach only works if your vocals already sound full. If the vocals are thin, cutting around 300Hz will just make them sound worse! If your mix is muddy but the vocals can’t afford to lose anything in the 300Hz range, try reducing this frequency in the other instruments instead.
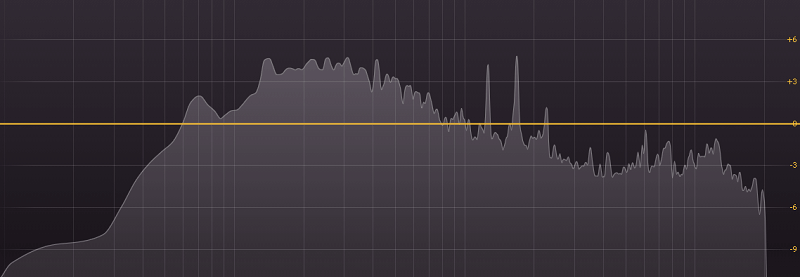
Getting the frequency balance right is really important. Pay special attention to this area and listen for any inconsistencies in the frequencies. If you’re struggling to hear the problem, use a visual aid plugin to help you. These tools can show you where you might need to boost or cut certain areas.
Tip #3 – Boost where it works
“Boosting in the 8-10 kHz range can add some air or breathiness to a vocal,” is advice often given when mixing lead vocals. That approach usually works well, and I often boost those frequencies myself. How you EQ vocals is a personal choice, though. You might find that boosting different areas gives you a better result for your particular recording.
As mentioned earlier, vocal microphones can pick up a lot of different sounds, even if you have the gain set just right. Drum cymbals, for example, can be very loud on stage. If your vocal mic is picking up a lot of cymbals, boosting the high frequencies on that mic can also increase the cymbal presence in your mix.
Backing off a bit from those very high frequencies, you can also try adding brightness by boosting the 6 kHz range. But be careful—too much boost here can introduce sibilance. A general mixing rule is to boost wide and cut narrow. Cutting removes only what’s problematic, much like a surgeon making precise corrections.
When boosting, you’ll usually want to affect a wider frequency range. If your analog mixer has Q values (which control bandwidth) on the EQ controls, you can adjust how wide or narrow your EQ changes are around the selected frequency.
Tip #4 – Increase fundamental frequencies of the vocal
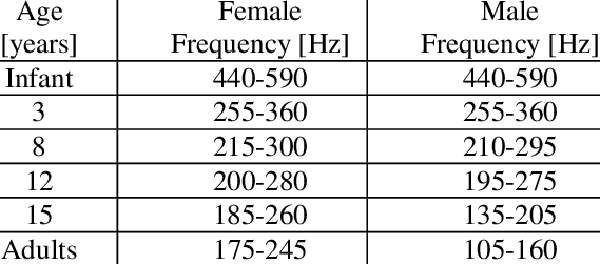
You might or might not want to do this, which is why it’s usually one of the final steps in the process. Generally, boosting (or even cutting) the core frequencies can easily affect the quality of the vocals. This can vary depending on whether it’s a female or male vocal take, but the range is always similar. Figure out where the problem areas are and make the right choices for vocal EQ if you notice any issues.
For now, just know that you’ll want to focus on the 1 kHz to 2 kHz frequency range to find this core frequency. Boosting this area can add clarity to the words being sung or spoken, making it easier for listeners to follow and connect with the vocals.
Tip#5 – Lower resonances with a bell filter
A vocal should sound especially smooth, with any resonant frequencies managed or reduced. This isn’t true for every style—jazz vocals, for example, usually have more nuance and resonance than pop vocals to sound more “natural,” and sometimes to emulate traditional instruments like horns.
Pop vocals, on the other hand, are defined more by their brightness than by the mid-range. To achieve the right balance, you need to find and reduce resonant frequencies in the vocal.
Resonant frequencies are spots in the voice where there’s too much energy. We might describe them as “nasal,” “metallic,” or “brassy.” Every voice has different amounts of resonance at different points in the frequency spectrum.
Resonance also depends on factors like the microphone used, the key of the song compared to the singer’s range, the time of day, the specific performance, and more. To remove resonances, you can use a technique called ‘peak and sweep.’
Take a bell filter, set the Q (width) as high as possible to make the range very narrow, then boost the gain about 10dB. While the vocal is playing, sweep this filter across the frequency spectrum. Listen for anything that sounds harsh or unpleasant. Once you find the resonance and its width, you can cut it and widen the band if needed. Parametric EQs like FabFilter Pro-Q3 are perfect for this process.
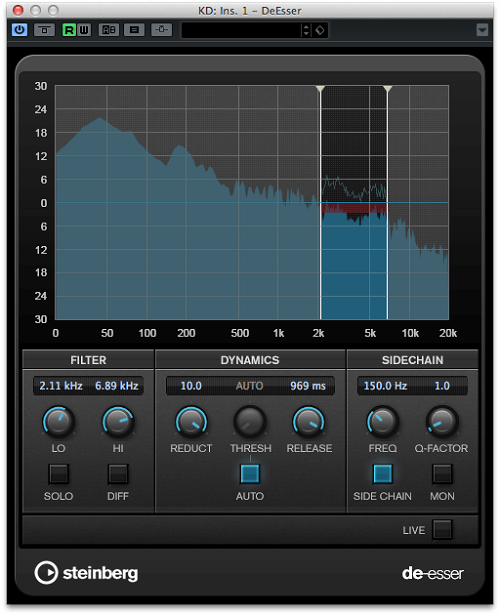
Tip #6 – Use De-Esser
Sibilance here refers to the hissing sounds we make when pronouncing certain letters, like S or Z. Think of Daffy Duck repeating the word ‘Nervous’ while grilling Porky on the witness stand.
A good microphone will pick up even the slightest hiss from sounds like the letter ‘S’ or the ‘Sh’ phoneme. This can be annoying to listen to and might make your vocals sound less professional.
But not all sibilance is bad. There’s good sibilance, like in Michael Jackson’s ‘Wanna Be Startin’ Somethin’’. You can also hear some nice sibilance in George Michael’s ‘Careless Whisper’. And if you’re into old-school hip-hop, you’ve probably jammed to the sibilant hook in Vanilla Ice’s ‘Ice Ice Baby’.
In the end, it comes down to your ear and creative judgment. If the sibilance doesn’t add value to your vocals, it’s a good idea to reduce those Ss.
Conclusion
These are simply starting points—not magic solutions—because every instrument, every voice, every mic, and every recording chain sounds completely different. Still, these guidelines are a great way to create your own presets and give you a place to begin in your favorite EQ plugin.
Always remember: it’s better to cut than to boost. When you do need to boost, use a wide Q and only add a small amount of dB. The more instruments you have in your mix, the more you’ll need to cut and filter, and vice versa. And of course, don’t try to boost something that isn’t there in the first place.
Sometimes, when you solo the EQ’d instrument, it might sound terrible. But luckily, no one except you will ever hear it in isolation.
Remember, EQ is one of the best ways to make room for everything to fit together in the mix!
We hope these steps give you enough detail to be helpful for EQing vocals, while still being general enough to apply to any voice. The idea is to organize your approach into a clear sequence of steps. That way, you can work smarter and more efficiently as you move through each process. May these tips serve you well!