EQing Your Mix Bus
Introduction
Great job! If you’re reading this, it means you’ve mastered track mixing and are now ready to finish your song. Many people overlook or barely touch the process of preparing and processing the entire mix bus before the final mastering stage.
In this article, we’ll explain how to EQ your mix bus and shape your song’s frequencies before mastering, whether you’re doing it yourself or sending it to a mastering engineer.
1. Beware of Phase Shifts
Usually, when we start EQing the mix bus, we listen very closely to identify any spots that stand out and need attention. At this stage, we always reach for a very precise EQ, aiming to be surgical and cut out any areas we don’t like.
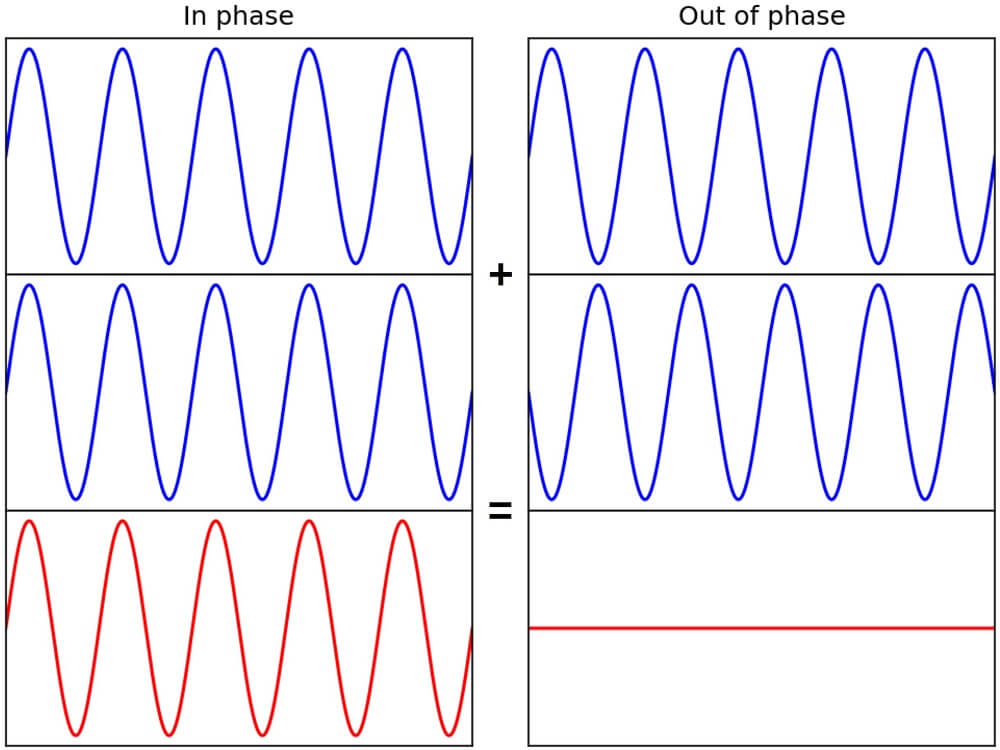
However, something can happen at this point—your mix might lose clarity when played on different speakers because of phase shifts introduced by EQ adjustments. To avoid this, we recommend using a linear phase EQ, which handles phasing in the best possible way and prevents your mix from being ruined.
We suggest trying out the FabFilter ProQ3 in linear phase mode, which will keep the phase intact and allow you to be extra precise when addressing problematic areas.
2. Automating the Cuts Down
This is another important point that we really like to focus on. Automating the gain of a particular EQ band allows you to make precise adjustments only where they’re truly needed. We understand this can be a challenging process, but it’s exactly what can set your song apart from sounding average and help make it great.
Of course, if you discover a frequency area that needs to be cut throughout the entire song, it’s understandable not to automate that cut. However, if that’s the case, it might be a sign that something’s not quite right in the mix. In those situations, we recommend going back to the mix and fixing the issue at the track level. Now, onto the main point…
Automating EQ cuts in specific sections where problems appear is essential—this way, you’re only applying EQ on the mix bus when the issue actually occurs. This approach also applies to areas where you might want to boost a frequency, not just reduce it, though we’ll leave that decision to you. We simply wanted to highlight this option, and encourage you to choose where it’s best applied.
3. Usual Mix Bus EQ Spots
Before we dive into this topic, we want to highlight that we’re only talking about boosting certain areas that might work—these aren’t hard and fast rules!
There are some common EQ spots that usually benefit your song if you boost them a little, as long as you use the right type of EQ. Also, when boosting frequencies on the mix bus, keep your changes subtle—most of the time, somewhere between 1dB and 3dB. If you find yourself needing to boost more than that, it’s better to go back into the mix and fix things there.
The first area you can try boosting is the low end, around 60Hz, to add a bit of body to both the kick and bass with just one boost. If your mix sounds a little weak, this might solve that problem.
Another trick for highlighting your low end is to cut a little bit around the 300Hz area. This can help the lows stand out—just make sure your song can handle that kind of tweak.
You can also try boosting the upper frequencies with a shelf EQ starting from 10-12kHz and above. This can add clarity to your mix if it’s missing, and creates the well-known “smiley face” curve. That curve is still effective, and many people use it as a guideline for good frequencies on their final mix.
4. Mid/Side EQing
Be cautious with mid/side EQing—only use it before mastering if you truly think it’s necessary. This is important because mastering engineers usually handle this type of processing. Only apply it if you feel there’s a crucial reason to do so.
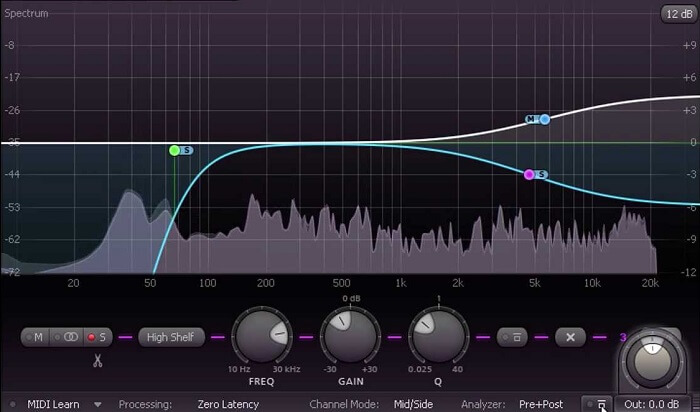
You can use mid/side EQ in the same frequency areas mentioned earlier: the lows and the highs. For the lows, try boosting the sub-frequencies in the Mid channel to make them more mono-compatible.
When it comes to the high frequencies, consider boosting the Sides slightly. This can help bring out tracks with important high-frequency content, like vocals and overheads/cymbals, making them more noticeable.
5. Analog EQ for Analog Flare
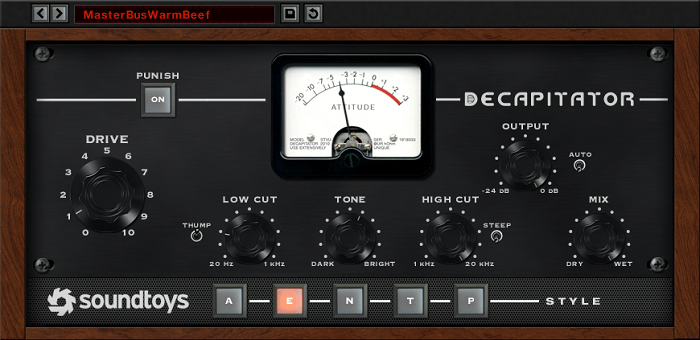
If you find yourself needing to boost certain frequencies, try using some analog-modeled EQ plugins. In addition to shaping your sound, these plugins add a touch of analog character that can really enhance your mix.
Even if you don’t need to boost much on the mix bus, simply adding an analog EQ and leaving all the knobs at their default settings can make a difference. Just running your signal through the “analog modeled circuitry” can add that special sweetness you get from real analog gear.
Try this out with different plugins to see which one best suits your song and your musical style. Experiment and see what works for you!
6. Balance in the Frequencies
You might notice some slight inconsistencies in the frequencies when you sum everything down on the mix bus. While these may not be a real problem, if you think the balance could be improved, try using a touch of dynamic EQ to even out those areas.
A slight cut or boost with the dynamics engaged can work wonders for balancing your mix, helping you achieve the sound you’re after. You can also use dynamic EQ for other purposes in your mix, but remember to proceed with care and make only minimal changes.
7. Alternative Ways of EQing
If you’ve already used all your usual tricks, the next thing you can try is adding a bit of saturation to your mix bus and highlighting certain areas. Use a saturator gently—you might end up with a fuller, more rounded sound and, in turn, a rounder mix.
Here too, make sure to choose the best possible saturation plugin that complements your mix, and apply it very sparingly. You don’t want to add too much color to your mix, because this effect can become even more noticeable after mastering.
Once you’re finished with all the EQ adjustments on your mix bus, it’s time to A/B test your work. This will help you figure out whether you’ve actually improved the sound. It also gives you a clear sense of how far you’ve come in shaping your frequencies, and lets you decide if you’re done or need to keep tweaking. This is critical listening at its best!
Conclusion
Mix bus processing is the final step that every mixing engineer needs to complete before finishing their work. At this stage, you’re finalizing the mix before mastering it or sending it to a mastering engineer.
EQing the mix bus is one of the processes you should do to finish balancing the mix’s frequencies. This is your last chance to make small adjustments that will help your mix sound its best on all playback systems. Remember, only make slight changes here. If you find yourself needing big boosts or cuts, go back to the mixing phase and address the problem there!
If you have any questions or suggestions about working with frequencies on the mix bus, please let us know in the comment section below. We’re happy to help and provide more answers on this topic!