Delay Mixing Tips!
Introduction
Using delays in your mix is a great way to add depth and width to a track—when used thoughtfully and in the right circumstances. Below, we’ll share some of our top tips and tricks for using delays while mixing your tracks, but remember, these techniques can be applied to all sorts of sound sources and instruments!
First, listen closely to your sound source—does it really need a delay? Not everything needs effects or extra processing. If it already sounds good, trust your ears! Take your time when choosing a delay, as each type can sound quite different. From analog to digital delays, there are plenty of options out there. Use your ears to find what works best.
Delay is a fundamental factor in shaping our perception of space in sound. The amplitude, frequency response, and timing of delayed signals provide powerful cues for localization and help us judge the size of our environment. When you add delays to sounds in a mix, it can create a sense of depth and space that enhances clarity and presence.
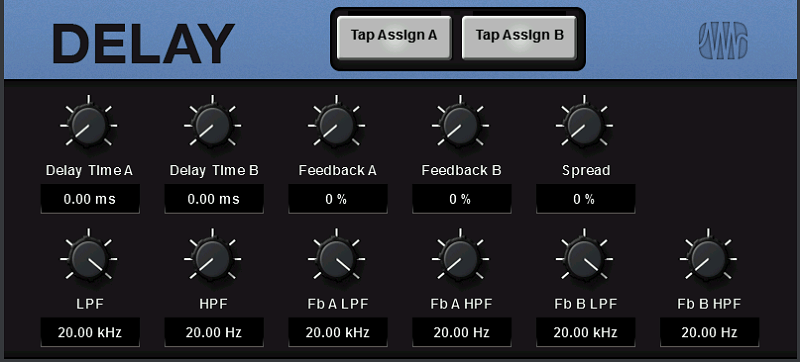
Delay Parameters
Every manufacturer might offer slightly different parameters on their delay processors. However, most delay units share some common features.
- Wet/Dry: This controls the balance between the processed (delayed) and unprocessed (dry) signals.
- Delay Time: This lets you adjust the amount of time between the original and delayed signals.
- Feedback: This sets how many times the delayed signal is repeated.
- Depth: This controls the amount of modulation applied to the delay.
- Rate: This sets the speed of the modulation.
Adjust these parameters until you find a sound you like. If your track is recorded to a click, you might want to sync the delay time to the tempo. For live recordings, you may need to automate delay times to fit the track.
For a more atmospheric sound, try increasing the feedback. Turning up the feedback knob can cause some tape delays to enter a feedback loop, creating a sound similar to a guitar amp. This effect can be used creatively for dramatic results.
If you want a more unusual or spacey sound, try adding modulation. Adjust the depth and rate until you achieve a character that fits your mix.
#1 – Enhancing Stereo Image
One really cool trick you can do with a delay is to turn a mono sound into a stereo one. Here’s how: take your mono sound and put it on two channels, pan one hard left and the other hard right, then add a delay to just one side. Set the wet/dry mix to 100% wet, turn the feedback all the way down, and set the delay time somewhere between 5 and 20ms. Suddenly, you’ve got a stereo sound—like magic.
Most of the time, you’ll want to use a clean delay with no extra character for this, but there’s no rule against using a more colorful delay if you want a unique sound.
Another way to do this is by using three channels: one panned left, one panned right, and one straight up the middle. Set the delay on one side to between 5 and 20ms, and on the other side to between 15 and 30ms—just make sure the delay times aren’t the same.
Then, pull down the volume of the hard-panned channels until you barely hear them. This gives you a mono instrument that still feels wide in the stereo field. This technique usually works best on sounds that aren’t super punchy, like guitars, keys, and pads. For drums, it can be a bit trickier to nail.
#2 – Delay Throws Concept
Usually, a delay throw is created by automating the send level to a specifically timed delay at certain points where a particular word or phrase appears in the track. With this approach, you get much more control and freedom, instead of just using the same ¼ note delay on every word.
This is what we call ear candy. It grabs the listener’s attention by filling a gap in the track or vocal with a well-placed delay throw. When done right, it draws in your audience and keeps them engaged.
For this technique, you might want to use a different delay with unique characteristics. Again, automation is key—depending on the style, you might only want to add a delay throw to one or two words.
What you’ll end up doing is isolating each phrase you want to repeat and placing it on its own separate track. Now that each word or phrase has its own track, you can add a different delay to each one and personalize every phrase exactly how you like, even adding effects like distortion or reverb if you want.
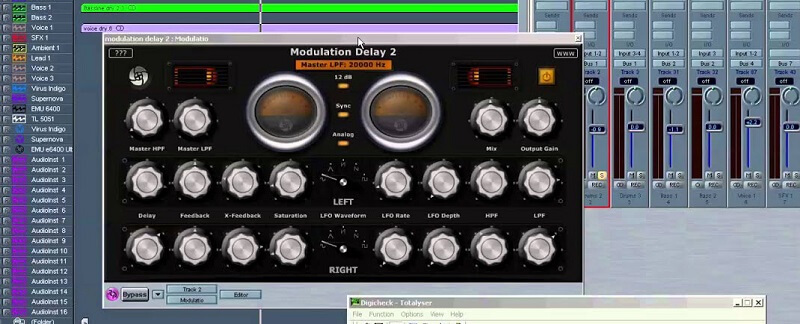
#3 – Dull Down the Delay
One of the main giveaways of a bad delay sound is that the echo or slapback from the delay is just too bright. If you’re using something simple like the Mod Delay, try pulling down the LPF (Low Pass Filter) slider to make your delay sound darker. This way, it won’t sound cheap.
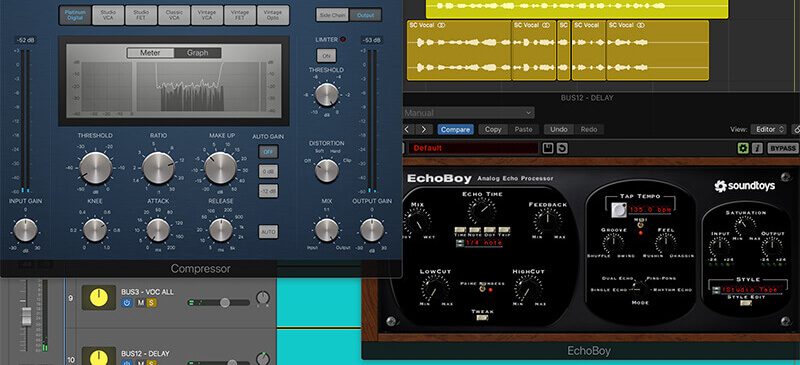
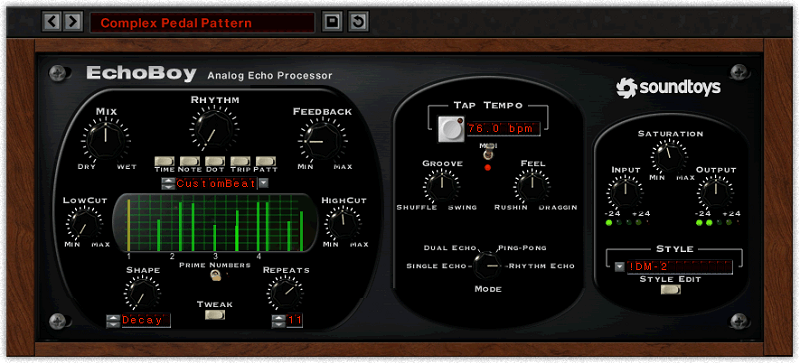
Keep in mind that different delay plugins have different ways to darken the tone. For example, the classic SoundToys EchoBoy has a HighCut filter with Min and Max settings. By turning the HighCut up (clockwise), you’ll make the delay returns sound darker overall.
Or, if you’re using something like the Massey TD5, you’ll see a tone switch for Normal, Dark, or Bright, as well as a mode switch for Classic, Retro, and Modern. Setting it to Dark and Vintage will help those delays blend more smoothly into your mix.
#4 – Sidechaining Delay
Sidechain compression is another effective technique for creating space in a mix. Often, we add a generous amount of delay to lead vocals or lead guitar to bring a sense of depth to the recording. However, things can quickly get cluttered, especially when using long delay times or lots of feedback. If your mix starts to sound crowded, try using sidechain compression.
To do this, insert a compressor on your delay send. Route the dry signal to the key input of your compressor and enable this function. This setup will cause the level of the delayed signal to increase only when the original track becomes silent.
Using this technique on several instruments can make your track sound more or less reverberant as the dynamics change. It’s a great way to add subtle emotional content to your mix. With these tips, you can achieve greater depth in your mixes and craft more realistic delays.
#5 – Fill the voids
Silence can add some nice tension to a mix. However, if there are too many empty spaces, your track can get boring pretty quickly.
A great way to keep your mix interesting is to let delay echoes fill in the silent areas you don’t want. Sometimes it’s not about how you use delays, but where you use them.
If a part ends abruptly before the next section comes in, set up a simple delay with a low feedback setting. The feedback control on your delay plugin determines how many echoes of the original signal you’ll hear.
You can even let the delay echoes spill into the next section of your track. This gives you smoother transitions, blends your elements better, and keeps things engaging throughout the mix.
#6 – Module the Delays
Add a delay to something—maybe a vocal, or whatever you like. Now, hit play, and while it’s running, start changing the delay’s time setting. You’ll notice the delay not only shifts in tempo, but the pitch also changes: it goes up if you speed up the delay, or down if you slow it down. This effect works especially well with triggered delays—those set to hit just one phrase or note.
A really fun variation is to set up a twin mono delay. If you make micro-adjustments to one delay’s timing in one direction, and the other delay’s timing in the opposite direction, you’ll get some seriously cool results.
If you pan the delays apart, you get a “doubler” effect with a huge sound. If you pan them together, the delay becomes very chorus-like, creating a cool texture. The real magic happens when you do a partial pan—say, 50% left and 50% right—giving you a spread-chorus effect.
Since you’ll be making very tiny changes—using sine wave automation or an LFO to create 10–20 ms time variations—you can use this as a consistent delay on elements like vocals or guitar. The rhythm of the delay stays exactly the same; only the feel actually changes.
#7 – Telephone EQ your Delay
Here’s another popular technique in modern music production—the phone EQ effect, which has been around for decades. To achieve this, simply place an EQ before your favorite delay plugin (or you can do it after, if you prefer). Use a low-cut filter to remove everything below 520 Hz.
Next, use a high-cut filter to take out everything above 3500 Hz. Finally, boost the remaining frequencies by about 2 dB, and voilà—you have a phone effect EQ. This trick also helps your delay throws stand out and adds extra interest compared to the original lead vocal, which your listeners will appreciate.
#8 – Repeating Delays
One way to add rhythmic interest and enhance vocal depth and space is by using repeating delays. Depending on the tempo of the vocal and the song, delay times typically range from sixteenth notes to half or whole notes. You might also want to try dotted or triplet values if straight note values aren’t giving you the sound you want.
However, repeating delays can easily pile up in a busy vocal section, which can muddy the mix and reduce vocal clarity. To avoid this, try using delay selectively—choose specific words or phrases to emphasize with delay rather than applying it to the entire vocal.
The best words or phrases to highlight are usually those that define the hook of the song or those that have a natural pause or empty space after them.
#9 – Pan Two Delays
Why settle for just one delay when you can use two? Most delay plugins let you add multiple delays to a single signal. Try using two delays with slightly different times on the same sound. Then, pan one delay to the left and the other to the right.
These offset delays will seem to weave in and out of each other across the stereo field. This is often called a stereo delay effect. It can give your mix an amazing sense of movement, depth, and space—all with just two simple delays.
You’ll need to experiment a bit to find the best delay times for your signal. The real fun comes from searching for the perfect delay times and feedback settings.
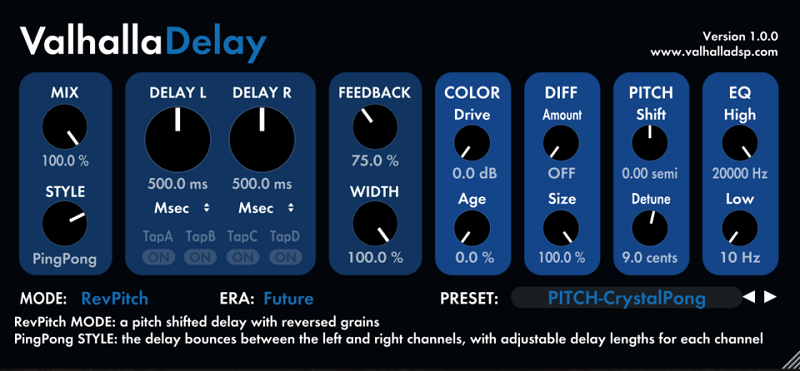
#10 – Ping Pong Delay
If you’re looking for a bit more motion in your repeating delays, the “ping pong” effect is a popular way to add extra rhythmic movement and interest while widening the stereo sound field. A simple ping pong delay alternates each repeat to the opposite side, and the feedback control lets you determine how many repeats you want.
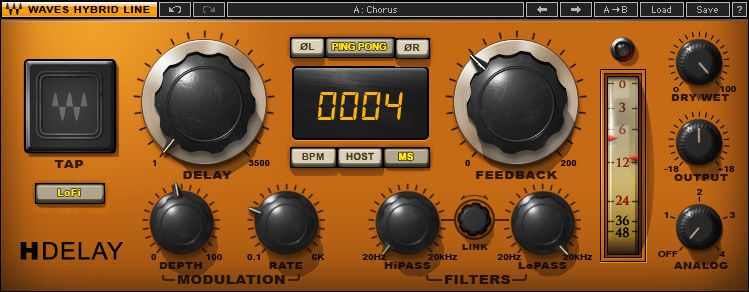
To make the rhythm even more interesting, try adding a dotted note to one side. For example, if the delay on the left is set to a 1/4 note, use a dotted quarter note delay on the right side. The H-Delay Hybrid Delay is perfect for this when set to ping-pong mode. You can also independently set how much feedback is sent to each side.
Conclusion
Delay is essential for creating an interesting mix. Experiment with your delays and try applying them to groups of instruments, not just individual sounds.
As an effect, delay is creative and versatile. Use these tips in your mix and push them further to suit your sound.