Compressing Vocals 101
Intro
When you’re trying to find the perfect vocal compression settings, there’s one key aspect to focus on: you need to hear every word. Sure, color and character are important too, but they’re not as crucial. Concentrating too much on these aspects can often distract you from what truly matters.
When in doubt, ask yourself this question: How can I hear every word? Let the answer guide you, and you’ll stay on the right path.
What Is Vocal Compression?
Audio compression is a common topic we discuss frequently. Essentially, vocal compression works by reducing the dynamic range of your recording. This is achieved by lowering the volume of the loudest parts, making the loud and quiet sections closer together in volume. As a result, the natural volume differences become less noticeable.
An audio compressor can then increase the overall level of this compressed signal. The outcome is that the quieter parts sound as if they’ve been boosted in volume to be closer to the louder sections.
Dynamic volume adjustments in a recording are carefully controlled, resulting in an overall increase in the level of the compressed recording within your mix. This allows the recording to blend more seamlessly with the rest of your mix.
A compressor does three main things:
- Modifies the transient; with vocals, this means adjusting the consonants
- Brings the loudest and quietest parts of a signal closer together
- Adds “character” or not, depending on the compressor
Types of Compressors
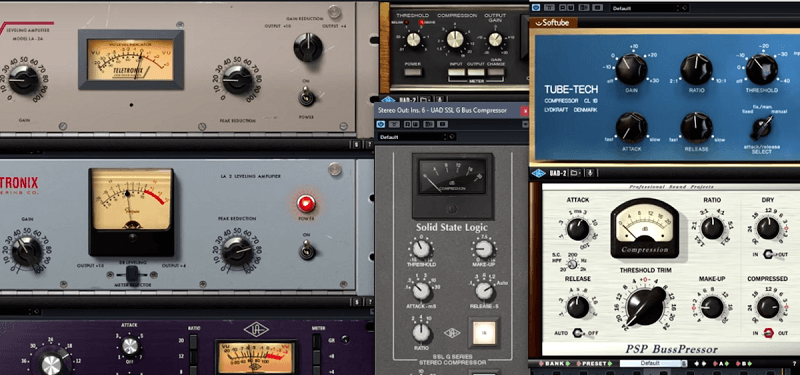
Not all compressors are designed the same way. Each has its own unique “character” or sound. The four most common types are:
- VCA
- FET
- Optical
- Variable-Mu
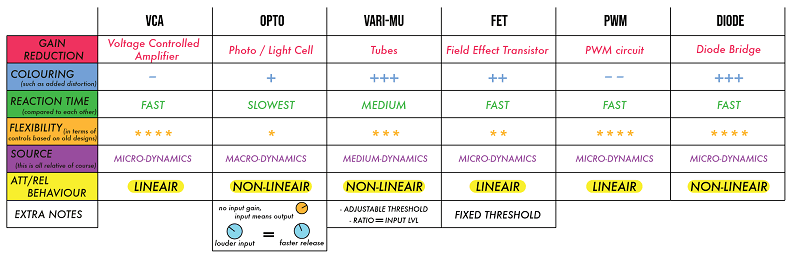
Each type of compressor has its own unique sound characteristics, which might be worth exploring once you’ve mastered the basics of compression.
Take note of this idea and consider exploring it later. In short, the names of different compressors describe their gain reduction circuits and how they respond to the input signal.
They impart specific sonic qualities based on the type used, which can enhance the sound beyond standard vocal compression settings.
Vocal Compression Settings
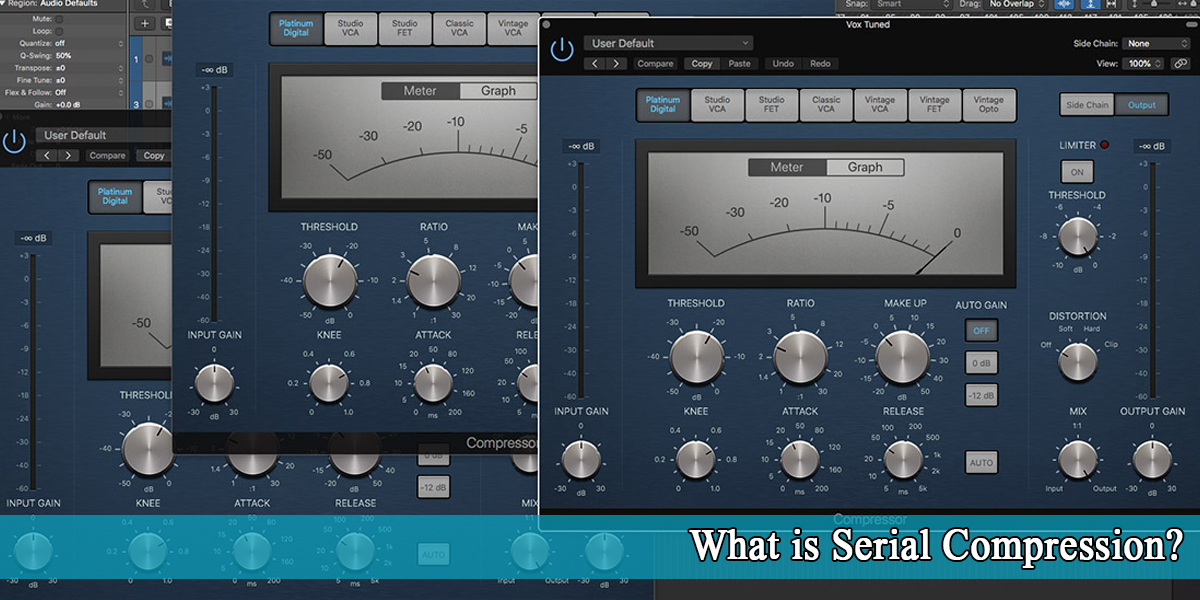
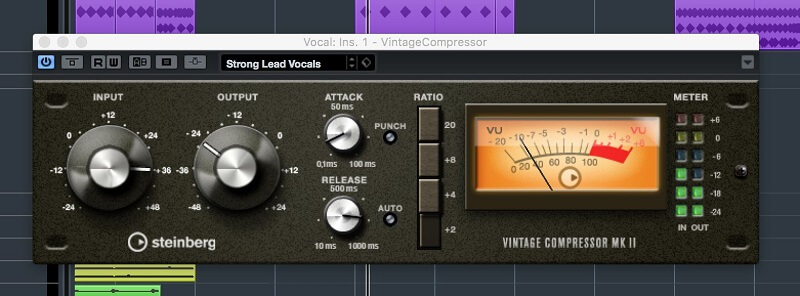
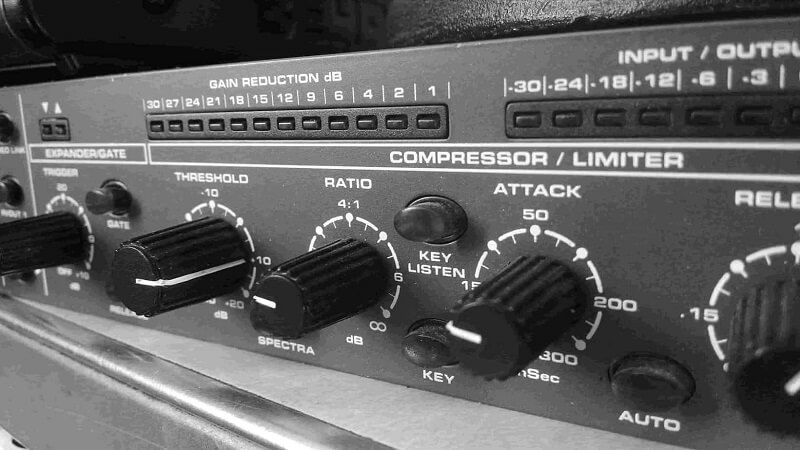
These are the most basic features you’ll find in most compressors. Some may have more features, some less, but these are the essentials:
Input Gain
This controls the level of the signal entering the audio compressor.
Threshold
Compression reduces the overall level of the loudest parts of your recording. But how does the compressor know which parts of the signal are ‘loud’ and need compressing? By setting the threshold.
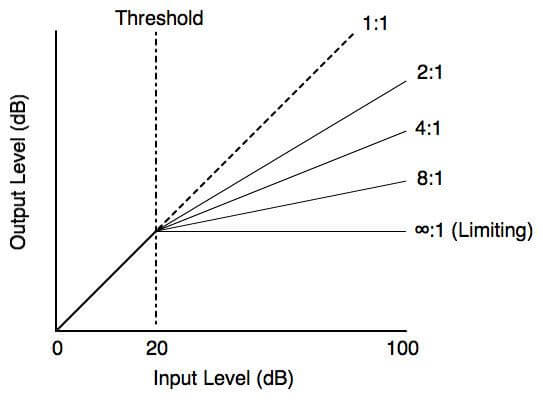
The threshold determines the point at which the compressor activates and begins altering the recording’s dynamic range. For example, if you set your threshold at -20 dB, everything below this level won’t be affected by the compressor. However, anything louder than this level (-20 dB) will be compressed.
Ratio
How much will the signal be compressed once it surpasses this threshold stage? This is controlled by the ratio. The larger the ratio, the greater the compression will be.
The best way to show you how the ratio works is by providing some examples:
If the ratio is 1:1, there is no compression at all.
If the ratio is 2:1, for every 2 dB of sound that exceeds the threshold, you get 1 dB of output above the threshold. So, if the signal goes over the threshold by 10 dB, the compressor reduces this signal so it’s now 5 dB over the set threshold.
If the ratio increases to 8:1, for every 8 dB of sound over the threshold, you get 1 dB of output above the threshold. So, if the signal goes over the threshold by 16 dB, the compressor reduces this so that only 2 dB goes over the set threshold.
Attack
This is the time it takes for the compressor to engage once the input sound exceeds the threshold level. It’s typically measured in milliseconds (ms).
Release
This is the time it takes for the compressor to let the signal return to normal once it falls below the threshold level. This is also usually measured in ms.
Output Gain (Makeup Gain)
When the audio signal is compressed, its overall level is reduced. Increasing the output gain raises the level coming out of the compressor, making it easier to match the volume with the rest of the tracks in your mix.
Knee
Soft-knee compression offers a gentler transition for the sound as it passes through the audio compressor, providing a smoother change from uncompressed to compressed sound. Hard-knee compression, on the other hand, results in a quicker and more noticeable effect.
Using Compression on Vocals During Recording
When you’re in the process of recording, don’t hesitate to apply some compression right from the start. It’s important to take a cautious approach with vocal compression during recording—just enough to control your dynamic range and shape your sound, but subtle enough that you’re not significantly affecting the quality of your recording.
Remember, you can always add more compression later, but removing compression from a recorded signal is extremely difficult and often doesn’t yield the results you might expect.
While recording, a light amount of compression can reveal aspects of your vocal performance that might otherwise go unnoticed. With a very gentle application, things like breaths become more pronounced with vocal compression.
Consonants start to have a bit more bite. Your vocal becomes closer and more intimate, especially with a vocalist positioned closely to the microphone, where the microphone’s proximity effect is in full effect.

Using a low compression ratio (2:1), a fast attack time, and a gradual release time can help a compressor catch peaks and sustain them, bringing extra life to your vocals.
Set your input so that the needle on your compressor barely moves—just a few dB of gain reduction is all you need for tracking.
Compressing Vocals Starting Point
Some recording engineers believe compression is essential for vocals. It evens out the often-erratic levels a singer can produce and tames transients that may cause digital distortion. You can use compression on vocals to even out the performance and create an effect.
If you use a compressor to even out a vocal performance, you don’t want to hear the compressor working. Instead, you just want to catch the occasional extremely loud transient that might cause clipping. A vocal compressor works like a charm for this.
The compression setting features a quick attack time to catch stray transients, a fast release time so the compression doesn’t color the singer’s sound, and a low ratio so that when the compressor activates, it smooths out the vocals without squashing them.
Typical vocal compression settings might look like this:
- Threshold: –8dB
- Ratio: 1.5:1–2:1
- Attack: <1 ms
- Release: About 40 ms
- Gain: Adjust so that the output level matches the input level. You don’t need much added gain.
If you want to use a compressor that pumps and breathes—one that you can actually hear working—or if you want to bring the vocals to the forefront of the mix, try using the following settings.
These vocal compression settings make the vocals “in your face,” as recording engineers say:
- Threshold: –2dB
- Ratio: 4:1–6:1
- Attack: <1 ms
- Release: About 40 ms
- Gain: Adjust so that the output level matches the input level. You might need to add a good amount of gain in this setting.
As you can see, the two parameters you modify the most are the threshold and ratio. Experiment with these settings and compare the results by toggling between the affected and unaffected sound (use the Bypass switch on your compressor).

Backup Vocals
If you’re wondering about compressor settings for backup vocals, try a setting that’s somewhere between subtle compression and more noticeable pumping and breathing effects. This approach will slightly bring your background vocals forward. Your settings could look like this:
- Threshold: –4dB
- Ratio: 2:1–3:1
- Attack: <1 ms
- Release Time: Around 40 ms
- Gain: Adjust so that the output level matches the input level. Be careful not to add too much gain.

Compressing Vocal Effects
Many reverb and delay effects offer some level of tonal management through high-pass and low-pass filters, but it’s much less common to find any built-in compression. It’s reasonable to assume that a compressed vocal going into these effects will emerge sounding fairly controlled dynamically; however, there’s nothing stopping you from using another compressor if it doesn’t.
For the final stage of compression, many professionals use a vocal bus to combine their vocals with their effects, merging all vocal components into a single, manageable fader.
Don’t hesitate to add a compressor below your vocal effects. Compressing your reverb and/or delay is a common practice to make them more noticeable. As mentioned, if your time-based effects don’t have a built-in compressor, use FX/AUX channels for the effects, where you can add some compression and even more processing after that.

Keep Your Genre In Mind
Each genre has a unique feel and perspective, so you’ll need to figure out which genre you’re aiming for. Here’s a breakdown of the genres with some basic guidelines:
- Pop/R&B/EDM: Heavy processing is preferred. Highlight the high-end of the vocals, keep the dynamics consistent, and feel free to get creative with effects.
- Hip Hop: You need lots of presence and fewer effects. Try to reduce the top-end while boosting the upper-mid frequencies. The dynamics should be tight for the vocals to have more consistent sound levels.
- Rock: Aim for a fuller sound with less top-end and more high-mids. The vocals don’t need to be so prominent in the mix. A medium balance in consistency should be suitable for this genre.
- Jazz: Think “less is more” when compressing. Use minimal processing—keep it subtle.
- Heavy Metal: You’ll want to use compression generously to make the vocals sound upfront and powerful. Also, boost the high-mids and reduce the low-end.

De-essing
De-essing primarily involves reducing mouth sounds like “s,” “z,” and “sh.” Even if you have a pop filter (which you should), some of these sounds might still come through.
That’s where de-essing becomes useful. Find a good de-esser plugin and select an appropriate preset. Then adjust it until it sounds right to you. One thing to keep in mind is that if you apply too much de-essing, your vocals might sound like the singer has a lisp.
Vocal Compression Mistakes
Relying solely on compression to fix vocals
The human voice is naturally dynamic and inconsistent, depending on everything from which vowel is being sung to where a word falls within the singer’s vocal range. Our goal is to take a great, natural performance and make it dynamically consistent while retaining character and life.
Using just one compressor to achieve this will most likely lead to over-compression. Instead, before adding a compression plugin to the channel, apply some gain automation manually. Gain automation involves increasing or decreasing the level of the raw vocal file (not volume automation—volume automation would adjust levels for the entire track after the signal has passed through your effects chain).
This creates consistency within the performance before any plugins affect the signal.
Applying Compression to the Channel
To keep your vocals prominent in the mix for each phrase, use parallel compression. Place a heavy compressor on a return track and send your vocal signal through that channel. On the return channel, ensure each phrase is at nearly the same volume.
When soloed, it might not sound right, but this is intended to be just a layer in your vocal mix. Set the return track to 0 dB and increase until your vocal starts to become louder. Leave the volume there or reduce it; remember, this is meant to be just a layer.
Using Super Fast Attack Time
Squashing the transients with a fast attack time will push your vocal further back into the mix. Typically, an attack time above 2ms should allow the transients to cut through. However, if you notice your vocals sounding squashed, try adjusting your compressor’s attack times. The “squashed” effect can be useful for backup vocals and helps to distinguish them from your lead vocals.
Vocal Compressor: Parallel Compression
A great way to enhance the richness of a vocal is by using a technique called parallel compression. This technique allows you to maintain the natural dynamic quality of the original vocal while blending in a heavily compressed version of the same vocal with it.
To achieve this, you can either duplicate the track or “Send” a copy of it to another AUX track. The final outcome is distinctly different from just using the original signal alone. It’s an effective method to give your vocal a boost.
Additionally, you can add interesting effects to this heavily compressed track that you wouldn’t apply to the original. I often compress the second track extensively and sometimes add distortion or other effects. I experiment with different sounds.
As you notice the differences, you’ll be able to make informed decisions about what works best for your vocal. Despite these adjustments, the vocal will still sound natural with these configurations.
Using Makeup Gain to Match Gain
When you increase the ratio, you will also increase the gain reduction, and vice versa. This is useful but something you should be aware of since you’ll add that average amount of gain back using the makeup gain.
As you reduce the volume of the peaks, your track will generally be perceived as louder, but only after you add back the lost gain reduction. Loudness is perceived based on the RMS (root mean square) value of the vocals, which is a form of average. By compressing, you’re increasing this average, but you’re also lowering the overall volume.
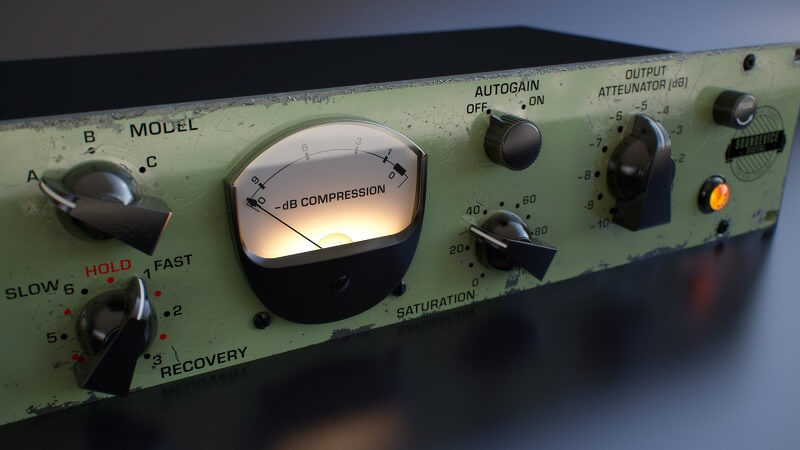
So, loop a representative part of your vocals and check the gain reduction meter. If it’s bouncing around -6 dB, then add +6 dB back using the makeup gain knob. Gain and volume are not the same (learn about gain vs. volume here), but you can think of it as adding back the amount you’re losing.
You should be able to watch an input gain meter and compare it to your output gain meter as well, instead of merely adding back the typical gain reduction. It doesn’t matter; either way, you can simply use your ears. The goal is to push the volume back up in the mix to acceptable levels.
Conclusion
A compressor is an important tool in your studio. However, before you use one, it’s crucial to understand the names of the various controls, how they work, and how they interact with each other.
Once you have this understanding, using an audio compressor in your studio becomes much easier and can lead to both technical and creative uses of this essential piece of equipment. It is also easy to overuse your compressor, so tread carefully with this tool. It can easily ruin your recording and leave you confused.
If you’re unsure of what you’re doing, it is best to compare your signal with a compressed one, just to know how hard you can push. Also, try to go for some softer settings, where you cannot ruin your signal. This is why we use parallel compression and do it in parallel with the original signal.
Compression pulls down the level of the loudest parts and brings up the quiet sections of the vocal or any other signal.

