21 Beginner Mixing Mistakes
Introduction
Before you sign with a record label, you’re on your own when it comes to finalizing your music. Because studio time and professional mixing engineers can be expensive, many producers start out by mixing their own tracks. To be honest, mixing is an art that’s tough to master. However, there are plenty of helpful tips to guide you, as well as common mistakes you should try to avoid.
For musicians, learning notes, chords, and scales are the first steps. For engineers learning to mix, there’s a similar set of skills you need to develop. Beginning engineers often need to overcome obstacles unique to mixing. Experience is the best way to handle many of the issues listed below, but this list will cover some of the most common mistakes that many engineers will face at some point in their careers.
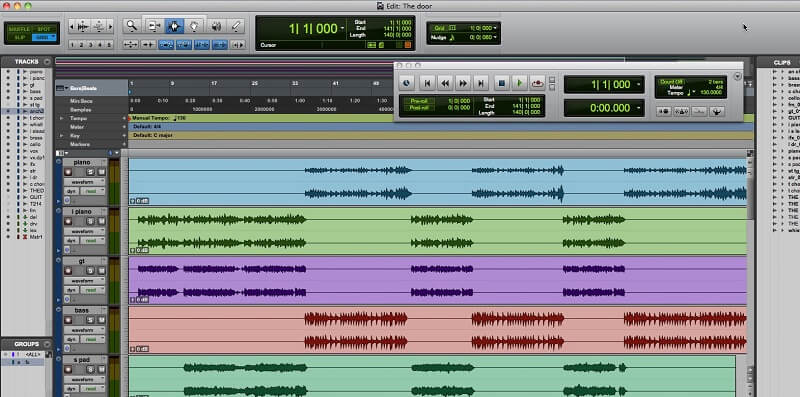
Audio mixing is the process of blending multiple layers of audio to create one final track. The mixdown process ensures that all the elements in the music sound good together.
Mixing involves balancing levels, panning sounds, equalizing, compressing, enhancing harmonics, fixing issues, and adding various effects. It also includes automation, creatively editing sounds, and giving each instrument its own space in the mix. The goal is to shape a balanced and unified arrangement that’s ready for mastering.
Here are some common mistakes that any mixing engineer might make. Take a look to see if you’re making any of these errors, and learn how to avoid them.
1. Not paying attention to gain-staging
You might think that in today’s world of floating-point algorithms, traditional gain staging would be a thing of the past. However, many plug-ins—especially those that emulate analog gear—still react to signal levels just like the hardware they’re modeled after.
If you use analog hardware or emulations on an aux track, cranking up the level of the instruments feeding that aux can push the sound into unwanted distortion. This can become a real issue, especially in large sessions where you have to manage the levels of many different tracks moving at once.
Also, if you don’t pay attention to proper gain structure, you can box yourself in. What do we mean by that? Whether you’re mixing live, working from a producer’s session, or using an analog console for recording, these professional tasks become much harder if your workflow doesn’t support good, analog-style gain staging—something many systems and formats still require.
2. Not Enough Headroom
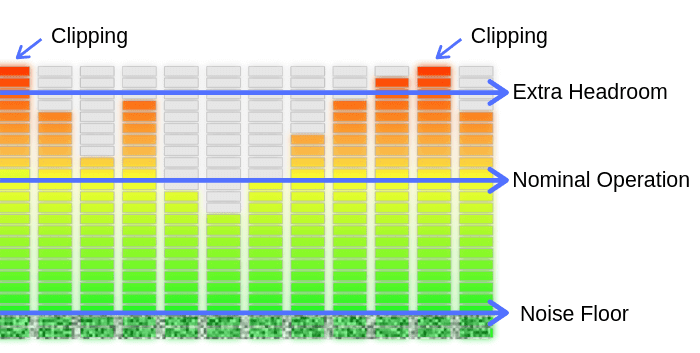
Managing your levels at every stage throughout the signal chain is important. Gain staging ensures your audio signal stays at an optimal level as it passes through different processors and mixer channels. No track should be clipping! Also, check your master level to make sure your mix has enough headroom for mixing or mastering.
Check the volume levels of your tracks. Keeping optimal levels prevents overloading the master channel. For best results, keep the master volume fader at ‘unity,’ which is 0 dB. Also, try to maintain the master level around -3 to -6 dB when mixing. These average levels ensure you have enough headroom for the mastering process.
3. Mixing Proactively, Not Reactively
A common misunderstanding is that mixing is just something you have to do because it’s a standard part of music production. This leads less experienced producers to pile on effects without really understanding why, making things messy and not carefully thought out or listened to.
Here’s what mixing actually is: you mix because you want to fix things and keep improving the sound based on what you hear. Mixing shouldn’t be done proactively, but reactively. Listen to your mix, pay attention to how it sounds, and then make changes to get it sounding the way you want.
4. Mix At Low Volumes
When we mix at loud volumes, everything seems to sound better. That’s an unavoidable truth of psychoacoustics: the bass feels punchier, the vocals stand out more, the stereo image seems wider, and the whole mix feels more “in your face.” But what happens when the volume drops—when your mix leaves the studio and heads out into the real world? Mixing loudly often tricks us into thinking the mix is better than it actually is.
Listening to your mix at lower volumes helps you spot volume imbalances and dynamic issues more easily. Loud volumes also boost the high frequencies, which can fool you into thinking your hi-hats or acoustic guitars need more treble cutting than they actually do. The result? A mix that sounds hollow and lacks air and presence.
5. Mixing in Solo
Clicking the solo button and mixing tracks in isolation isn’t the best approach for making mixing decisions. This habit can be hard to break because it’s easier to focus on a sound when you hear it by itself. However, a track that sounds great on its own might not work as well when all the tracks are playing together.
Mixing in solo mode makes you focus on making a single track sound amazing by itself, instead of making it fit well in the overall mix. The goal is to make all the tracks sound good together. So, try to make your mixing choices while all the layers are playing at the same time. If it’s hard to hear the part you’re working on, turn up its fader until it sounds right, then rebalance the levels after you’ve finished processing.
6. Not Checking The Mix in Mono
Checking your mix in mono is important. Listening to your mix in mono helps you identify issues with the stereo image, phase problems, volume balance, clarity, and more. Mixing in mono also ensures your song sounds good on mono speaker systems.
To check your mix in mono, place a mono utility plugin on the master at the end of your effects chain. Play back the mix and switch between mono and stereo to spot any mix problems.
7. Not checking Phase Relationships
It’s essential to check the phase relationships of the instruments in your mixes, especially if you’ve used multiple microphones to capture the sounds. If you have phase cancellation issues, certain frequencies will disappear, making your mix sound unbalanced. To check the phase for each instrument, you can use phase correlation plugins.
These plugins help you determine if there are any phase problems. Another issue to watch out for is that if you have phase issues, your sounds might disappear when your music is played in mono. To avoid guessing, use phase correlation plugins along with phase alignment plugins, because doing all of this manually can be tedious and easy to miss. However, a well-trained ear can detect these problems easily. After fixing the phase, your sounds should be thicker and fuller.
8. Test Your Mix On Multiple Systems
When you’re mixing in the studio, you probably use a pair of studio monitors or headphones. These are great for giving you a ‘clear’ version of your mix, but they are very different from regular loudspeakers and consumer headphones. Consumer gear is designed to boost and enhance certain frequencies, while studio monitors try to keep all frequencies as flat and accurate as possible.
The room you mix in also affects how you hear the sound. Rooms without acoustic treatment can cause problems with the low end. Bass frequencies can get trapped or linger in the room, making them sound much louder than they really are. As a result, you might end up cutting too much bass when mixing in this kind of environment, only to find your mix sounds thin when you listen on other systems.
9. Not Fixing and Compiling your Tracks
Mixing becomes much simpler when you’re working with tracks that already sound good. Part of achieving this is getting the sounds right at the source, but it’s just as important to edit your tracks carefully. This means improving both the groove and removing any unnecessary noise. Noisy tracks can cause problems when you add compression, and poor timing can ruin the feel and enjoyment of the music.
Also, if you’ve recorded multiple takes, make sure to spend time comping together the best parts from each one. For example, if the vocal emotion in verse one is best in Take #1, and the chorus feels tighter in Take #3, combine these takes to take your song to the next level.
10. Ignoring Automation
Automation is here to stay, and we fully believe in its power. Take vocals, for example—there’s usually a big jump in volume during the chorus. If we want the overall level to stay consistent, our first thought might be to throw on a compressor. But using a compressor alone can end up squashing the life out of those loud parts, leaving us with a really compressed-sounding chorus and a pretty dry verse.
As a general rule, broad volume changes are best handled with automation. If the chorus is 6dB louder than the rest of the song, just bring it down a bit so it’s only slightly louder.
This way, the compressor can work more gently, just smoothing out the dynamics. For quick volume spikes like plosives, there’s no need to automate them (unless they’re really terrible), since they’re so fast that a compressor won’t make much of a difference.
Also, remember that the tone of someone belting out a note is very different from someone singing softly. Our brains pick up on those tonal changes and recognize that they’re singing louder. If you compress all the dynamics out, it stops sounding like a real voice, and it won’t do your song any favors.
11. Panning Everything Centrally
With the wide stereo image and deep sound of most modern synth plug-ins, it’s easy to overlook the pan control entirely. But if you keep everything panned to the center, your mix won’t benefit—sounds that should be centered, like kick drums, basslines, and lead vocals, will have to fight for space with every other element in the mix.
Mixing on headphones makes this problem even worse, since panning changes can feel much more jarring without the natural blending you get when mixing on speakers.
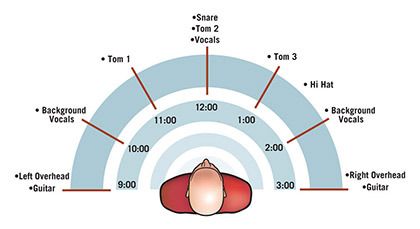
12. Lack of panning
Many people overlook this incredible feature: music is stereo! And you should take advantage of it. It’s important to pan your instruments and use the entire stereo field. You’ll get much better clarity, even with imperfect panning, compared to not panning at all. But how should you pan your channels? Certain elements—like the main vocal, kick, snare, and bass—should usually stay centered.
Other elements can and should be panned. Don’t be afraid to pan your backing vocals, secondary guitars, synths, and effects. Whenever possible, record your instruments in stereo (especially main guitars) to keep them from overlapping with the vocal tracks. Keeping the center less crowded allows your ears to hear each individual instrument more clearly.
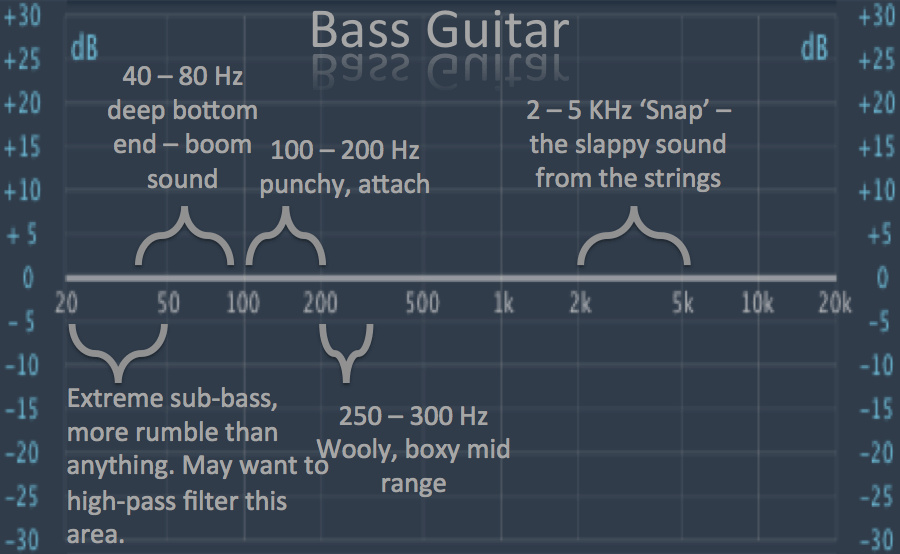
13. Too Many Low-End Sounds
Frequencies in the low end and low mids have long, large wavelengths, which makes them naturally thick, heavy, and demanding—both to listen to and to reproduce with sound systems. When you start combining low sounds in a mix, they can be hard to manage and keep under control so they sit well together. It’s very easy for a mix to become muddy if there’s too much low bass and too many low-mid sounds.
Here are two good tips: First, keep things simple in the low end, especially when you’re composing. Use just one or two bass elements to define your chords and give your music depth—don’t overdo it.
Second, use a high-pass filter to remove unnecessary low-frequency rumble from tracks that don’t need it. For example, violins are naturally high-pitched instruments, so if you hear any low-end rumble that doesn’t help the overall sound, just cut it out. Pay attention and see if it sounds cleaner.
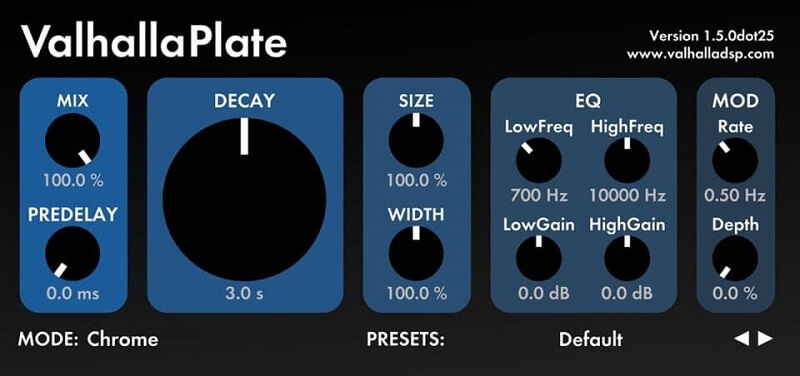
14. Be Cautious with Reverbs on the Bass End
Reverb is an essential mixing tool, but while it can work wonders for some sounds in your mix, it can also turn others into a muddy mess. This is especially true for sounds with lots of bass—like kicks, basslines, and the lowest notes in pad sounds. Instead of adding punch and power, reverb can actually make your mix lose focus if you’re not careful.
If you’re set on adding reverb to these types of sounds, try placing an EQ after your reverb and drastically cutting frequencies below 200Hz from the reverb signal. This will help keep the low end clean and prevent it from becoming overwhelming.
15. Too much reverb
Listening to an instrument in a room isn’t something we usually think about. The human ear blends the sound of the instrument with the acoustics of the space it’s played in, which helps us figure out where the sound is coming from and roughly how far away it is. This is how we naturally hear things, and it’s also how we expect things to sound.
With reverb, we can mix the direct sounds with plugins or hardware to give the listener the effect of hearing an instrument in a real space. There are tons of options available, which means there are many ways to make your tracks sound more natural. However, too much of a good thing can be a problem.
As great as reverb is for bringing a mix to life, it’s often overused by engineers who are new to mixing. Depending on the kind of space you want your instruments to sound like they’re in, you might end up with washed-out mixes if you don’t control what you’re affecting.
16. Making Huge Cuts or Boosts with EQ
Unless you’re making corrective or subtractive adjustments, you should use extreme caution when applying EQ cuts or boosts greater than 5dB. If you go above 6-7dB, it’s a good idea to make an additional boost or cut elsewhere. This isn’t necessarily to compensate for the large adjustment, but rather to help keep things balanced.
As always, this isn’t true for every piece of source material, but it’s a helpful rule of thumb for most situations. If you do find yourself making big EQ changes, make sure to get the most out of it by adjusting the Q (bandwidth). Narrowing the Q can help you really hone in on a specific area. A tight or narrow boost is more effective when you want to target a particular frequency, rather than using a wide Q setting.
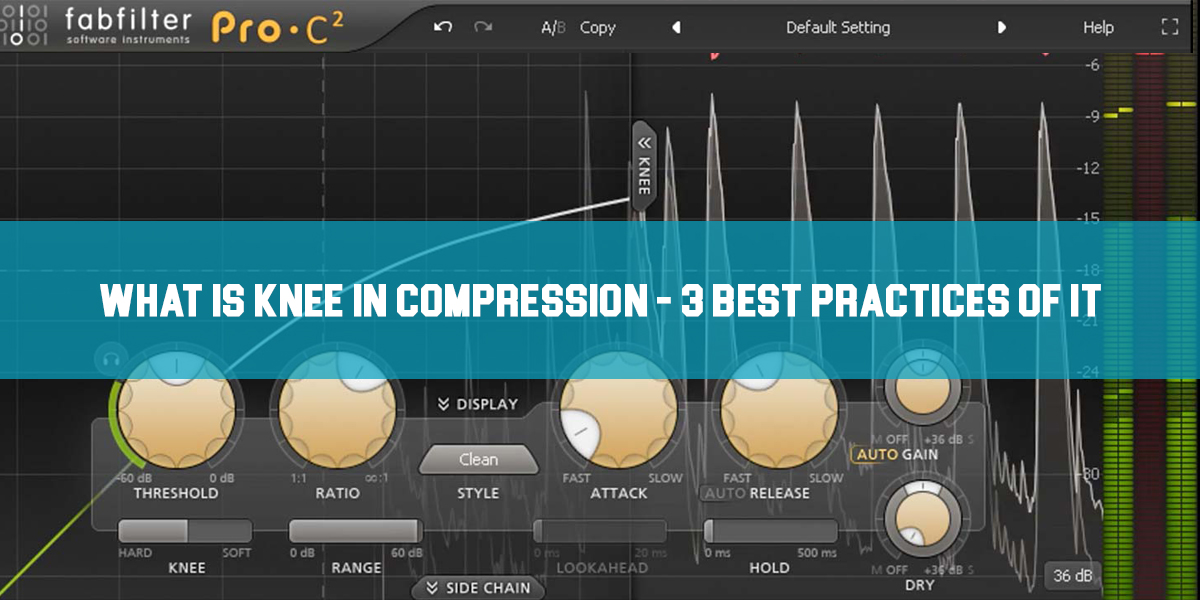
17. Using The Wrong Type Of Compression
The term “keyboard” can refer to a huge variety of sounds, from pianos to ambient synths. Each one can have very different characteristics when it comes to the EQ spectrum. For example, some synth sounds—because they use waveforms to create signals—can have a much “bigger” presence in the lower register compared to the middle and upper ranges.
This means that using a single-band compressor on a synth track might control the mids well, but leave the bass end too heavy and overwhelming. On the other hand, if you compress the bass just right, you might end up making the mid-range sound dull. A multiband compressor solves this by letting you control exactly which parts of the frequency range get compressed, and by how much. If the keyboard sound is simpler, such as just a lead line, a single-band compressor is usually enough.

18. Lack of Clarity
Even the best mixes can sometimes have a bit of muddiness in the low frequencies. This usually comes from issues with the monitoring system or the acoustics of the mixing room, but these are simple problems to fix during premastering.
A lack of clarity, on the other hand, is a completely different challenge. Clarity in a mix comes from contrast. The best way to avoid a lack of clarity is to reference music you know well while mixing. Find a solid foundation for managing tonal contrast in your mixes, and keep checking back as you work.
Another way to make sure your mixes have enough contrast and focus is to turn off some of those compressors. This leads us to the topic of distortion.
19. Too Much Clarity
Let’s dive into some music mixing tips! It’s always tempting to make your audio sound bright during mixing. Boosting the high frequencies can add a nice sheen to your production and make your music feel “big.”
But keep in mind, human ears are especially sensitive to frequencies between 2kHz and 5kHz. It’s easy to overload this range with EQ and extra energy to make certain parts stand out or seem more present. The risk is that your highs can end up overloaded with EQ, too much power, and excessive bite—turning everything into one harsh, spiky wall of sound.

20. A Mix is Not a Master
Output channel processors designed to boost loudness and ‘master’ your mix can be great tools, but be careful not to use them too early in the mixing process. Here’s the thing—if you mix a track with a Loudness Maximizer turned on and then bypass it when your mix is finished, you’ll probably notice that the mix doesn’t sound ‘right.’
The dynamic processing that these plugins apply can throw off the balance of your mix, making it rely on the processor to sound good. So, if you create mix stems or remove your processor before sending your track off for professional mastering, you might end up disappointed with how it sounds.
21. Not Taking Breaks
It’s hard to overstate just how important it is to give your ears a break. If you don’t, you’ll likely end up with an unbalanced mix. Why does this happen? When your ears are exposed to a full range of frequencies for long stretches—even at low volumes—they start to lose their natural sensitivity.
This desensitization mainly affects the mid-high frequency ranges, which is why you’ve probably experienced false perceptions before. In other words, what you thought sounded perfect at first can end up sounding very different the next day, or even later the same day, after your ears have had time to ‘readjust’.
Conclusion
We’ve gathered a list of some of the most common mistakes people make in the world of audio mixing. Of course, there are plenty more out there, but we chose these because they tend to get overlooked.
If you know of any other common audio mixing mistakes that beginners often make and aren’t mentioned here, please let us know in the comments. We’ll put together another list to share with everyone!