What Is Audio Limiter
Introduction
The simplest way to explain a limiter is that it’s a device that stops any audio—whether it’s digital or an electrical signal—from going above a certain volume. While it can work at any volume level, it’s mainly used at the highest allowed amplitude to prevent “peaking,” which is when the sound gets too loud and distorts.
Before we go any further, here’s what we’re going to do. First, we’ll define what an audio limiter is. Then, we’ll talk about its sibling, the compressor. After that, I’ll explain when you should use a limiter and how to actually do it.
By the end, you’ll know everything you need to about limiters—plus a little extra—without too much technical jargon or complicated language.
What’s the limiter and what it does to the audio signal?
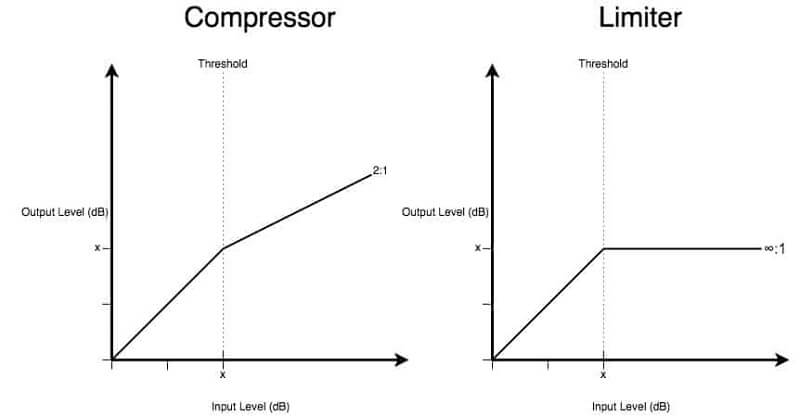
Simply put, a limiter is a type of compressor, and many standard compressors can also function as limiters. Limiting is a stricter form of compression that doesn’t allow the audio to go beyond the threshold. Because of this, limiters let us push the volume without causing clipping. They’re usually the final stage in the mastering chain, setting the final level and making sure there aren’t any stray peaks or spikes eating up your headroom.
This is different from a regular compressor, which will let audio go past the threshold depending on the ratio. With a limiter, however, the ratio is set to a very high value, such as 8:1 or higher. Limiters usually have fast attack and release times to keep things sounding clean, avoiding the “pumping” artifacts that can come with regular compression.
The strict way limiters compress audio has led to the term “brick wall limiting.” This refers to the limiter’s ability to stop the signal abruptly, as well as the look of the compressed waveform, which resembles a wall.
As you might expect, not all limiters are the same. Some are made specifically for mastering, some work better on drums, and some are valued for their unique tone rather than their accuracy in compressing audio.
So, picking the right one for you can be a bit of a challenge. While it’s usually a good idea to try a few out first, that isn’t always possible with expensive software, and the demos might not help you make a decision anyway. Plus, with so many choices available, it’s tough to know where to begin.
Types of Limiters
Compressor-limiters:
Limiters are basically compressors set to very aggressive settings. With ratios above 20:1, they let only a tiny portion of the audio signal go past the threshold. These limiters may or may not have a look-ahead feature, and if they don’t, you might notice some slight distortion or color in the sound when trying to limit loud transients. You can use these limiters on instrument groups like drums and percussion to make them sound bigger.
Brickwall limiters:
Brickwall limiters have a fixed ratio of infinity:1. This means that absolutely nothing gets past the threshold (except in cases of inter-sample clipping, for which peak limiters are used). Almost all brickwall limiters include a look-ahead parameter. This makes sure that the gain reduction is perfectly timed to the millisecond. These limiters are typically used as the final step in most mastering chains.
Clipping limiters:
Both regular and brickwall limiters work by reducing gain. It’s like quickly turning the volume knob down and back up, just fast enough to keep the signal under the threshold. This happens so quickly that we usually don’t even notice it. If the attack and release times aren’t set just right, you might hear some pumping artifacts between transients due to the rapid gain changes.
Clipping limiters make things simpler. Instead of quickly dropping and raising the gain, these limiters just chop off the tops of transients or anything that’s too loud. This is basically clipping the audio for a very short time. Because this happens within milliseconds, we hear it as harmonic distortion. In many styles of music, this can be desirable because it makes transients brighter and keeps the punch in the sound. However, the downside is that it might not result in the cleanest sound.
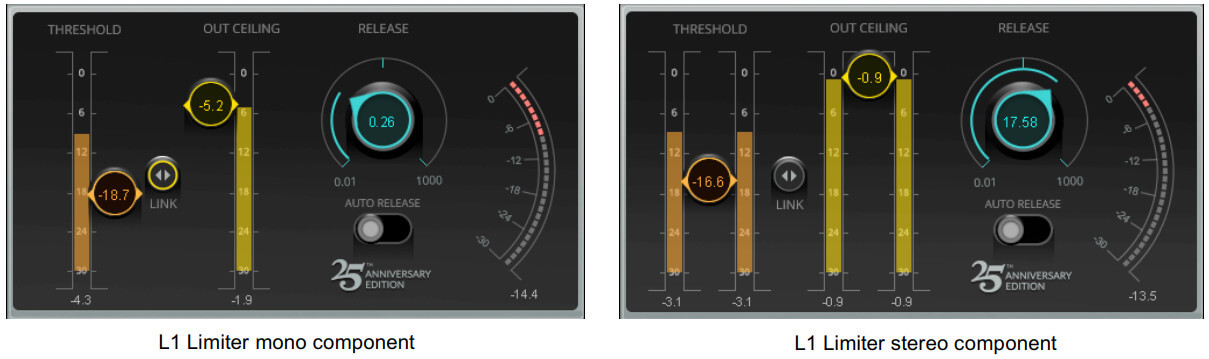
Limiter Parameters
- Threshold / Ceiling – This is the main “level” that limits your signal. The signal won’t go above this point.
- Input Gain – This increases the signal before it reaches the threshold. You’ll usually only find this control on limiters that have a fixed threshold.
- Output / Make-up Gain – This adds volume after the limiting process. Some limiters apply gain compensation automatically, so the overall volume increases as you lower the threshold.
- Attack / Release – These control how quickly the limiter responds to changes in the signal. For limiting, you usually want very fast attack and release times. Many limiters keep these settings fixed “behind the scenes,” so you might not always see these controls.
- Ratio – You almost never see this on a limiter because the ratio is usually set very high and can’t be changed. However, if you’re using a regular compressor as a limiter, set the ratio to at least 8:1.
Limiting in Mixing
Usually, limiters are used sparingly during recording and mixing, since compressors are typically relied on to control an audio signal’s dynamics. However, limiters can serve as ‘safety’ devices in your signal chain, as mentioned earlier, to prevent the audio from clipping or distorting.
For example, if you’re recording a vocalist with a wide dynamic range (the difference between the quietest and loudest parts), it can be tricky to set the right recording level on the mixing desk or the microphone’s preamp.
In this case, you might insert a limiter after the mic’s preamp to catch only the very loudest moments, just before the signal goes into the red and distorts. Still, this method should be used only as a last resort.
You should first try to get a better recording level at the source—either by turning down the gain on the desk or preamp, switching to a different microphone, or working with the singer on their microphone technique (for example, moving away from the mic when singing loudly and getting closer when singing softly).
If you’ve already used a compressor on a track during recording or mixing, and you still notice a few signal peaks slipping through, you can add a limiter after the compressor to catch those peaks. This is another way to control the audio and ensure nothing peaks or distorts in the recording.
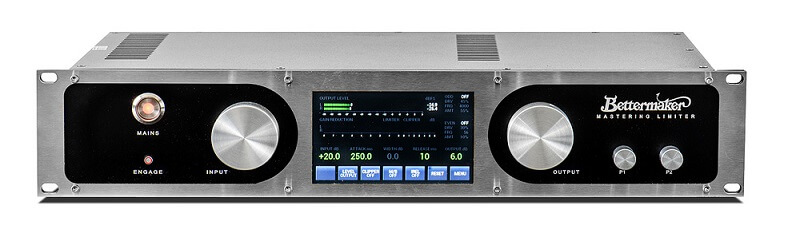
Limiting in Mastering
An audio limiter is mostly used during the mastering stage of a record, where it serves as the final processing tool for the entire mix. The ratio is set at infinite:1, meaning as soon as the signal reaches the set ceiling level, it cannot go any higher. This process is often called ‘brick wall limiting.’
A mastering engineer uses a limiter to boost the overall level of a finished track or album and squeeze out as much volume as possible. However, it’s important to note that the qualities of the sound are not affected—the only difference is the perceived loudness of the track being increased.
When to use limiting?
Final Level Adjustments before Exporting
That’s exactly what we discussed earlier—using a limiter as the final effect in your mastering chain to set a “ceiling” for your audio’s peak level. If you’re not adding any make-up or output gain, then the threshold itself becomes the ceiling.
It’s a good idea to set this ceiling to -1 dB, especially because when music is converted to MP3 or other lossy formats, clipping can happen during the conversion process.
Improve Loudness
This relates back to the earlier scenario, except loudness is a bit more complex than just volume or volume ranges. In fact, loudness is more about how consistent the volume is over time.
For example, a sound that is mostly quiet but has a sudden loud moment can’t really be called loud overall. On the other hand, a sound that stays loud the whole time is truly loud.
This gives you a clue about how limiters and dynamic range compression work. When we use a limiter, we’re not always making things louder. In fact, we’re often making things softer by making sure the volume never goes above a certain threshold.
Color and Character
That’s absolutely true for classic hardware limiters and analog-style VSTs, which add a bit of extra “mojo” to your sound. If that’s what you’re after, you don’t need to push the limiter too hard right away. These models usually add subtle harmonic enhancement and introduce a touch of saturation to achieve this effect.
Before making any judgments, balance the volume so that when you turn the limiter off, the audio is just as loud as it was with the limiter on. This will help you accurately hear how the tone is being colored. While this is a good rule for evaluating any effect, it’s especially important here since limiters can dramatically impact volume.
Conclusion on What is Audio Limiter
Without limiters, it can be really tough to get your music to sound balanced across different platforms and streaming services.
But limiters have a downside too—they can completely drain the dynamics from your audio, making it sound flat and lifeless. It might seem exciting when you’re doing it just because everything sounds loud, but that’s just a trick your ears are playing on you.
While limiters can make things sound loud in a good way, you need to be careful not to go overboard, or you’ll end up ruining your mix.