DIY Microphone Isolation Shield
Introduction
Very few people have the budget for a fully enclosed isolation booth with complete acoustic foam protection for vocal recording. Many of us don’t even have the space for a vocal booth in our home or condo. Luckily, there are plenty of low-cost and simple ways to create your own DIY vocal booth or portable vocal booth. This is one of the ideas we came up with.
First, make sure you have a high-quality microphone. The next easiest thing you can do is set up some kind of audio isolation barrier around your mic. We looked into what many podcast producers and vocal experts do and found some simple solutions.
We experimented with acoustic foam panels in our own home office and realized we could build a low-cost solution ourselves. Here’s what you’ll need to make your own DIY microphone isolation shield.
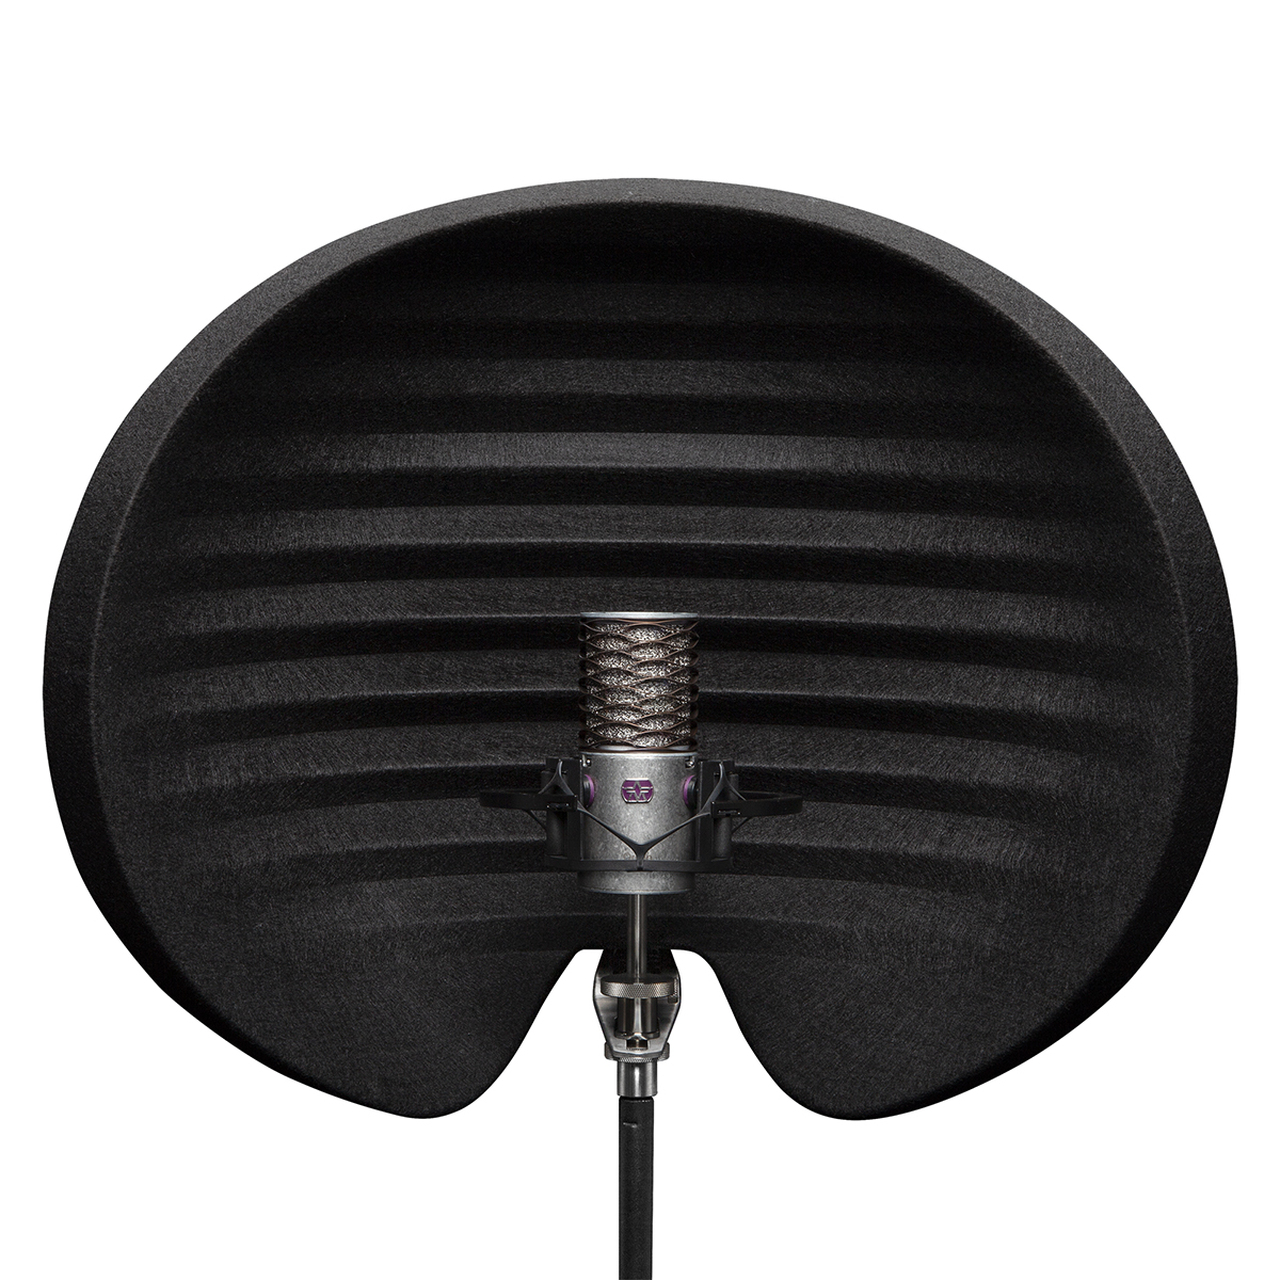
Short on time and need to buy a microphone isolation shield right away? Here are a couple of our top suggestions!
| For US Customers | For EU Customers | |||
|---|---|---|---|---|
 |
||||
 |
1. Materials
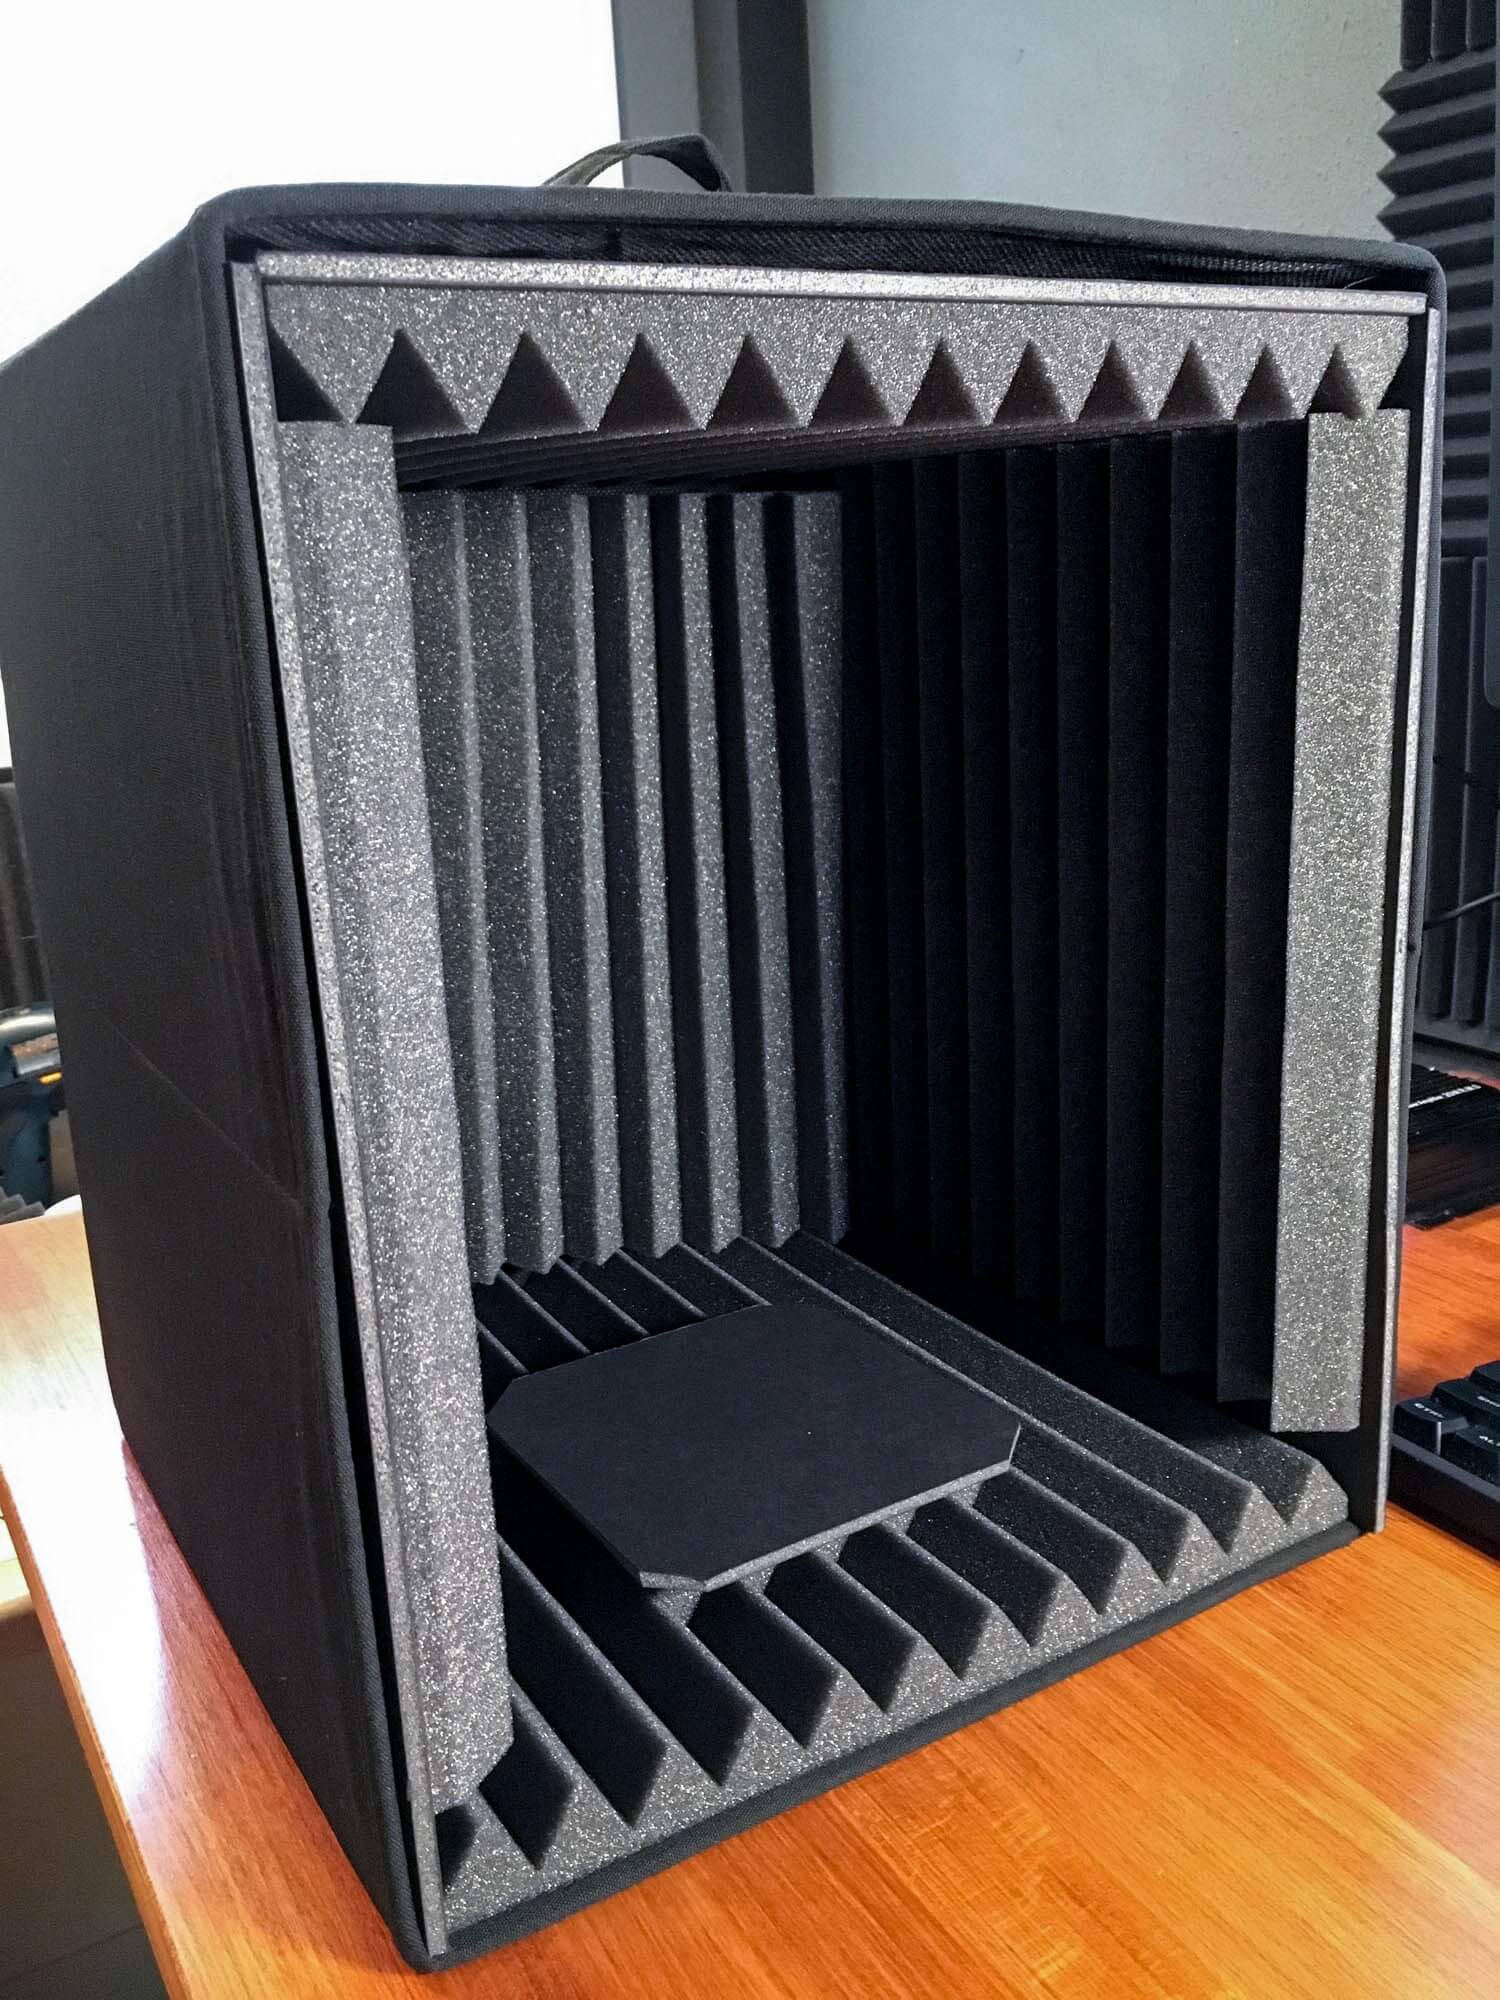
For professional results, you’ll want to use high-quality acoustic foam. You can find this at any music store; it’s the same kind of foam used on studio walls. Typically, they sell it in packs of two, with each piece measuring 12″x12″. This type of foam usually has ridges—often in a pyramid shape. The only downside is that when you bend the foam, those pyramid points can get squished together, eliminating the deeper gaps.
If you want to curve the foam, you can simply cut off the tips of the pyramid points. Cut them low enough so that when you bend the foam, the gaps don’t close up completely. If this approach works for your needs, it’s the easiest option. Alternatively, you can choose a different foam pattern that will keep those low points intact even after bending.
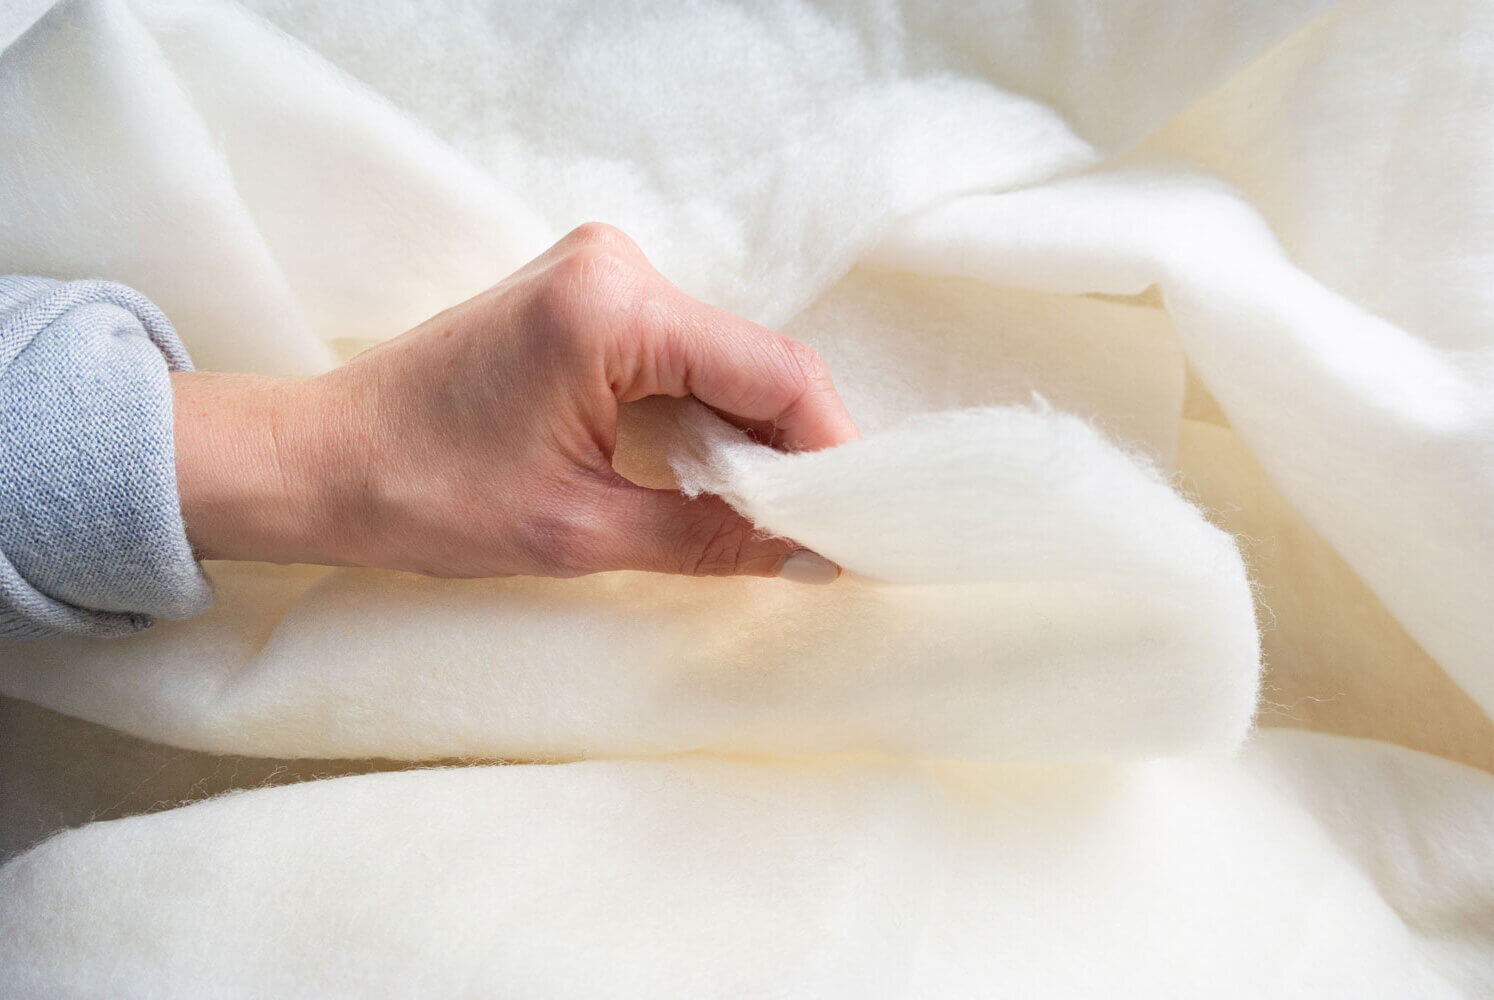
Another material you might consider is unrefined wool. It’s also great at absorbing sound and works well for projects like this. While it won’t look as “professional” as acoustic foam, it can still get the job done. In fact, for some DIY mic isolation shields, wool can actually be even more effective.
You can use a pre-made box made of lightweight but sturdy materials, or you can make your own using hard cardboard to hold the absorbing materials. Pressed wood is also an option for building the frame of your DIY mic shield. While this won’t be as effective as the Kaotica Eyeball, it will still do a good job and will help with your vocal or instrument recordings.
Next, you’ll need glue. We recommend spray adhesive since it’s much simpler to use. Choose a spray glue that works on metal, foam, and wood. If it doesn’t specifically say it’s for metal, skip it. Avoid using super glue or hot glue—spray adhesive will make this messy step much easier. If you can choose an easier option, even if it costs a little more, go for it.
You’ll also need some tools: a pointy knife that’s a few inches long (too long, and the blade’s weight will make cutting foam uneven); a box cutter with an adjustable blade that extends about an inch; a ruler; a sturdy, straight edge that’s long and wide; and a pair of scissors. Most of these tools you probably already have at home. If so, you’re ready for the next step in your DIY microphone isolation shield project.

2. Development & Assembly
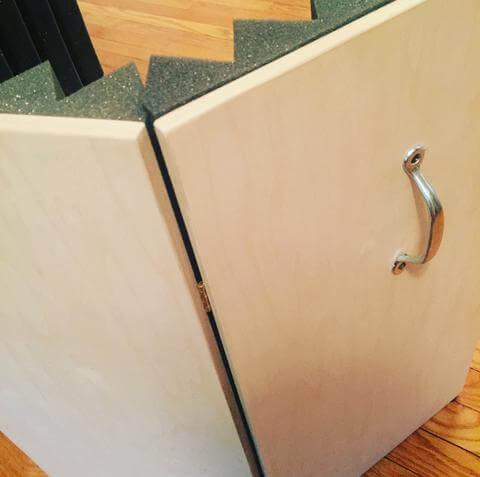
For our example, we’re going with a wood option. This is much more practical and sturdy if you don’t plan to move it around often. It won’t be very portable, though. If you want a DIY vocal isolation shield that’s easy to move, you should use lighter materials. But in our case, we’re building a DIY microphone isolation box that will stay in our home studio.
Here are the steps you can follow to put it together:
- Step 1: Sand the wood. Sand each piece of plywood so there are no rough surfaces or splinters.
- Step 2: Attach the hinges. Make sure the hinges fold inward. Mark the location with a sharpie, drill pilot holes with a small drill bit, and then attach the hinges with screws.
- Step 3: Mount the acoustic foam. Use adhesive squares, spray adhesive, or double-sided tape to stick the foam to the boards. Press firmly for at least thirty seconds so the adhesive bonds well with the acoustic foam.
- Step 4: Attach the handles. The handles we used needed two small screws each. We put our handles on the back of the two outer wood panels. Drill pilot holes with a small drill bit and attach the handles with screws.
- Step 5: Add non-slip grippers. Stick the non-slip grippers to the bottom of the unit. The ones we used were self-adhesive.
3. Extra stuff to plan
The microphone might have one or more cables coming out of the back. I cut a few threads along the seam and then covered them with some black duct tape to let a USB or other cable run out the back. If you can get it, gaffer tape is much better and will last longer. Ideally, spend a few minutes stitching some reinforced edges around the slit to keep the seam from tearing any further.
If you’re setting up on a tabletop, like in front of your laptop as we did, you can use a couple more pieces of foam. This helps create a mat for the mic and keeps it stable. It also prevents any reverb from bouncing off your desk.
Now all you need is a pop filter. There are several YouTube videos showing how to make cheap ones. Just grab a $2 embroidery hoop and stretch some pantyhose or nylon material across it.
Frequently Asked Questions
What does a microphone isolation shield do?
The perfect microphone isolation shields act like filters, reducing unwanted background noise. They also minimize sound-wave reflections, giving you a more balanced vocal recording. By isolating your microphone from its environment, the shield improves sound quality and helps prevent distortion.
DIY microphone isolation shields can make your home recording studio sound more professional. They’re a great first purchase if you haven’t set up a dedicated recording space yet but want to take your recordings to the next level.
Why use DIY Microphone Isolation Shield and does it work?
When recording sounds from a greater distance, isolating the microphone from unwanted noise is key to keeping your recordings clear. There are several ways to do this, depending on where the unwanted sound is coming from and how loud it is compared to your intended signal.
If the noise is just stray sound or background noise, the best solution is to eliminate it entirely. You can do this either at the source or by placing a barrier between the microphone and the unwanted noise. For example, the hum and buzz of air conditioning is a common issue. Because low-frequency sounds spread throughout the room, the best fix is often to turn off the AC while recording.
To keep the room from getting too hot and stuffy, you can run the AC between takes or whenever there’s a break in the session. This isn’t ideal, but it can work. A DIY mic shield is also a great tool to block stray noise and help you get the best possible recording.
What stand to make use of with a DIY microphone isolation shield?
The microphone isolation shield is a bit on the heavy side, weighing between 2 to 4 kilos. Because of this, you’ll want to make sure it has enough support. One of the simplest ways to help support the isolation shield is by mounting it on two heavy-duty tripod microphone stands. You can also use a twin clamp mounting bracket, which makes it easy to attach the shield to any stand.
We recommend choosing a stand that can handle extra weight, such as the Post Audio Heavy Duty Mic Stand. This stand is sturdy and capable of supporting the load of the shield. If you want, you can add some DIY reinforcement to the bottom of the stand for even more stability. However, these stands should be more than enough for the job.
Conclusion
When you use a microphone shield, you block one of the main paths that sound waves travel. This means you’ll have fewer reflections in your recording area. Of course, the only perfect solution is a fully acoustically treated room. But using a shield helps isolate vibrations and reduce unwanted reflections. Plus, for a relatively low cost, they can make a noticeable difference without requiring you to completely remodel your space.
From my experience, having a microphone isolation shield in your studio is essential for recording great audio. Whether you buy one or make your own DIY microphone isolation shield or reflection filter, it gives you more control over your sound. We hope our article on how to build your own DIY microphone isolation shield helps you save some money in the process.
Here’s another way to make your own DIY Microphone Isolation Box.