
What is Serial Compression?
Introduction
Imagine you want to add punch to an instrument while also ensuring it remains consistent throughout the entire song. As we’ve discussed in previous articles, a compressor is an excellent tool to achieve both of these qualities. However, achieving punch and consistency requires completely different settings.
So, what can you do? You can use two compressors, one after the other, each with appropriate settings. But be careful; it’s not as straightforward as it seems.
The first thing to consider is that the order of the compressors is crucial. For example, to achieve a punchy and consistent sound, the first compressor should be set to achieve consistency, and the second should be set for added punch.
Reversing the order can be counterproductive because the consistency settings of the first compressor can negate the punchy settings of the second. Therefore, you need to consider which order works best for you, depending on your desired outcome.
What is serial compression, and is it necessary for your project? Well, that largely depends on the sound you’re working on and whether it requires serial compression. This is a decision you must make after carefully analyzing the signal.
Always proceed with caution when making this decision, and use it only if you know how to do it correctly and set it up properly. If you’re unsure how to do it, here are several pointers that might be helpful for you.
What is Serial Compression?
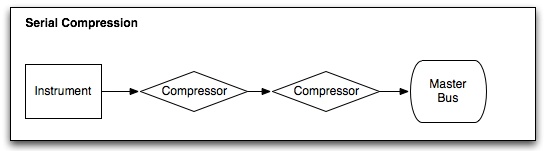
Serial compression involves using multiple compressors in a sequence, one after the other, to combine the best features and capabilities of two or more plugins. This method is great for mixing, as it allows you to achieve the most desirable sound characteristics.
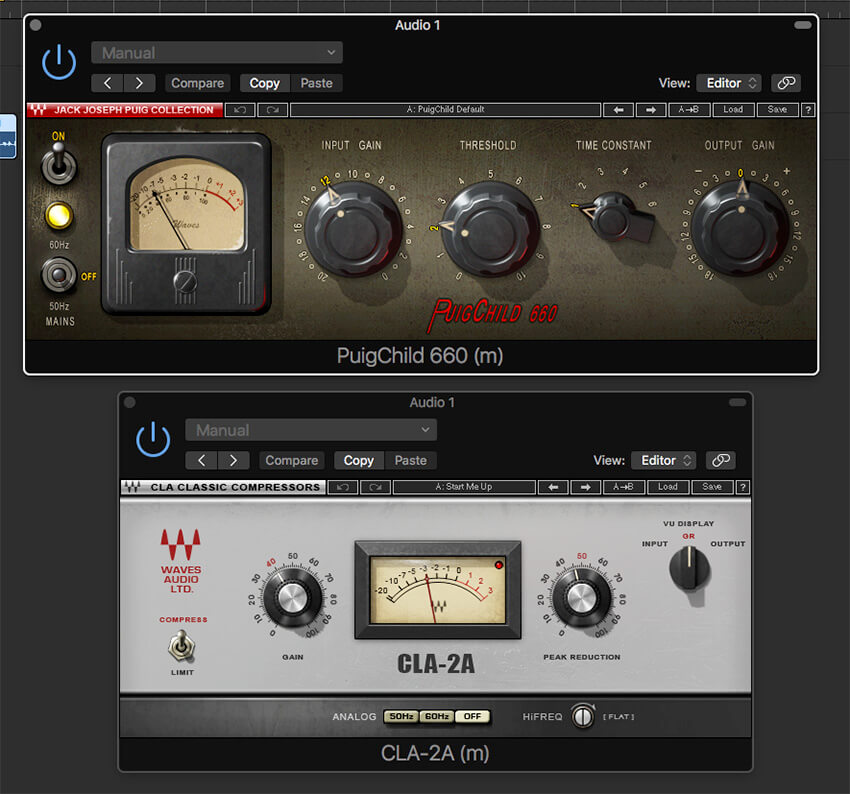
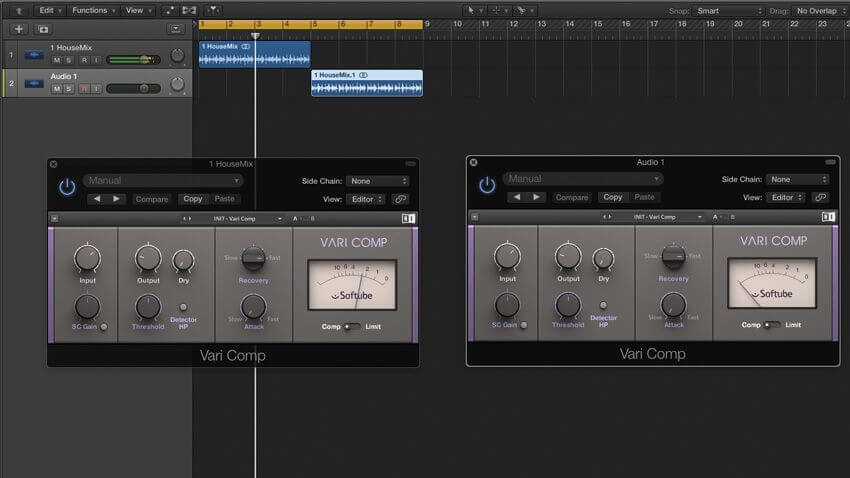
A practical example is pairing a slow-performing compressor, like Native Instruments’ Vari Comp, which is based on a classic valve design, with a more modern compressor such as an SSL clone or a digital compressor with lookahead capabilities.
By doing this, you can leverage the general leveling and vibe of the first compressor while benefiting from the precise peak control and clear sound of the second. This approach is excellent for replicating the feel of outboard gear within a digital environment, while still maintaining the accuracy that modern processors are known for.
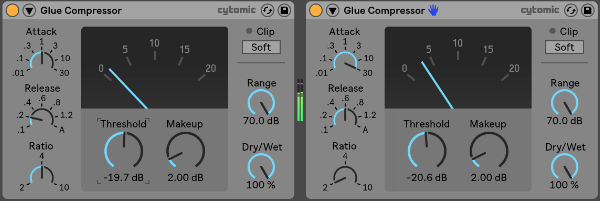
Using compressors in sequence also allows you to distribute the workload more evenly. Instead of having one compressor perform 4dB of gain reduction, you might use two compressors, each providing 2dB. This technique is particularly useful in mastering or precision mixing situations, where you want the audio to sound as if it hasn’t been processed at all.
Related Articles
- What is Knee in Compression: 3 Best Practices Of It!
- What is Parallel Compression? 7 Great Tips To Do It Right!
- How To Compress Bass Guitars: Great Guide For All!
- What Is Audio Expansion: Guide To Learn The Process!
The order in which different effects are positioned can make a significant difference to the outcomes. For instance, placing reverb before compression can create a ‘compressed room mics’ sound, whereas adding reverb after compression will result in a less ‘reactive’, studio-style sound since the reverb itself will not be compressed.
What about EQ? Boost the bass before compression to achieve a rhythmic pumping effect that works well for kick-driven music like house or techno, or apply it after for a ‘clean’ bass boost without affecting the compressor’s action.
Tonal and Dynamic Compression Blend
These two approaches work best when combined. As I mentioned earlier, compression sounds more musical and pure when applied at multiple levels (serial compression).
For lighter genres where minimal compression is needed, tonal compression is more suitable. However, for other genres that require heavy processing, it’s best to use both tonal compression and dynamic compression with two different plugins (or hardware devices).
I rarely use dynamic compression on its own for vocals, as it’s usually combined with tonal compression. However, I often use tonal compression alone for lighter genres.
Related Articles
- SSL BUS+ Review: Great New Addition from SSL!
- Heritage Audio Herchild 670 Review: Amazing Fairchild 670 Clone!
- Rupert Neve Designs MBC Review: A Master Buss Converter and Limiter!
- Lindell Audio LiN76 Review: Another Amazing Unit from Lindell!
- Heritage Audio Tubesessor Review: Great Opto Tube Unit!
Here is my go-to plugin chain for a mainstream vocal track:
- Apply gentle tonal compression during tracking.
- Use a surgical EQ.
- Apply tonal compression with a slow attack, low ratio, and low threshold.
- Use a tonal EQ.
- Apply dynamic compression with a quicker attack, higher ratio, and higher threshold.
You can also experiment with using the quicker dynamic compressor before the slower tonal compressor. This way, your slower compressor isn’t affected by any loud peaks, as the quick compressor will catch them first.
Setting it up
To start, set the first compressor to a fast-attack mode to clip the loudest peaks in your audio signal. Identify these peak elements, then set the attack time to one millisecond or less. Choose a high ratio, around 12:1, to ensure it’s only reducing the loudest peaks by two to three decibels. The second compressor should have a slower attack time, roughly 10 milliseconds.
Keep in mind that the first compressor, targeting the loudest and quickest peaks, will be transparent. However, the second compressor will manage the overall average, resulting in a very smooth sound. The end result is natural-sounding compression, with the audio signal maintaining a consistent decibel level. It should have minimal dynamics and little to no remaining artifacts.
The advantage of serial compression is comparable to having two recording engineers working together to control the track’s overall volume. Experiment with this technique to achieve optimal output.
As always, remember to trust your instincts when it comes to sound. Your ears are your greatest tools.
Conclusion
I can’t stress enough how important it is to avoid overusing this method. For anyone who uses two or more compressors in series on each track, I guarantee that your mix will end up being disappointing. There are two key points I’ve mentioned before that you should always keep in mind:
- When it comes to mixing, “less is more.”
- Compressors are like antibiotics—don’t overuse them!
Related Articles
- Top 10 Compressors: Best Compressor Units You Can Get!
- Best Mastering Compressors: Top 9 Units For Your Mastering Studio!
- What Are Optical Compressors: Top 5 Opto Compressors Listed!
- What is FET Compressor: Best 5 Models, Guide, and Plugins!
- What Is VariMu Compressor: Key To Achieve Classic Sound!
- Top 10 Best 500 Series Compressors: Best Models Shown!


[…] The best approach is to compress in stages. Instead of using one compressor to control everything, you can use serial compression. […]