How to Make Bass Traps
Introduction
What does it take to achieve success in recording and mixing? First and foremost, expertise is key—and of course, having the best gear possible certainly helps.
But don’t overlook the importance of a good-sounding room! Is there really such a thing as a perfect acoustic space? The answer to that isn’t so simple. Have you heard of bass traps? They’re like a secret ingredient when it comes to reaching that level of audio perfection.
My goal here is to help you learn more about bass traps. On top of that, I’ll show you an amazingly cost-effective solution.
Don’t have the time to build them yourself and need to buy some right away? Here are a few great recommendations from us!
| For EU Customers | |||
|---|---|---|---|
 |
|
||
 |
|
||
 |
|
What’s a Bass Trap?
If you want to get technical, the reality is you can’t actually “trap” bass.
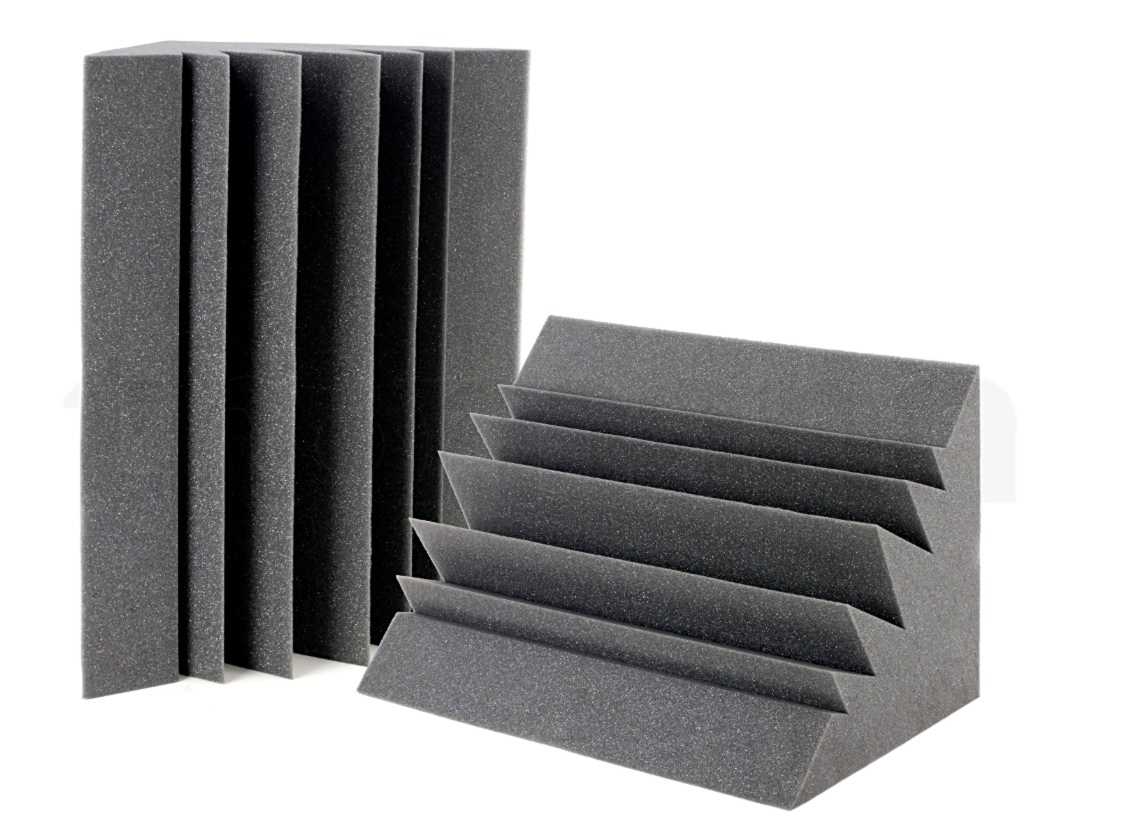
So what are bass traps? They’re units designed to slow down or absorb the energy of vibrating air molecules.
That sound energy is turned into heat, with much of it reflected back at a different time and angle than the original vibration, which helps scatter the returning sound.
The three most popular materials that deliver great results for bass traps—really “acoustic absorption” in the lower mid and upper bass ranges—are fiberglass, rock wool, and foam, just like with acoustic panels.
All three are completely safe when used correctly, though foam isn’t nearly as effective as the other two.
You’ll find all three materials from various sellers under different brand names. One of the best-performing and most well-known is the Owens Corning 700 series fiberglass.
Bass Trap Design and Planning
The standard size for DIY audio panels is 24 x 48 inches, since these are the factory dimensions for Roxul Rockboard. However, you can adjust the size as needed for your project.
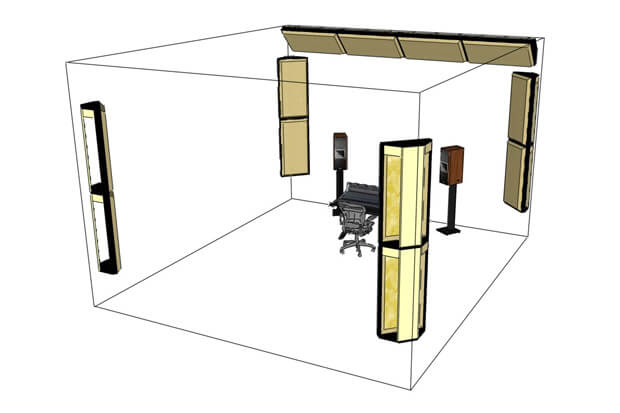
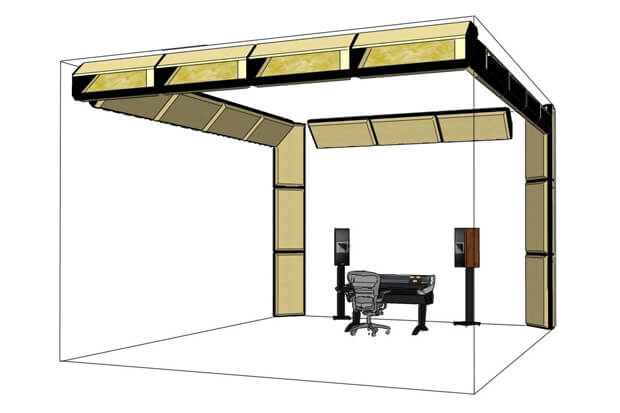
For a typical bedroom, I recommend using either four or eight bass traps, depending on your room and budget. If you use four, mount one in each corner, positioned diagonally across the corner about halfway up the wall.
If you use eight, stack two in each corner so they likely reach from floor to ceiling. Mounting them diagonally across the corner takes up more space than placing them flat against the wall.
However, having an air gap behind the panel actually makes broadband absorption more effective.
How to Make Bass Traps – Construction
DIY Bass Trap Supplies
- Roxul Rockboard – Each pack contains six panels, and since every bass trap requires two panels, one pack is enough to make three traps.
- Duct Tape – Plan on using one roll of duct tape for every four panels you build.
- Staple Gun
- 1×4 Lumber (by the foot) – You’ll need a total of 12’4” of lumber for each panel.
- Nails, screws, or wood glue – Choose your favorite way to join wood together.
- Electric drill or screwdriver – If you’re getting into DIY projects, this is one of the most useful tools you can have around.
- Tape Measure
- Fabric Scissors
- Fabric (by the yard) – This is where you can get creative! The fabric is the “skin” of your panel and almost any material will work. Choose any color or pattern that fits your space—it’s a great way to add some style while building your panels. I used cool vintage floral prints for mine. You’ll need about 5’x3’ of fabric for each panel.
Step 1: Assemble a Wooden Frame
In my opinion, the easiest way to get your wood is from a hardware store. You can buy 1×4 lumber by the foot, and often have an employee cut it to the exact measurements you need. If you’re new to DIY projects, this can save you a lot of hassle.
Build a wooden frame so that the inside area measures 24” wide, 48” tall, and 4” deep. This frame will support your insulation panels, which might otherwise get squished or damaged quickly.
If you’re making 2’x4’ panels, these measurements should give you internal dimensions of 24”x48”. The width should be 25.5” to account for the fact that 1×4 planks are actually about 0.75” thick, not a full 1” as the name might suggest.
You can use nails, screws, or wood glue to assemble the frame. If you’re using screws, I recommend drilling pilot holes first, then screwing the planks together.
Don’t hesitate to do a quick Google search if you’re unsure about any step!

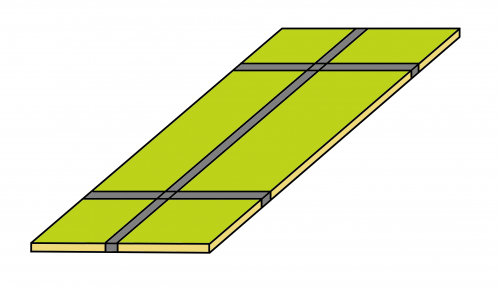
Step 2: Place Two Insulation Panels Inside the Frame
Stacked on top of each other. Like so:

Step 3: Use Duct Tape to Mount Panels to Frames
This might seem a bit low-tech, but it’s surprisingly effective. Wrap duct tape around both the back and front of the panel, pulling it snug against the wood. Make sure the duct tape is firmly stuck to itself at the end.
That’s how I built my audio panels! They’ve made it through a couple of moves already, and they still have plenty of life left in them.
Step 4: Wrap the Panel with Material
Place the panel on a sheet of material that is about 6–8 inches wider than the panel on all sides. Wrap the edges of the material up and over the wooden frame, then use a staple gun to secure the material to the wood.
Do your best to keep the material tight—this helps hold the panel together and gives it a clean, professional appearance.
Step 5: Mount the Panels (Bass Trap Placement)
There are a few different ways to mount the panels. You can simply lean them against the walls, or place them on a stack of old books to raise them to the right height.
For a more secure option, buy shelf brackets to mount the panels to the wall. Keep in mind that the panels can be quite heavy, so use heavy-duty brackets and make sure to attach them to studs, not just anchors in the drywall. (A stud is definitely your friend here!)
What should I count on to hear?
With proper bass management, your room can have a much more balanced sound across the entire audible range. Your soundstage will feel more unified and naturally balanced, with tighter separation between tones.
You’ll notice greater clarity in the frequencies and transients of your music. Details that were once hidden by a boomy low end will now come through clearly.
This means you can make better mixes, trust what you hear when mastering or doing critical listening, and pick up on subtle nuances you never noticed before.
A well-tuned low end will completely transform your listening experience. If you’re especially passionate about high-fidelity audio, you might even be moved to tears when you realize what you’ve been missing.
Here’s a video that shows you how to make your own bass traps. It’s a great DIY method for creating bass traps!