What Is Audio Normalization
Introduction
Audio normalization is the process of adjusting the recorded volume to a target level by applying a consistent amount of gain across the recording. In simple terms, audio normalization software finds the loudest part of your audio file, sets that as the maximum level, and then boosts the rest of the audio so everything is closer to that peak volume.
Normalizing your audio is important for creating a more balanced sound in your videos, especially for dialogue clips that need to stand out on platforms like YouTube and other social media. However, many people still get great audio results using traditional AD/DA converters or by manually matching the volume levels of different audio tracks, for a variety of reasons.
So, what exactly does audio normalization mean, and what are the best ways to normalize digital audio files? This article will explore the topic of audio normalization in detail, so keep reading to learn more.

Two Types of Audio Normalization
Peak Normalization
Peak normalization uses the highest point in a recording as a reference for adjusting the audio level. For example, if the loudest part of a song is at -6 decibels, the entire song would be increased by 6 decibels so that the loudest part reaches 0 decibels.
If your target level is 0 dB, this is what you want to achieve. This type of normalization is often used when you want to adjust each track in a session individually. It’s safe to say that peak normalization is the most common method for adjusting audio levels.
Loudness Normalization
To normalize loudness, we measure the overall loudness of a recording. In audio production, the volume is adjusted so that the overall gain of a digital recording reaches a specific level. There are several ways to measure this, such as using RMS, but LUFS has become the modern industry standard.
During audio mastering, loudness normalization can happen without the mastering engineer even realizing it. Loudness normalization is especially common on streaming services and platforms.
For example, Spotify uses a standard of -14 LUFS. If a song is at -10 LUFS, their policy is to turn it down by 4 dB. This way, you don’t have to keep adjusting the volume on your playback device when listening to songs from different artists.

Why Normalize Audio?
It has long been recognized that digital audio normalization has a significant effect, but opinions in the music community remain divided. Some believe that normalizing your audio can reduce its quality, while others see it as a useful tool for improving audio consistency. So, what is the purpose of normalizing audio, and when should you use it?
One purpose of normalization is to match the volume levels between different clips. For example, if you want all parts of your program—such as the intro music, narration, and interview segments—to have the same volume, you can use the normalize tool. This ensures that voiceovers aren’t louder or softer than the clips that come before or after them.
Normalization can also be used to raise the volume of a recording. If your audio is too quiet, you might not be able to see the waveforms or hear the content clearly, which makes editing difficult. Using the amplify or normalize effect can quickly solve these problems and make your audio easier to work with.
Audio normalization is a topic that often confuses beginners when they first encounter it. Some people claim that normalization can make the audio sound noticeably different or degraded. This was a real issue about thirty years ago due to the processing algorithms available at the time, but it has been resolved with modern technology.
It’s important to use the normalize effect wisely. In certain situations, it’s better to use other methods, as they can achieve the same or better results. Tools like automation, clip gain, or plugins can sometimes be more effective for adjusting the volume of a signal.
Manual Normalization
When it comes to normalizing audio to level out a performance, our first thought is usually, “This is just a one-click process—I should just do it.” But there’s another approach, and honestly, we prefer taking the more hands-on route.
If you have a quiet audio file and want to make it louder, you can use your DAW’s editing window to bring up the volume as much as you need. However, we recommend not pushing it to the absolute maximum; instead, try to match the volume to the other tracks in your arrangement.
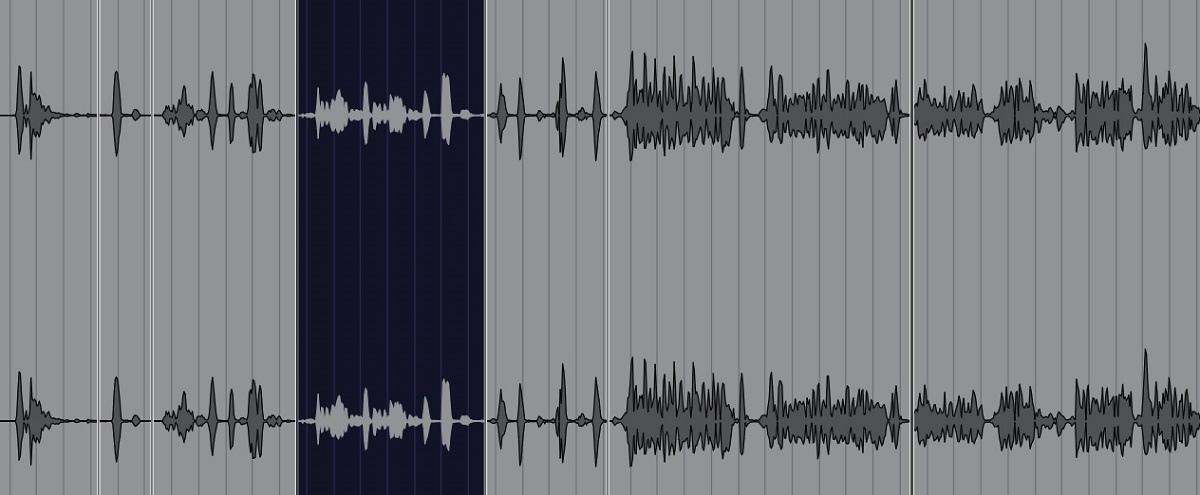
This step is actually pretty straightforward. We often use manual normalization when dealing with an uneven vocal track. For example, with rap vocals, you want the performance to sound consistent. The classic method is phrase-by-phrase normalization—manually cutting between the quiet and loud parts of the performance.
After that, you just need to even out those sections so the peaks are consistent and the phrases have similar average volumes. It’s a time-consuming process that involves listening to the recording several times and making adjustments, but it’s definitely worth the effort. In the end, you’ll have a consistent recording that’s ready for further processing.

Audio Normalization Cons
It’s important to remember that audio normalization comes with some disadvantages. Generally, it’s best to normalize your audio only at the end of the recording process. You don’t need to normalize individual audio clips that will be mixed together for a multitrack recording. If you normalize and then play digital audio components together, you may experience clipping.
Normalization can also be a destructive process. When you normalize your audio, you are applying a digital adjustment that is fixed in place and time. Because of this, you should only normalize after you’ve finished processing your audio files and are satisfied with the results.
Peak normalization is often used just to make audio waveforms easier to see on screen. However, this isn’t necessary, and your audio software should let you enlarge the waveforms visually without permanently changing the audio file itself.
Additionally, some media players offer “virtual normalization.” This feature helps match the volume levels between finished tracks during playback, without altering the original files. The goal is to play different songs at similar volumes.
To do this, the software measures the EBU R 128 and RMS volumes of each file to determine how much to adjust the music’s loudness. While this method isn’t always perfect, it’s useful for hearing songs at the same volume level.
Compression and Normalization Comparison
Many people mistakenly believe that compression and normalization are the same thing, but that’s not correct. Compression works by lowering the peaks in a track while boosting the quieter parts, resulting in a more consistent volume level throughout the entire track. In contrast, normalization sets the loudest point in your audio as the ceiling.
After normalization, the rest of the audio is increased with a proportional amount of gain. This process keeps the dynamic range of the audio intact while effectively raising the overall perceived volume, based on how humans perceive loudness.
With audio normalization, the volume of the entire recording is changed by applying a constant amount of gain. The main goal is to make the loudest peak reach 0 decibels. Unlike compression, normalization doesn’t alter the dynamics between different parts of multiple audio recordings.
On the other hand, audio compression reduces the highest peaks in your recording to achieve a fuller, louder sound without causing clipping. Compression changes the audio over time at varying rates, which affects the overall dynamics of the sound.
Conclusion
Any audio engineer or producer should understand the process of normalization. While it’s a powerful tool, it can be overused, which may lead to a loss of quality. Knowing the differences between RMS and peak volume will help you use normalization carefully and effectively.
Be mindful of increasing the signal-to-noise ratio when you raise everything up; this can introduce unwanted noise. Always trust your ears and review the signal after processing. We also recommend handling gain staging first—sometimes that alone solves the issue before you even need to normalize.
If you have any further questions about this topic, feel free to let us know in the comments below. We’re happy to explain things in more detail!


