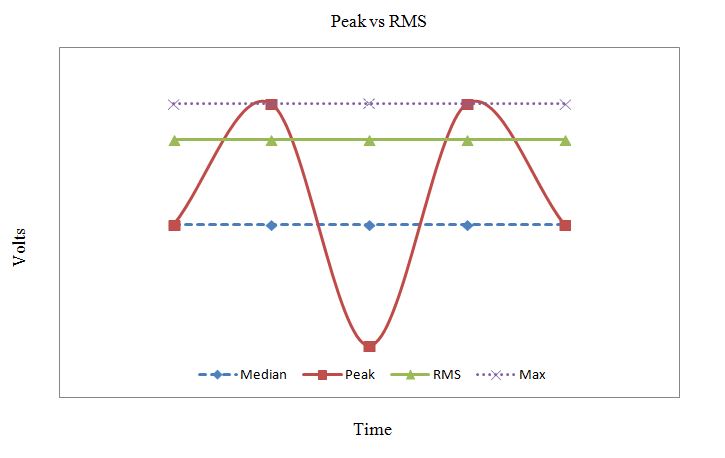
Peak vs RMS vs LUFS
Introduction
If you work in the audio industry, it’s important to understand the differences between loudness measurement units. We all want our tracks to sound loud, but have you ever really thought about how loud your song actually is?
It might seem like a simple question, but to answer it, you need a bit more information. That’s because “loudness” can mean different things depending on the situation.
Knowing how to measure and control audio levels is essential if you want your songs to meet the guidelines set by streaming services and distribution platforms. This is key to getting your music noticed in today’s world of recording, mixing, and mastering.
You’ve probably heard terms like peak, true peak, RMS, and LUFS. That’s why it’s so important to learn about the different ways loudness is measured—and to know how to use that knowledge in your mixes. Let’s dive in.
What Are Peaks?
With this measurement, you can spot peak levels that cross the 0dB ceiling between samples. If this ceiling is exceeded, clipping will occur and cause digital distortion. A true peak meter will alert you to these peaks, which can sometimes reach up to 6 dB.
However, true peak metering does not show perceived loudness, so it’s not the industry standard. That’s why many engineers choose not to use it. Still, true peak metering is useful for monitoring transients and finding spikes in your mix. To be safe, use a True Peak limiter or a limiting feature at the end of your mastering chain.
In digital audio, peak levels measure how your mix is performing. True peak metering, on the other hand, takes the D/A conversion process into account, meaning the analog version of your signal might peak higher than what your DAW displays.
Sometimes, true peak readings can be much higher than regular peak readings. This method is more accurate because it shows ultra-precise values for inter-sample peaks. In general, the peak level is defined by the highest points in the signal, regardless of how much energy they contain.
RMS (Root Mean Square)
The RMS value for music shows the average loudness of an audio track. RMS loudness measures the energy of the audio signal, giving a more accurate sense of how loud something sounds compared to just measuring peak levels. For speakers, RMS power is measured in watts and relates to the average power they can handle.
Depending on the speaker’s power rating and output, RMS indicates the highest amount of electrical power the speaker can safely handle. Audio engineers often monitor RMS to better understand a song’s overall loudness. However, a higher RMS value doesn’t always mean the mix is better or actually louder.
RMS tells you the average power output of an audio signal. In recent Billboard chart-topping songs, RMS levels are usually around -8 decibels. Songs that don’t make the charts generally have lower RMS values.
You can increase a song’s RMS level by reducing its dynamic range (lowering the Crest factor) and raising the volume. There are many plugins available that help you monitor a song’s loudness.
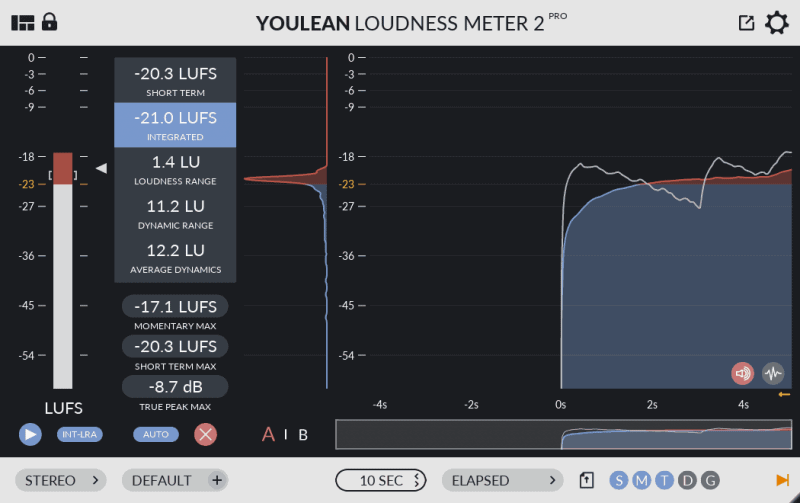
LUFS (Loudness Units referenced to Full Scale)
LUFS stands for Loudness Units relative to Full Scale (or Loudness Units Full Scale). It measures audio loudness based on both how humans perceive sound and the actual strength of the audio signal. Simply put, LUFS is the most accurate and modern way to measure audio loudness, helping you keep your sound consistent across different tracks. Think of LUFS as a digital measuring tape for audio, allowing engineers to match tracks perfectly for any listening environment.
Moises makes it easy to master your music to the ideal LUFS level. The web version of Moises has a dedicated mastering feature that lets you adjust the LUFS before mastering, using a simple and user-friendly interface. This is a great option if you can’t afford professional mastering or aren’t sure how to master tracks yourself.
The presets are optimized for different streaming platforms like YouTube, SoundCloud, and Spotify, but you can also set the LUFS to your own preference. If you don’t pick a specific level, it will automatically be set to -14 dBTP, which is the recommended standard for most streaming services.
Understanding LUFS, RMS, and PEAK Values and Standard
When mixing music, it’s important to create enough space for all the instruments and vocals. Each sound or frequency range should have its own place, so they don’t clash or interfere with each other. You should also pay close attention to the volume (loudness) of each track as you arrange them.
During mixing, we mainly focus on the dB level of each track. A good rule of thumb is to mix individual tracks at around -15 dB RMS. This gives us at least 8 to 10 dB of headroom for mastering, since adding more tracks will usually raise the overall output level.
It’s also important to understand LUFS, RMS, and peak values. No matter what kind of music you make, it needs to be ready for broadcast. Broadcasters want their content to have a consistent volume level.
That’s why we rely on our ears to judge the right volume. However, the best tracks are mastered by using both our ears and a few visual tools. These tools help us make sure our mix meets the standards for broadcast compliance.
Mastering and the Loudness Wars
You may have heard the term “loudness war” in the world of mixing and mastering. In the past, audio engineers around the globe would master songs to be as close to the maximum dB as possible. This was before the shift to digital streaming platforms, which now regulate music volume levels.
During the mastering process, the peaks and valleys of the audio waveform are evened out. This creates a sound that stays loud and consistent, but it also reduces the dynamic range and variation in the music.
Another important point is that the loudness war likely harmed many people’s hearing. For example, if someone listened to one song at a lower volume and the next song started much louder, they wouldn’t have time to adjust their device’s volume settings.
Thankfully, as streaming platforms like Spotify and Apple Music emerged, they began to act as regulators of volume levels. This helped bring an end to the loudness wars, as music is now mastered to fit within the guidelines set by these streaming services.
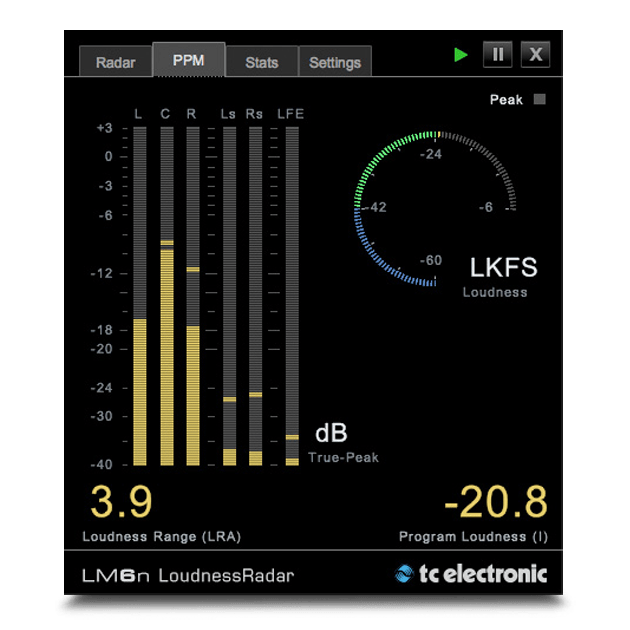
True Peak Metering
A meter like this measures inter-sample peaks, which can occur when a digital signal is converted to an analog signal. Even if you don’t see any peaking in your left or right channels, inter-sample peaks can still be present during playback.
As we mentioned earlier, encoding changes the relationship between the signal’s amplitude and the digital information used to represent it. This can reduce the accuracy of quantization, making inter-sample peaking even worse. That’s why it’s so important to use a true peak meter.
On a true peak meter, the loudest peak in your master should not exceed -2dB. Additionally, loudness normalization will change the loudness of your master, which means that peaks that were previously safe may now distort during playback if they are dynamic enough. Since normalization can boost the signal by about 2dB, those peaks will also get louder.
In mastering, using this type of metering is very helpful because it shows how your audio will be reproduced in the real world, helping you avoid distortion and clipping. Streaming services also use true peak metering to set the final loudness of your track.
How many LUFS do you need for Mastering?
As a general rule, the ideal mastering level for streaming is an integrated -14 LUFS. This is because it aligns best with the loudness normalization settings used by most streaming services.
Of course, there are other important factors to consider, such as the true peak value. However, when it comes to loudness, -14 LUFS is the best target for mastering. With this approach, you don’t need extra plugins to check for loudness penalties, such as tools that show how much your music will be turned down.
Another advantage is that mastering at this level allows you to keep your music at a consistent loudness without sacrificing your dynamic range or risking distortion on different streaming platforms, as long as you take the necessary precautions.
Finally, this lets you focus on other important aspects of your master, like how peaking, encoding, and loudness normalization affect your track’s sound when streamed.
So, why was -14 LUFS chosen as the standard loudness for streaming? Simply put, it’s the volume level at which the most popular streaming service normalizes music. Since so many people listen on Spotify, it makes sense to master your music to this level.
Conclusion
Now that we understand the differences between Peak, RMS, and LUFS, and know exactly how loud to make our masters for major streaming services, it’s time to put this knowledge into practice. To make better mixing decisions, you’ll need to get a loudness metering plugin, start measuring your loudness, and use that information to guide your choices.
If you have any questions about the topics we’ve covered, please let us know in the comments below. We’re more than happy to explain further or discuss anything you’d like to know more about.